Right front door skirt panel trim
OE / Material Codes
13736024-00SC2E-5402842Technical Specifications
- Vehicle Model
- BYD Atto 3
- Steering Configuration
- Universal (Left & Right-Hand Drive)
- Category
- Doors & Tailgates
Shipping & Returns
Ships worldwide from China via air or sea freight. Standard delivery 5–30 business days, express 2–10 business days. Shipping cost is calculated at checkout.
7-day return window for unused items in original packaging. Contact us before returning any item.
Compatible Vehicles — Right front door skirt panel trim
Right front door skirt panel trim Workshop Guide — BYD Atto 3
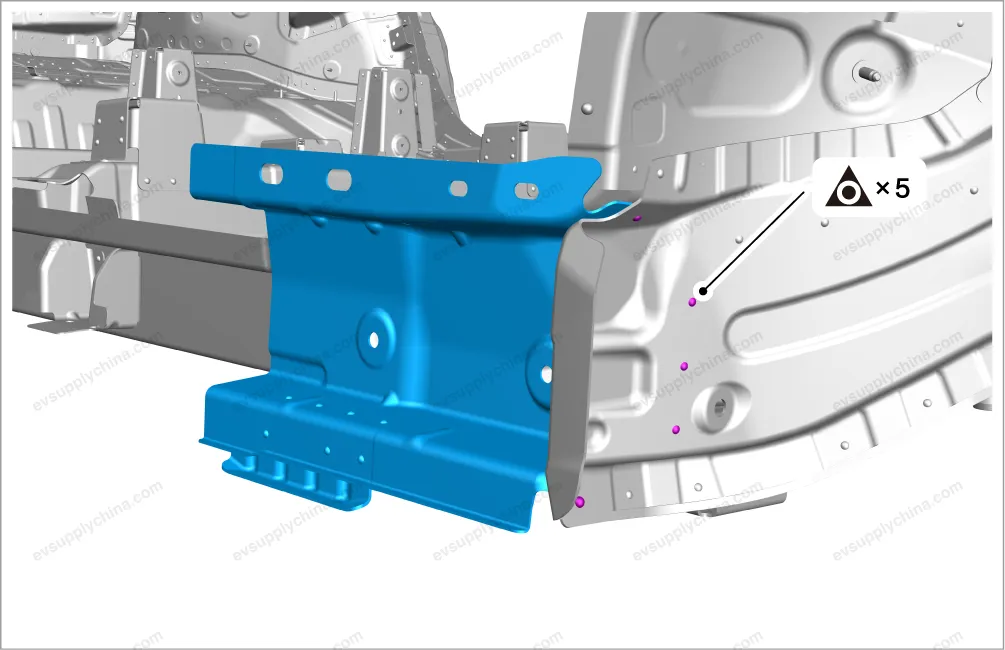
Replacement of Front Connecting Plate Assembly of Right Door Sill Inner Panel
Removal
- Remove the right door sill inner panel assembly. See Replacement of Right Door Sill Inner Panel Assembly
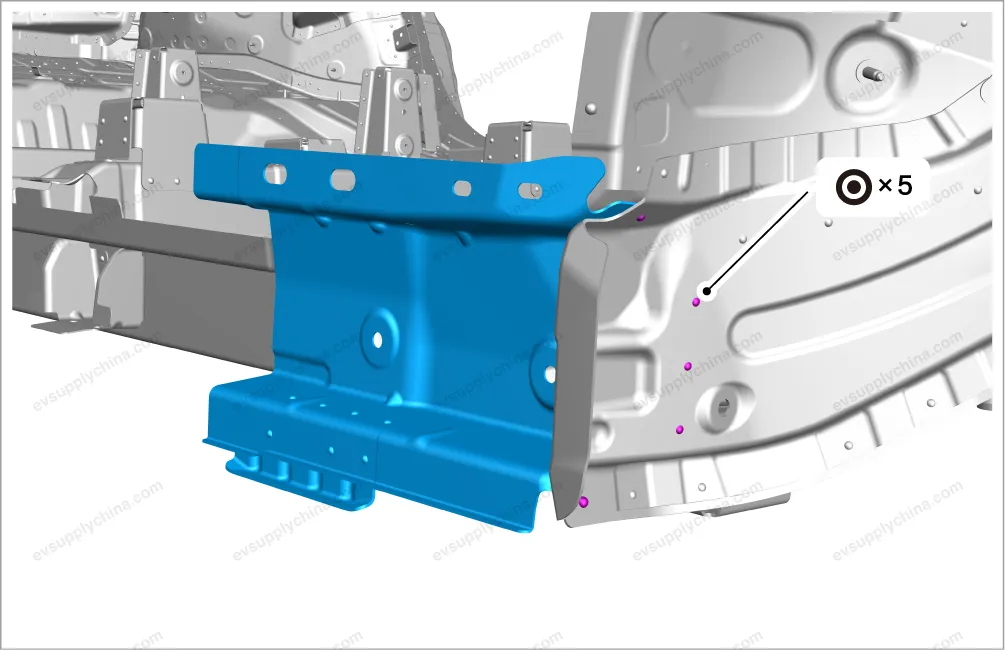
- Clear 5 welding spots from the right door sill inner panel front connecting plate assembly.
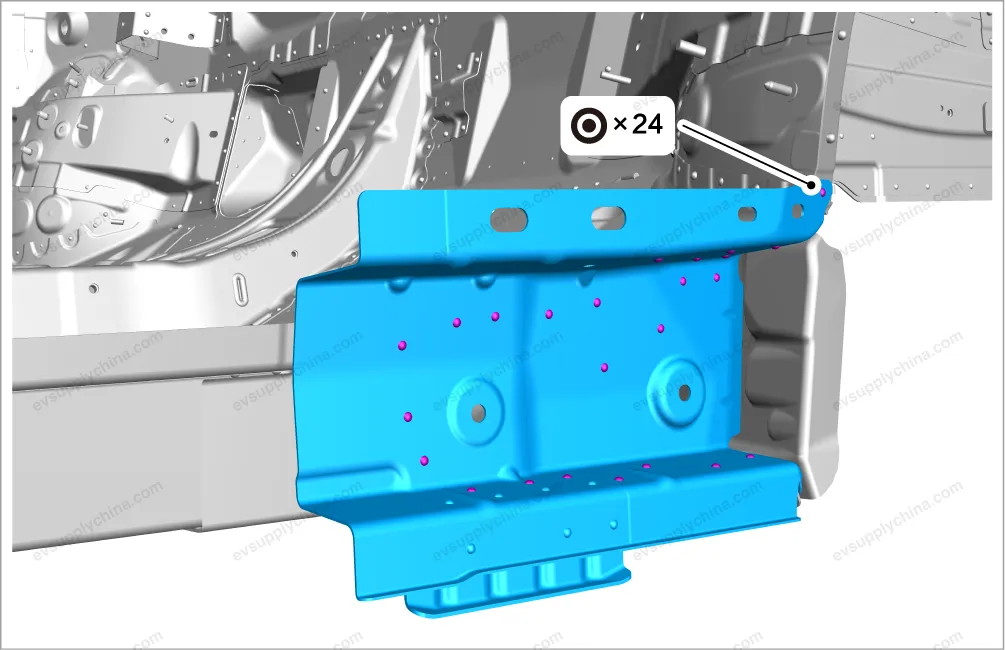
- Clear 24 welding spots, and take out the right door sill inner panel front connecting plate assembly.

Installation
- Fix the right door sill inner panel front connecting plate assembly to the mounting position.
- Check and adjust the relative position and dimensions of the right door sill inner panel front connecting plate assembly and the surrounding parts.
- Weld 24 welding spots on the right door sill inner panel front connecting plate assembly.
- Weld 5 welding spots on the right door sill inner panel front connecting plate assembly.
- Apply body sealant and internal coating at corresponding positions.
- After the external coating is applied, the anti rust agent shall be applied on the inner panel of the welding spots of the closed section structure.
Replacement of Right Door Sill Inner Panel Assembly
Removal
- Remove the right side wall assembly. See
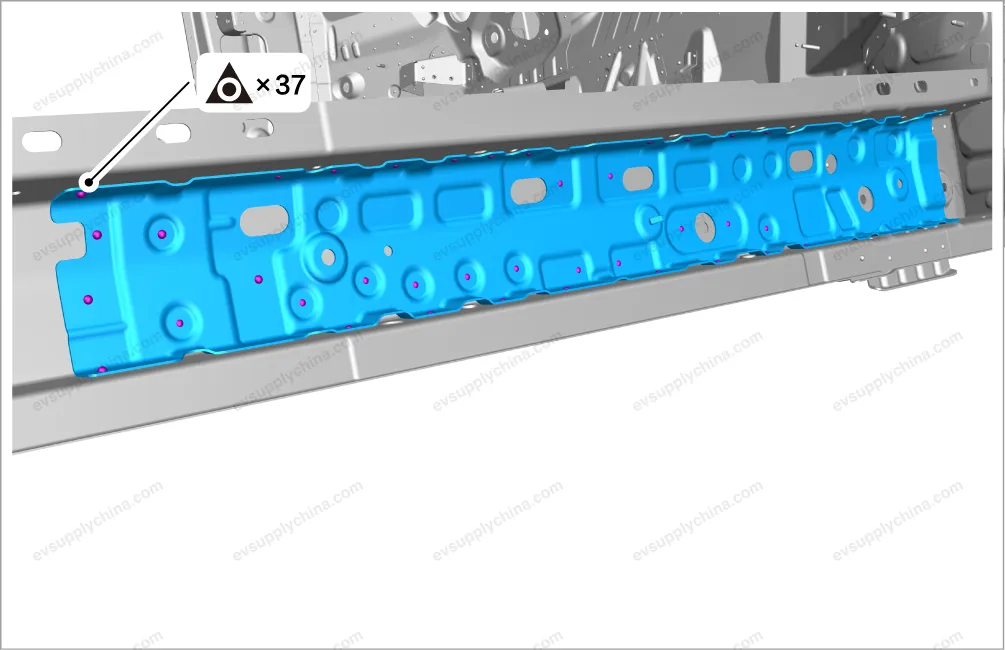
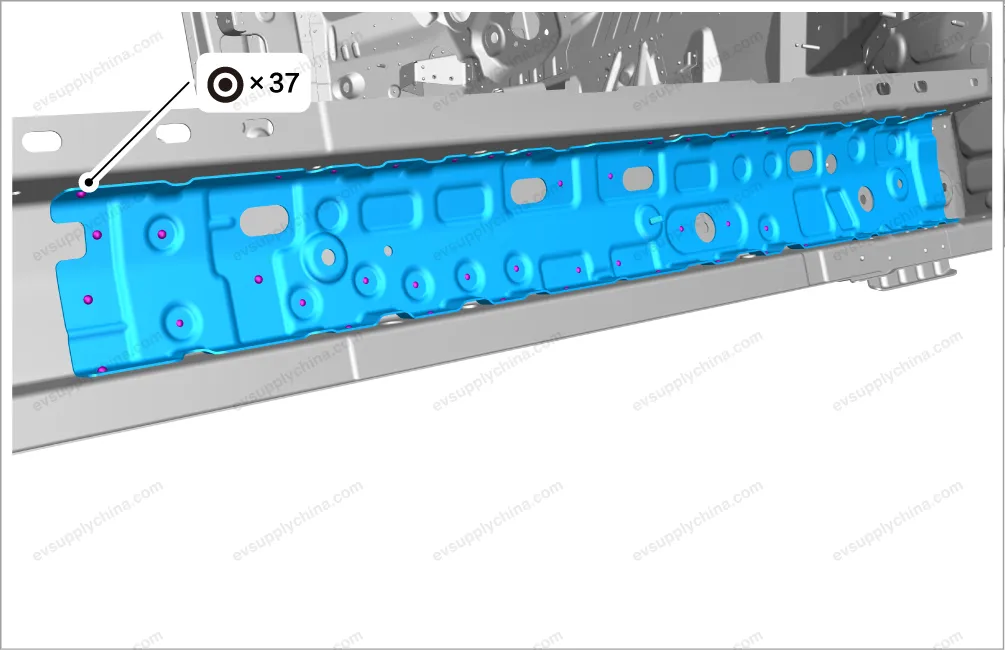
- Clear 37 welding spots, take out the reinforcement plate of right door sill inner panel.
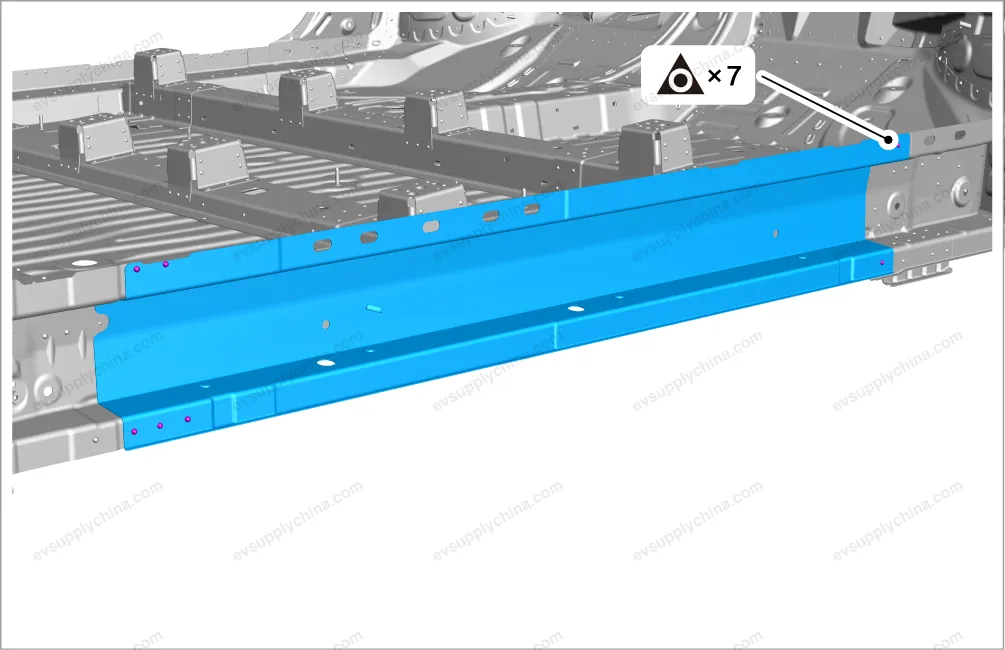
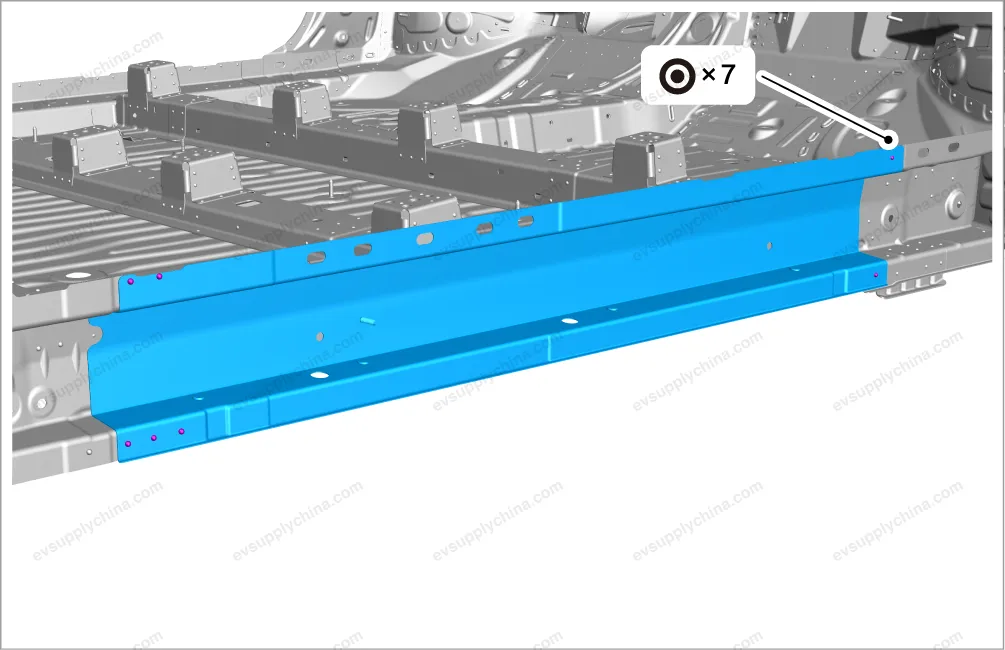
- Clear 7 welding spots, and take out the right door sill inner panel assembly.
Installation
- Secure the right door sill inner panel assembly to the mounting position.
- Check and adjust the relative position and dimensions of the right door sill inner panel assembly and the surrounding parts.
- Weld 7 welding spots on the right door sill inner panel assembly.
- Fix the reinforcement plate of right door sill inner panel to the mounting position.
- Check and adjust the relative position and dimensions of the reinforcement plate of right door sill inner panel and the surrounding parts.
- Weld 37 welding spots on the reinforcement plate of right door sill inner panel.
- Apply body sealant and internal coating at corresponding positions.
- After the external coating is applied, the anti rust agent shall be applied on the inner panel of the welding spots of the closed section structure.
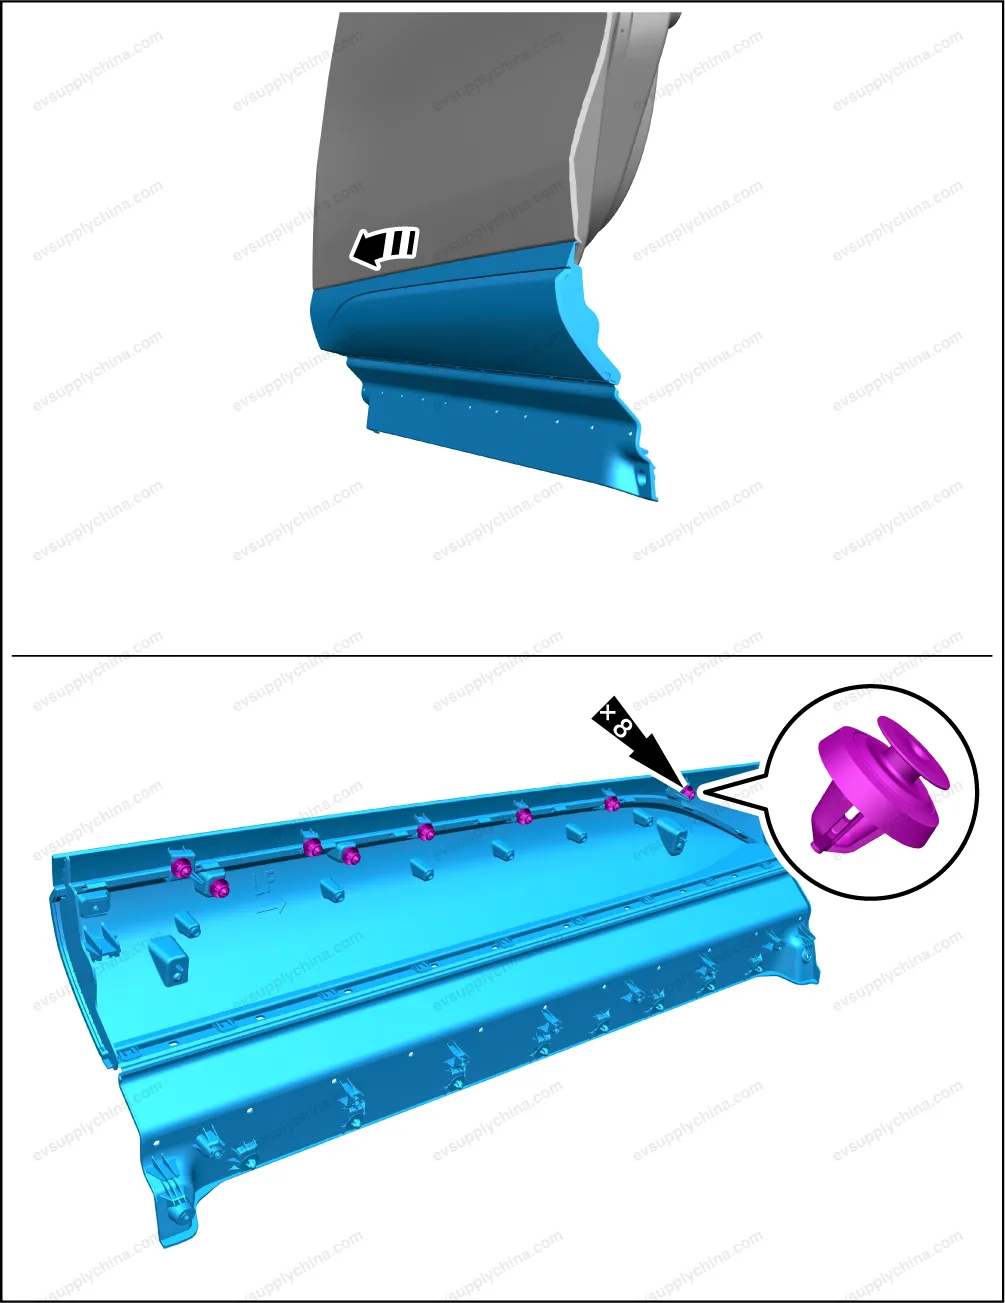
Right Front Door Skirt Panel Assembly - Removal and Installation
Removal
- Pry up the connection between the right front door skirt panel assembly and the inside of the right front door.
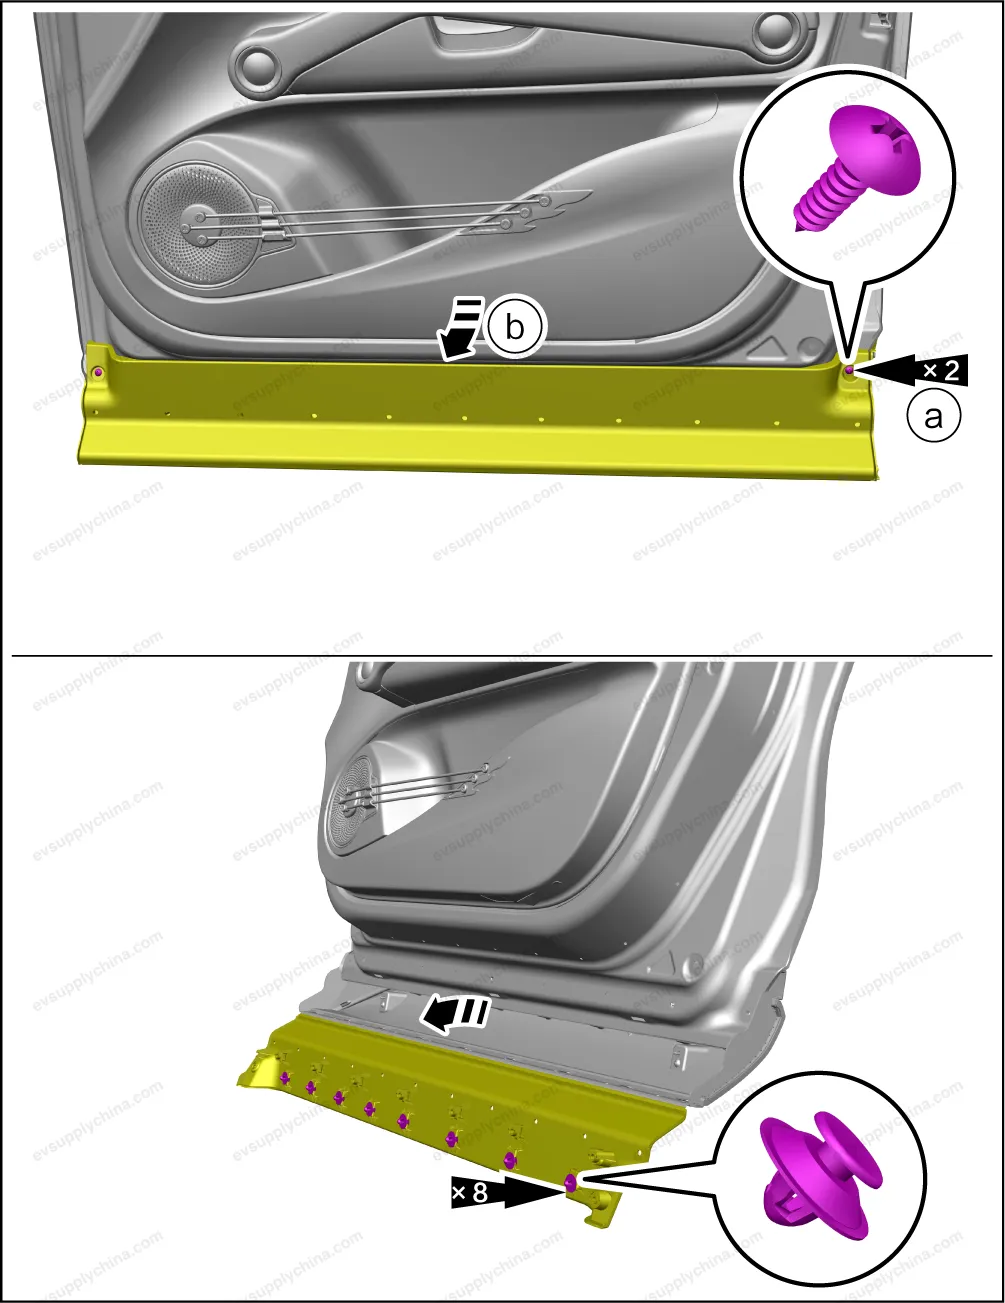
- Remove 2 fixing screws.
- Pry up the connection between the right front door skirt panel assembly and the inside of the right front door.
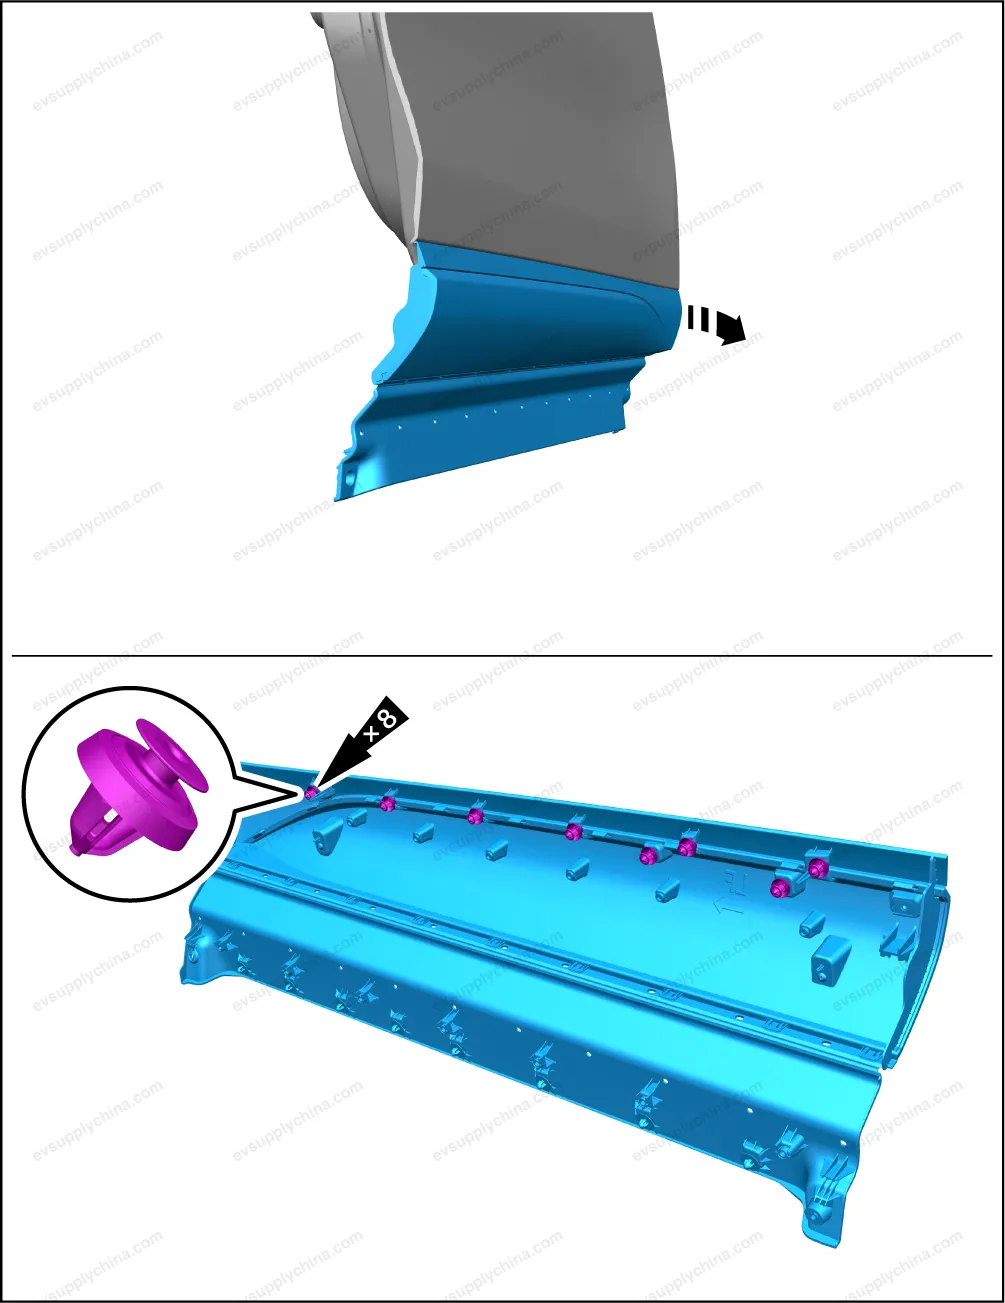
- Pry up the connection between the right front door skirt panel assembly and the outside of the right front door, and take
it out.
Install
- The installation is performed in reverse order of removal.
Caution Before installation, it is necessary to check whether all the clips are missing or damaged, and if so, install new clips, and then install the trim panel; After installation, check whether all clips are installed in place. The installation position of the trim panel may deviate, resulting in warping or abnormal gaps.
Front Compartment Right Trim Panel Assembly - Removal and Installation
Removal
- Remove the grille upper cover assembly. See Grille Upper Cover Assembly - Removal and Installation
- Remove the front compartment right trim panel assembly.
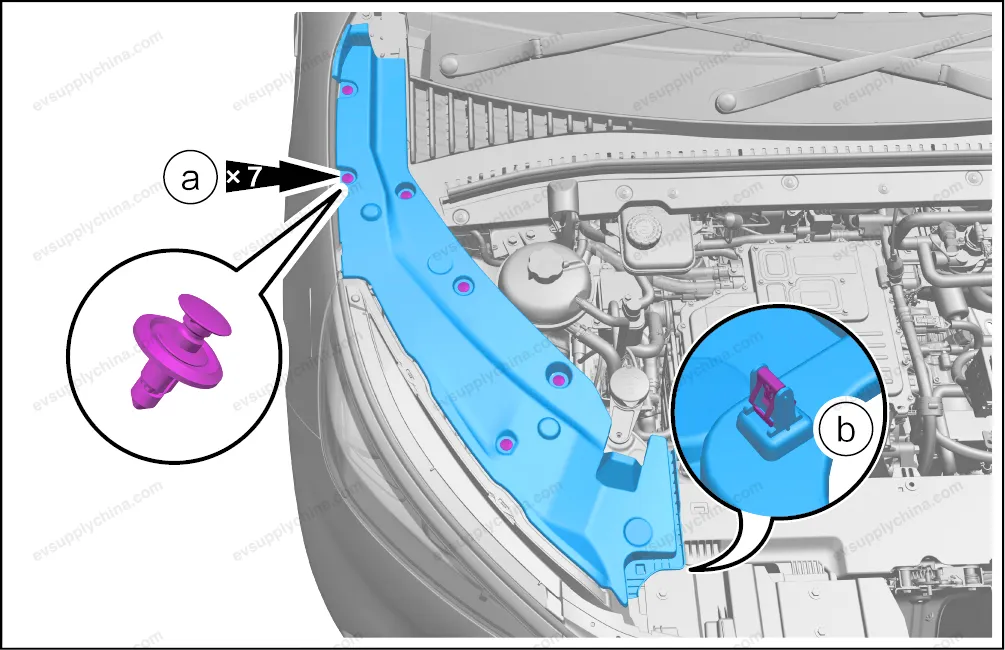
- Remove 7 fixing clips.
- Pry up 1 fixing clip, and take out the front compartment right trim panel assembly.
Installation
- The installation steps are opposite to the removal steps.
Left Front Door Skirt Panel Assembly - Removal and Installation
Removal
- Pry up the connection between the left front door skirt panel assembly and the inside of the left front door.

- Remove 2 fixing screws.
- Pry up the connection between the left front door skirt panel assembly and the inside of the left front door.
- Pry up the connection between the left front door skirt panel assembly and the outside of the left front door, and take it
out.
Installation
- The installation steps are opposite to the removal steps.
Caution Before installation, it is necessary to check whether all the clips are missing or damaged, and if so, install new clips, and then install the trim panel; After installation, check whether all clips are installed in place. The installation position of the trim panel may deviate, resulting in warping or abnormal gaps.