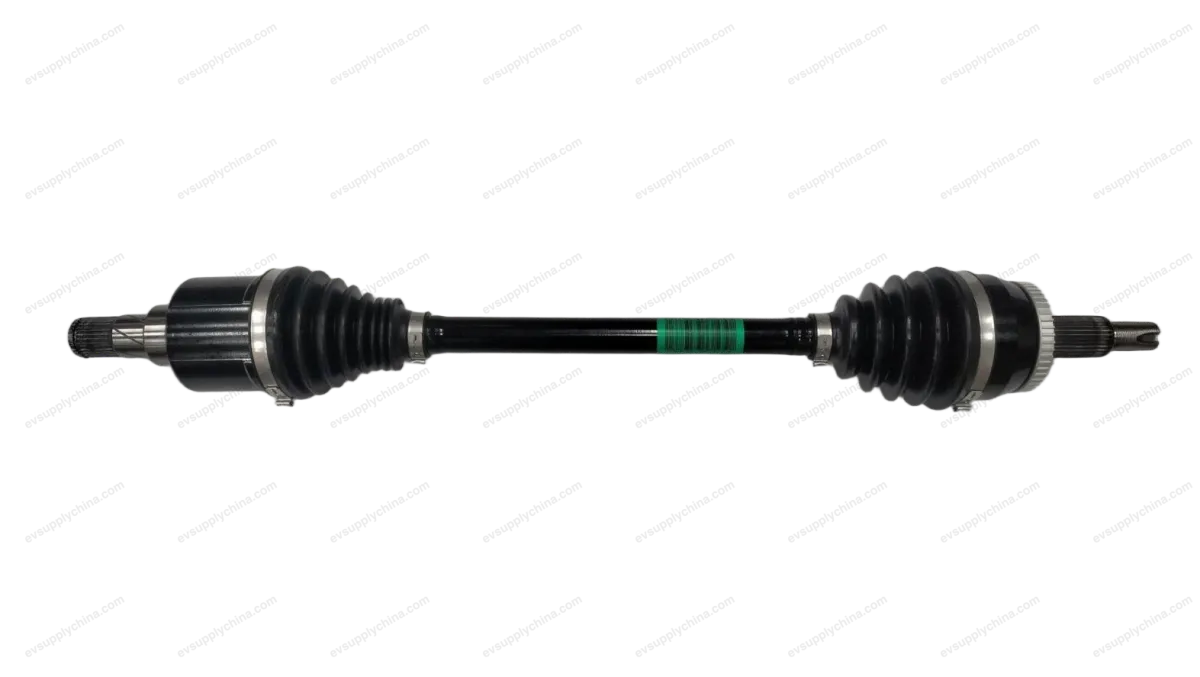
Right front drive half shaft assembly
OE / Material Codes
13732886-00SC2EM-2203020BTechnical Specifications
- Vehicle Model
- BYD Atto 3
- Steering Configuration
- Left-Hand Drive & Right-Hand Drive
- Category
- Driveshafts & Axles
Shipping & Returns
Ships worldwide from China via air or sea freight. Standard delivery 5–30 business days, express 2–10 business days. Shipping cost is calculated at checkout.
7-day return window for unused items in original packaging. Contact us before returning any item.
Right front drive half shaft assembly Workshop Guide — BYD Atto 3
Right Front Drive Half Shaft Assembly - Removal and Installation
Removal
- Remove the right front wheel assembly. See Wheel Assembly - Removal and Installation
- Remove the front motor lower mudguard assembly. See Front Motor Lower Mudguard Assembly - Removal and Installation
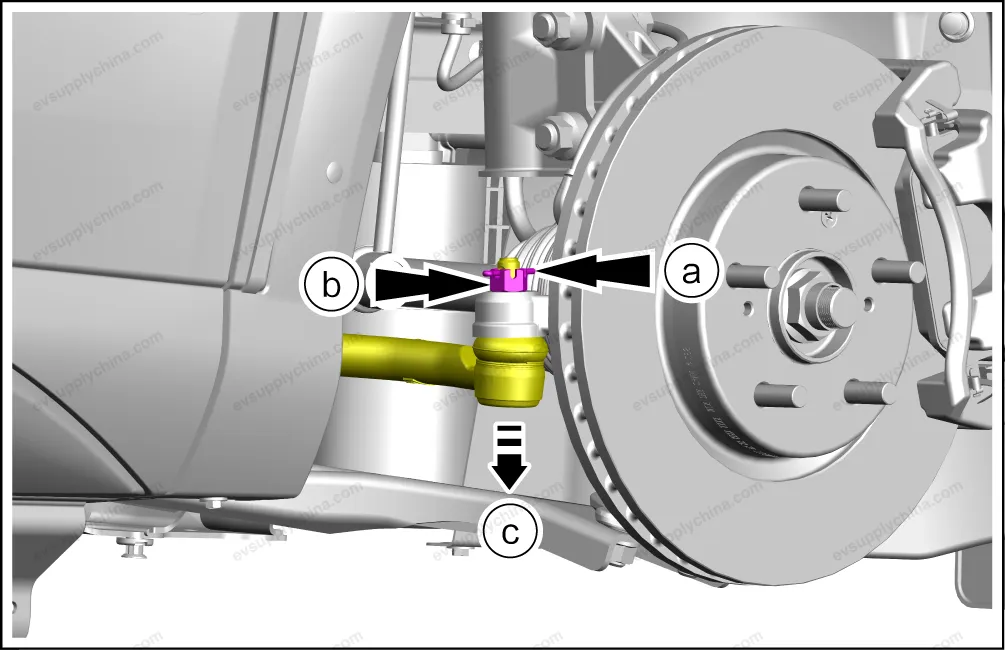
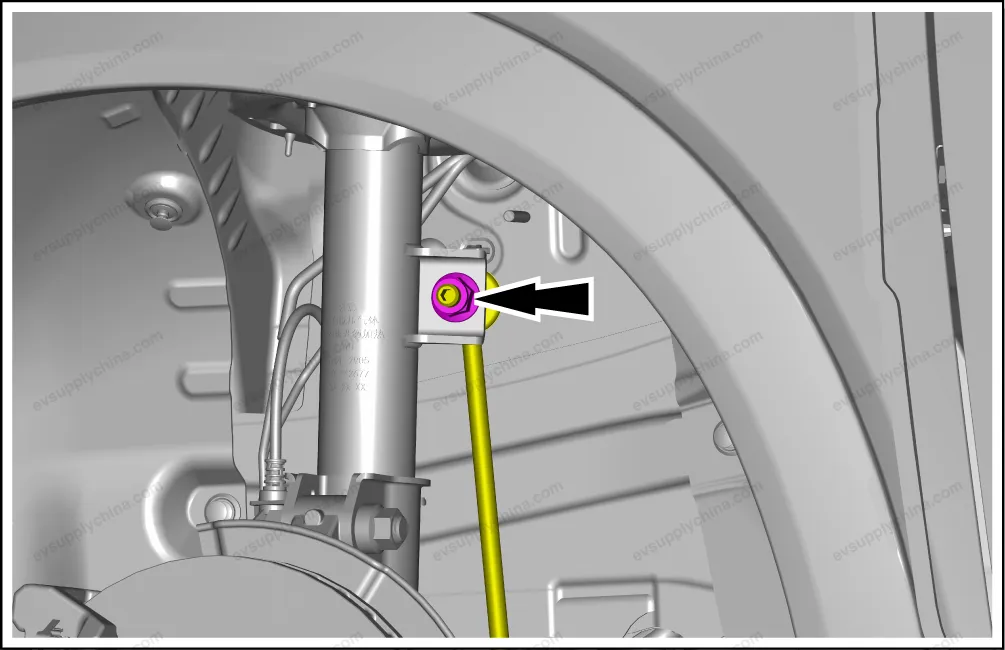
- Remove 1 fixing nut, and detach the right front stabilizer bar tie rod and ball joint assembly from the right front shock
absorber strut assembly.
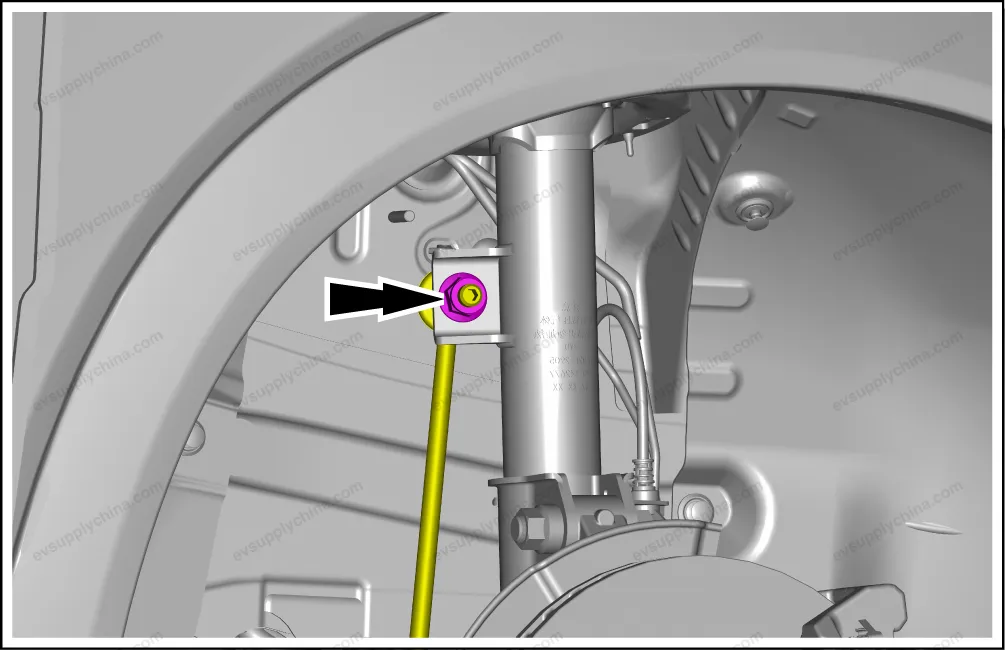
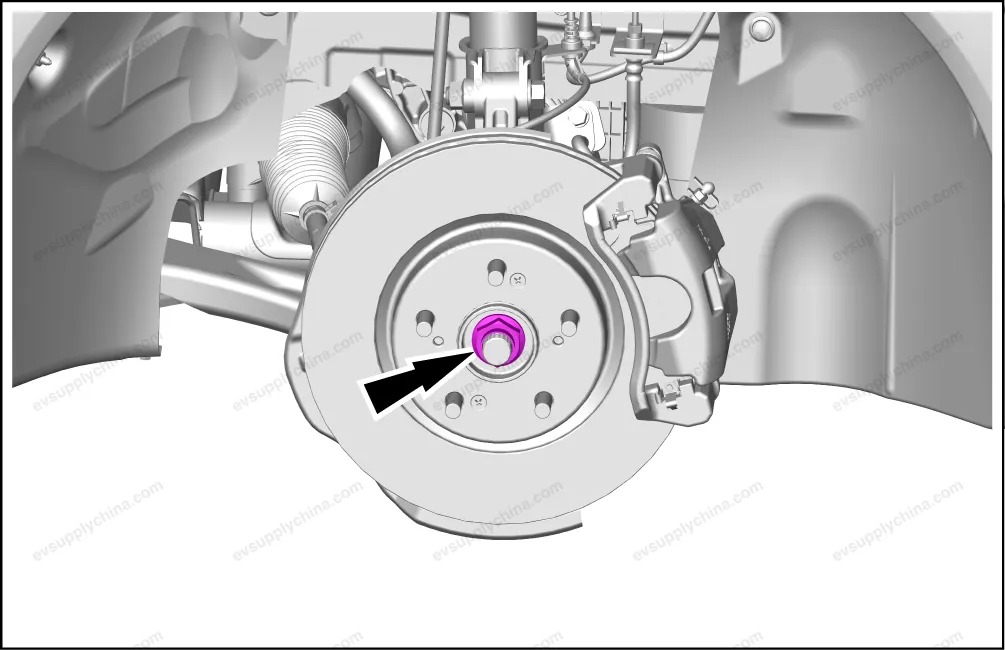
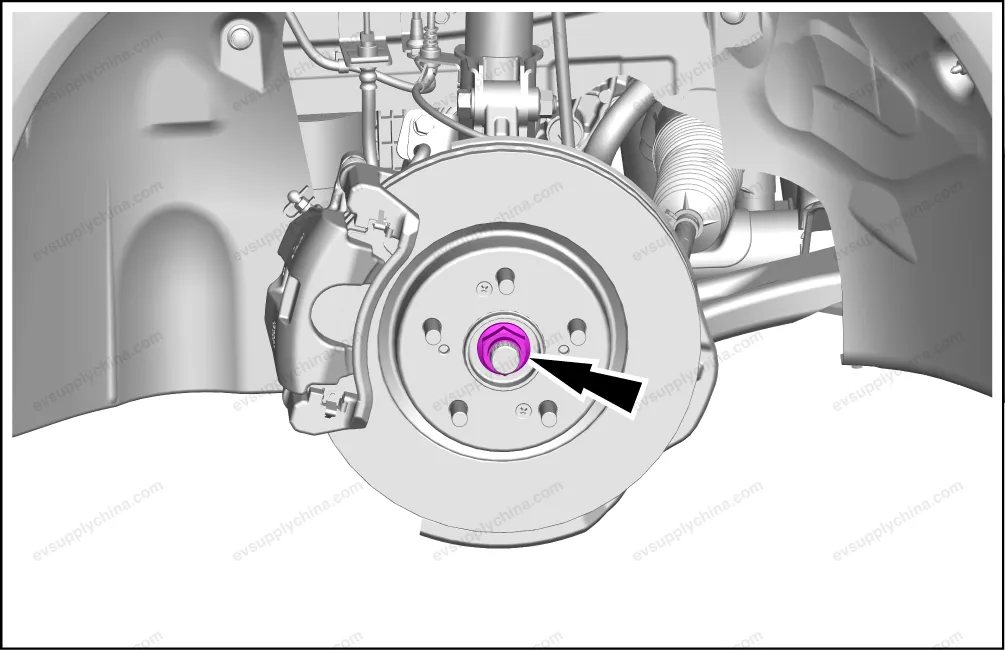
- Remove 1 fixing nut of the right front drive half shaft assembly.
- Detach the mechanical steering gear with tie rod assembly from the right front steering knuckle.
- Remove 1 fixing pin.
- Remove 1 fixing nuts.
- Remove the ball joint with the ball joint remover.
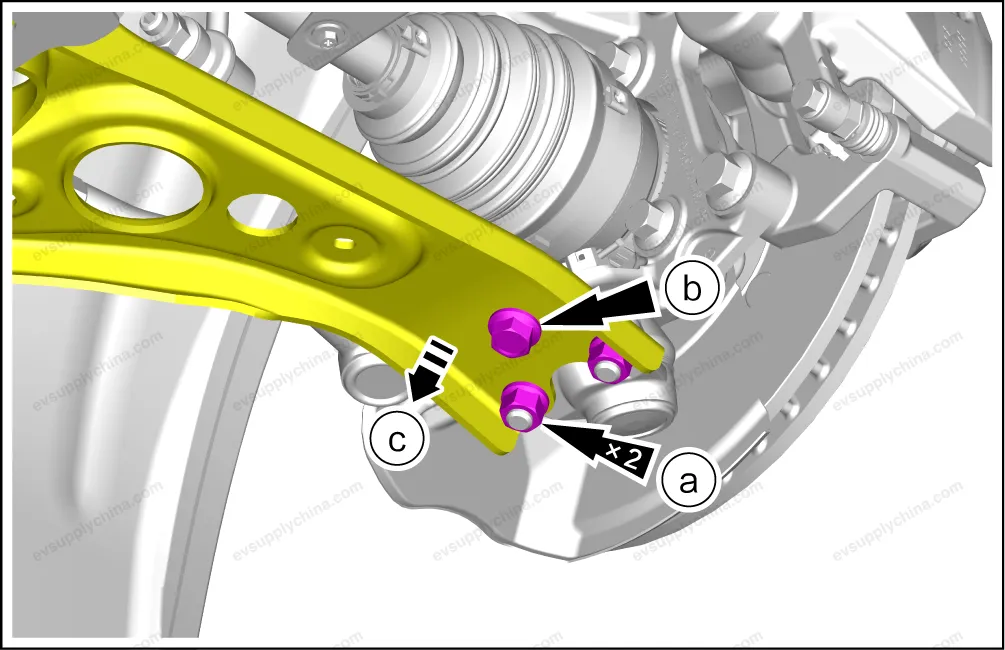
- Detach the right front lower swing arm assembly.

- Remove 2 fixing nuts of the right front lower swing arm assembly.
- Remove 1 fixing bolt of the right front lower swing arm assembly.
- Detach the right front lower swing arm assembly from the ball stud press assembly downward.
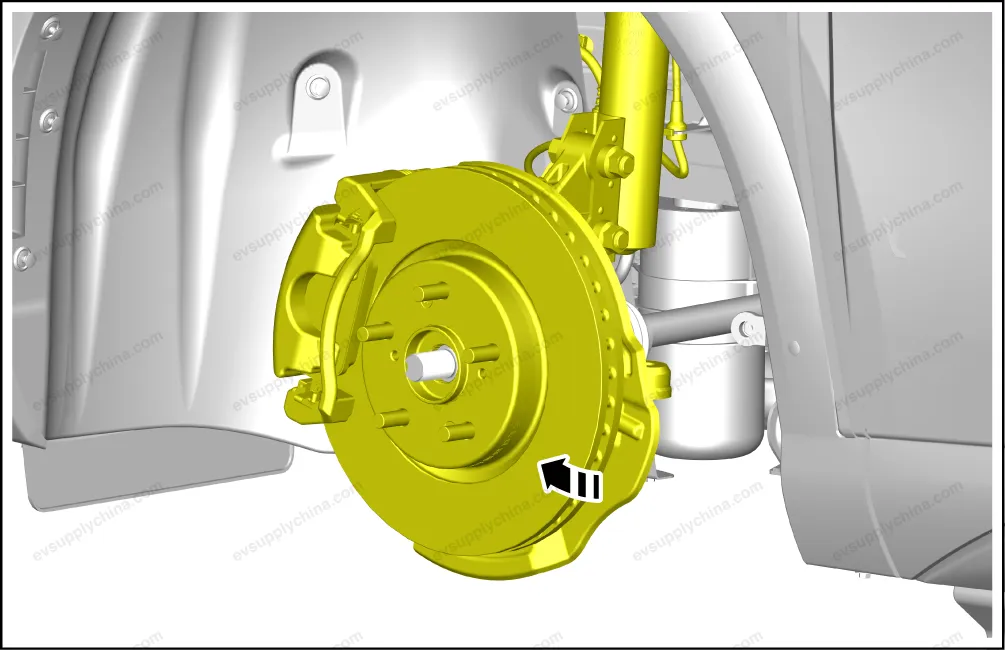
- Disengage the right front drive half shaft from the right front steering knuckle.
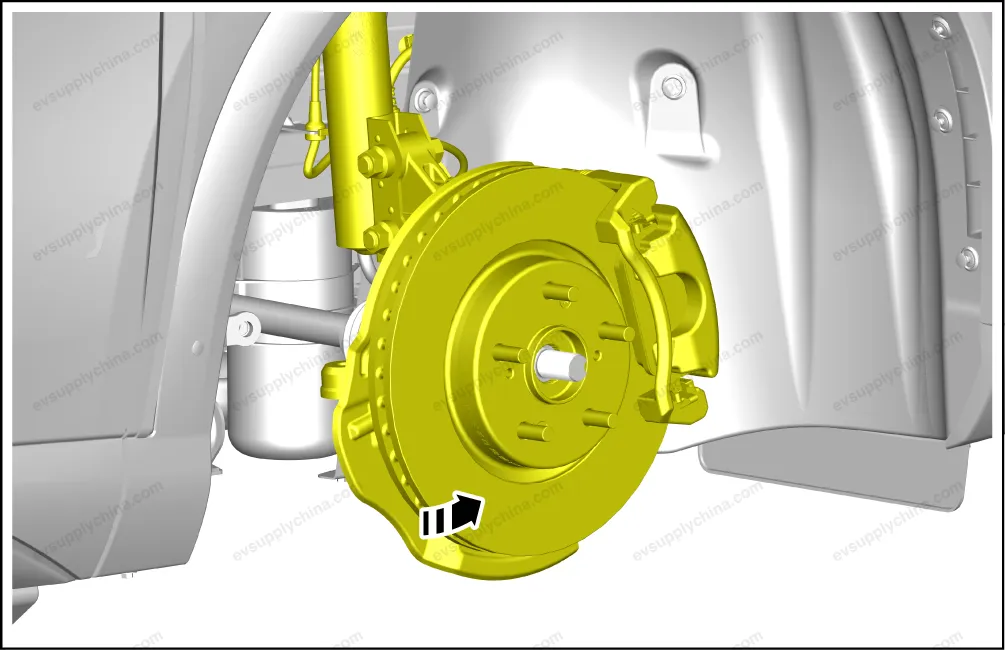
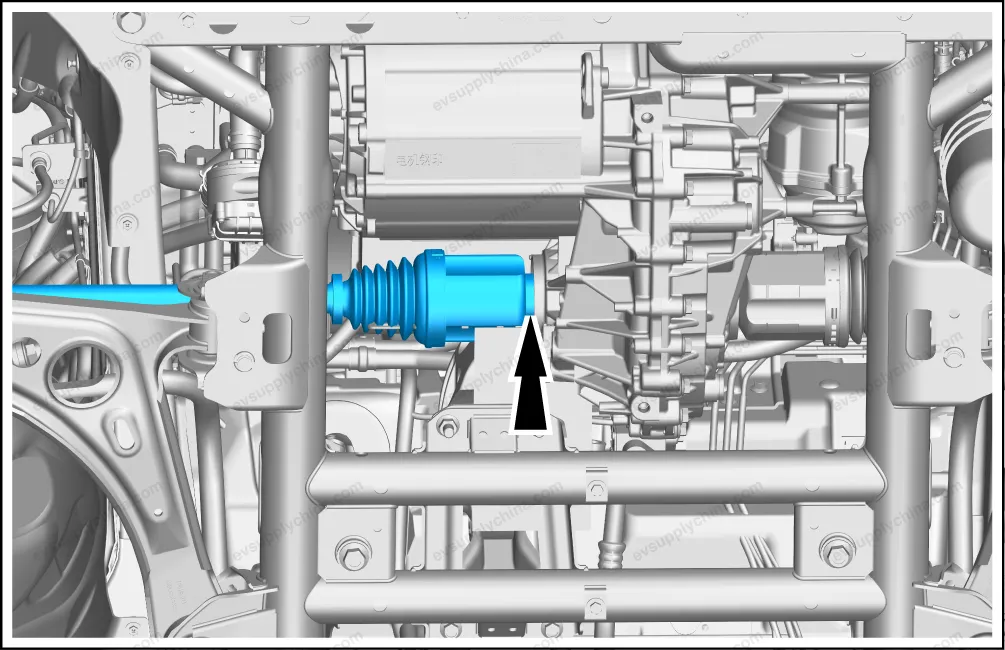
- Use the half shaft remover to remove the right front drive half shaft. See the Manual of Special Tools
Caution When removing the front stabilizer bar tie rod and ball joint assembly, fix the intermediate stud and then remove the fixing nut.
Caution Before removing the drive half shaft nut, pry the half shaft nut lock with a tool. The half shaft nut is a disposable part, and new parts should be used during installation.
Installation
- The installation steps are opposite to the removal steps.
Caution When installing the half shaft, use the half shaft oil seal protective cover to prevent damage. See "Special Tools Manual"
Left Front Drive Half Shaft Assembly - Removal and Installation
Removal
- Remove the left front wheel assembly. See Wheel Assembly - Removal and Installation
- Remove the front motor lower mudguard assembly. See Front Motor Lower Mudguard Assembly - Removal and Installation
- Remove 1 fixing nut, and detach the left front stabilizer bar tie rod and ball joint assembly from the left front shock absorber
strut assembly.
- Remove 1 fixing nut of the left front drive half shaft assembly.
- Detach the mechanical steering gear with tie rod assembly from the left front steering knuckle.

- Remove 1 fixing pin.
- Remove 1 fixing nuts.
- Remove the ball joint with the ball joint remover.
- Detach the left front lower swing arm assembly.
- Remove 2 fixing nuts of the left front lower swing arm assembly.
- Remove 1 fixing bolt of the left front lower swing arm assembly.
- Detach the left front lower swing arm assembly from the ball stud press assembly downward.
- Pull out the left front drive half shaft from the left front steering knuckle.
- Use the half shaft remover to remove the left front drive half shaft. See "Special Tools Manual"

Caution When removing the front stabilizer bar tie rod and ball joint assembly, fix the intermediate stud and then remove the fixing nut.
Caution Before removing the drive half shaft nut, pry the half shaft nut lock with a tool. The half shaft nut is a disposable part, and new parts should be used during installation.
Installation
- The installation steps are opposite to the removal steps.
Caution When installing the half shaft, use the half shaft oil seal protective cover to prevent damage. See "Special Tools Manual"