правый задний тормозной шланг в сборе
OE / Каталожные коды
13434542-00SC2E-3561040BТехнические характеристики
- Модель
- BYD Atto 3
- Конфигурация рулевого
- LHD и RHD
- Категория
- Тормоза
Доставка и возврат
Доставка по всему миру из Китая авиа или морем. Стандартная доставка 5–30 рабочих дней, экспресс 2–10 рабочих дней. Стоимость рассчитывается на оформлении заказа.
7-дневный возврат для неиспользованных товаров в оригинальной упаковке. Свяжитесь с нами до отправки возврата.
Совместимые автомобили — правый задний тормозной шланг в сборе
правый задний тормозной шланг в сборе Руководство по ремонту — BYD Atto 3
Right Rear Brake Hose Assembly - Removal and Installation
Removal
- Set the intelligent power brake system assembly to "installation mode". See Installation Mode of Intelligent Power Braking System
- Remove the right rear wheel assembly. See Wheel Assembly - Removal and Installation
- Discharge brake fluid. See Replacement of Brake Fluid
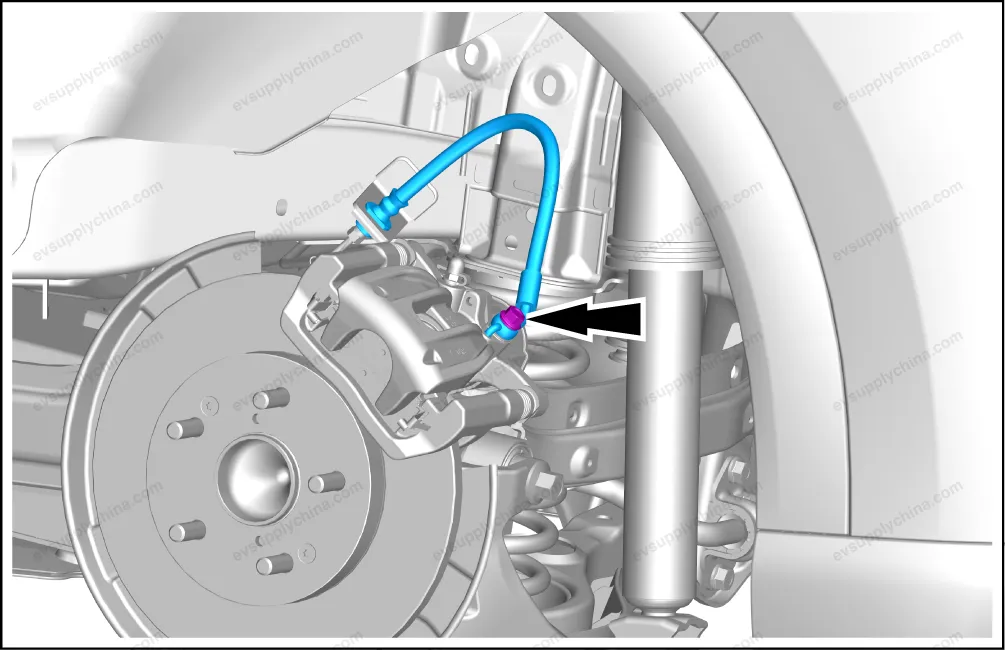
- Remove 1 fixing bolt from the right rear brake hose assembly, and take out the bolt gasket.
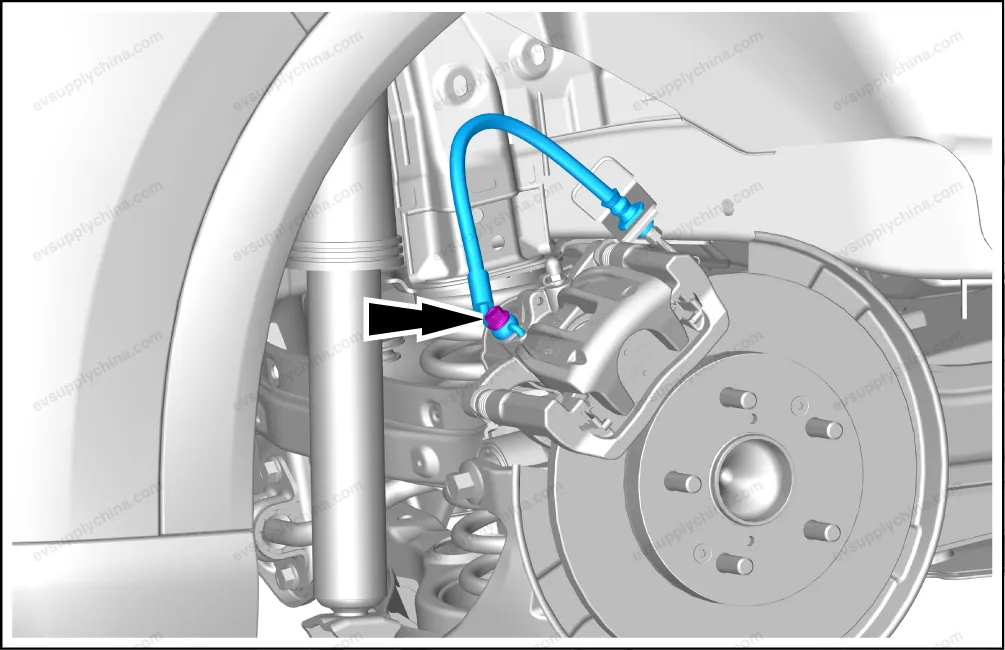
- Remove the right rear brake hose assembly.

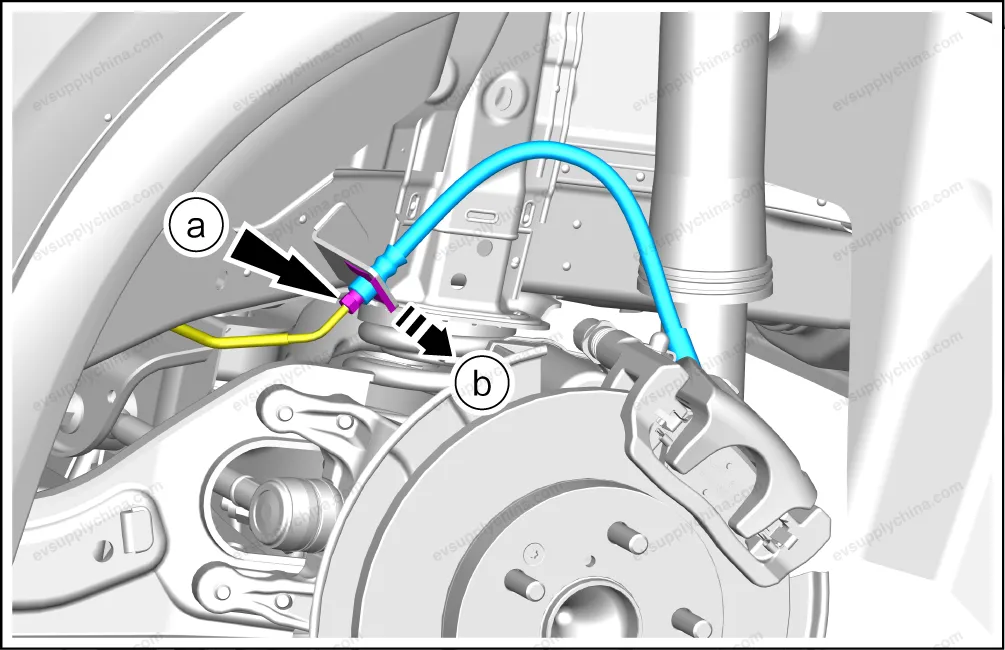
- Remove 1 brake line built-in bolt.
- Detach the metal clip, and take out the right rear brake hose assembly.
Caution The brake fluid has a strong corrosive effect on the paint. If it is accidentally splashed on the paint of the vehicle body, it must be cleaned with a rag as soon as possible. Avoid oil contact with skin. If it is accidentally splashed into the eyes, immediately rinse with plenty of water and seek medical attention as soon as possible. Do not discharge the oil at will, and recycle it according to local regulations.
Caution Place a collection container under the rear brake hose assembly to collect brake fluid. As the bolt gasket is deformed after the first installation, it cannot be used again. Replace the bolt gasket with a new one.
Installation
- The installation steps are opposite to the removal steps.
- Fill the brake fluid and bleed the brake system of the right front wheel. See Air Discharge of Braking System
Caution After the installation, press the brake pedal several times to ensure that the brake system works normally. Perform road test for inspection.
Left Rear Brake Hose Assembly - Removal and Installation
Removal
- Set the intelligent power brake system assembly to "installation mode". See Installation Mode of Intelligent Power Braking System
- Remove the left rear wheel assembly. See Wheel Assembly - Removal and Installation
- Discharge brake fluid. See Replacement of Brake Fluid
- Remove 1 fixing bolt from the left rear brake hose assembly, and take out the bolt gasket.
- Remove the left rear brake hose assembly.
- Remove 1 brake line built-in bolt.
- Detach the metal clip, and take out the rear left brake hose assembly.
Caution The brake fluid has a strong corrosive effect on the paint. If it is accidentally splashed on the paint of the vehicle body, it must be cleaned with a rag as soon as possible. Avoid oil contact with skin. If it is accidentally splashed into the eyes, immediately rinse with plenty of water and seek medical attention as soon as possible. Do not discharge the oil at will, and recycle it according to local regulations.
Caution Place a collection container under the rear brake hose assembly to collect brake fluid. As the bolt gasket is deformed after the first installation, it cannot be used again. Replace the bolt gasket with a new one.
Installation
- The installation steps are opposite to the removal steps.
- Fill the brake fluid and bleed the brake system of the right front wheel. See Air Discharge of Braking System
Caution After the installation, press the brake pedal several times to ensure that the brake system works normally. Perform road test for inspection.