Orisinil
BYD Atto 3
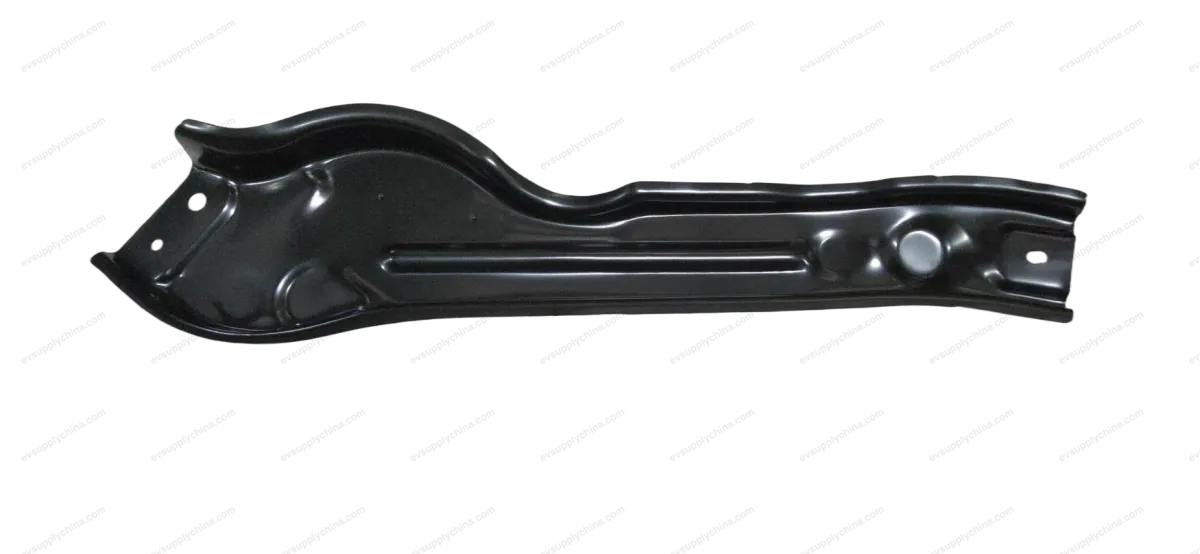
Rakitan pelat penghubung kanan palang atas tangki air
Kode OE / Material
13443028-00SC2EM-5301579Harga atas permintaanTersedia
Spesifikasi Teknis
- Model Kendaraan
- BYD Atto 3
- Konfigurasi Kemudi
- Universal (Setir Kiri & Kanan)
- Kategori
- Radiator & Pendingin
Pengiriman & Pengembalian
Dikirim ke seluruh dunia dari Tiongkok melalui pengiriman udara atau laut. Pengiriman standar 5–30 hari kerja, ekspres 2–10 hari kerja. Biaya pengiriman dihitung saat checkout.
Jendela pengembalian 7 hari untuk barang yang belum digunakan dalam kemasan asli. Hubungi kami sebelum mengembalikan barang apa pun.
Kendaraan yang Kompatibel — Rakitan pelat penghubung kanan palang atas tangki air
BYDYuan PLUS/Atto 3
2024Rakitan pelat penghubung kanan palang atas tangki air Panduan Bengkel — BYD Atto 3
Replacement of Right Side Wall Front Connecting Plate Assembly
Removal
- Clear 19 welding spots, and take out the right side wall front connecting plate assembly.
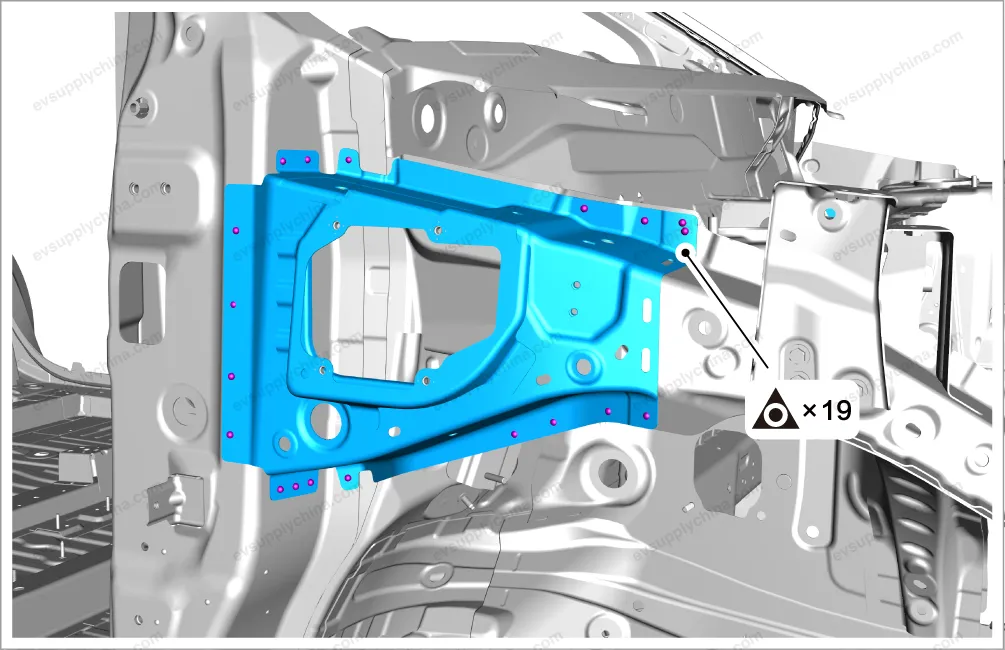
Installation
- Secure the right side wall front connecting plate assembly to the mounting position.
- Check and adjust the relative position and dimensions of the right side wall front connecting plate assembly and the surrounding parts. See Front Door
- Weld 19 welding spots on the right side wall front connecting plate assembly.

- Apply body sealant and internal coating at corresponding positions.
- After the external coating is applied, the anti rust agent shall be applied on the inner panel of the welding spots of the closed section structure.
Water Tank Upper Beam Right Connecting Plate Assembly - Removal and Installation
Removal
- Remove the front compartment right trim panel assembly. See Front Compartment Right Trim Panel Assembly - Removal and Installation
- Remove 5 fixing bolts, and take out the water tank upper beam right connecting plate assembly.
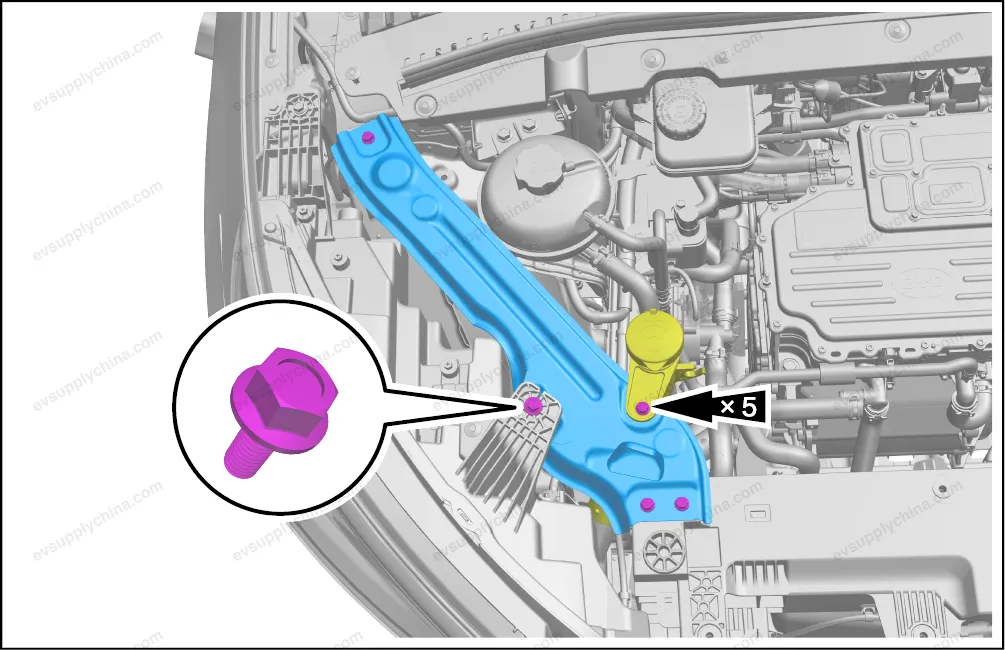
Installation
- The installation steps are opposite to the removal steps.
Left Connecting Plate of Upper Beam of Water Tank - Removal and Installation
Removal
- Remove the front compartment left trim panel assembly. See Front Compartment Left Trim Panel Assembly - Removal and Installation
- Remove 4 fixing bolts, and take out the left connecting plate of upper beam of water tank.
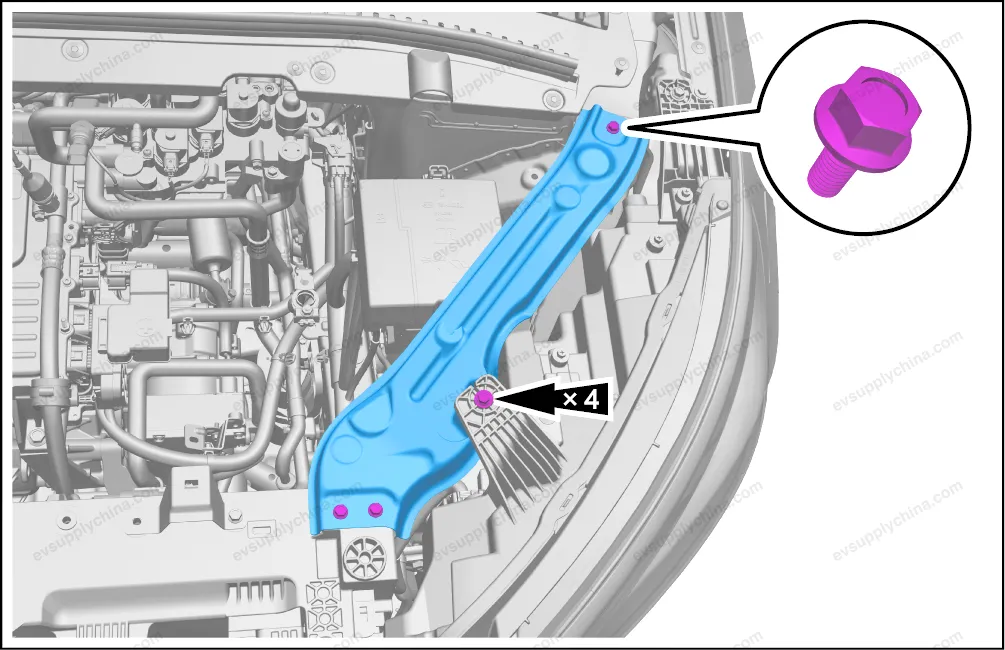
Installation
- The installation steps are opposite to the removal steps.