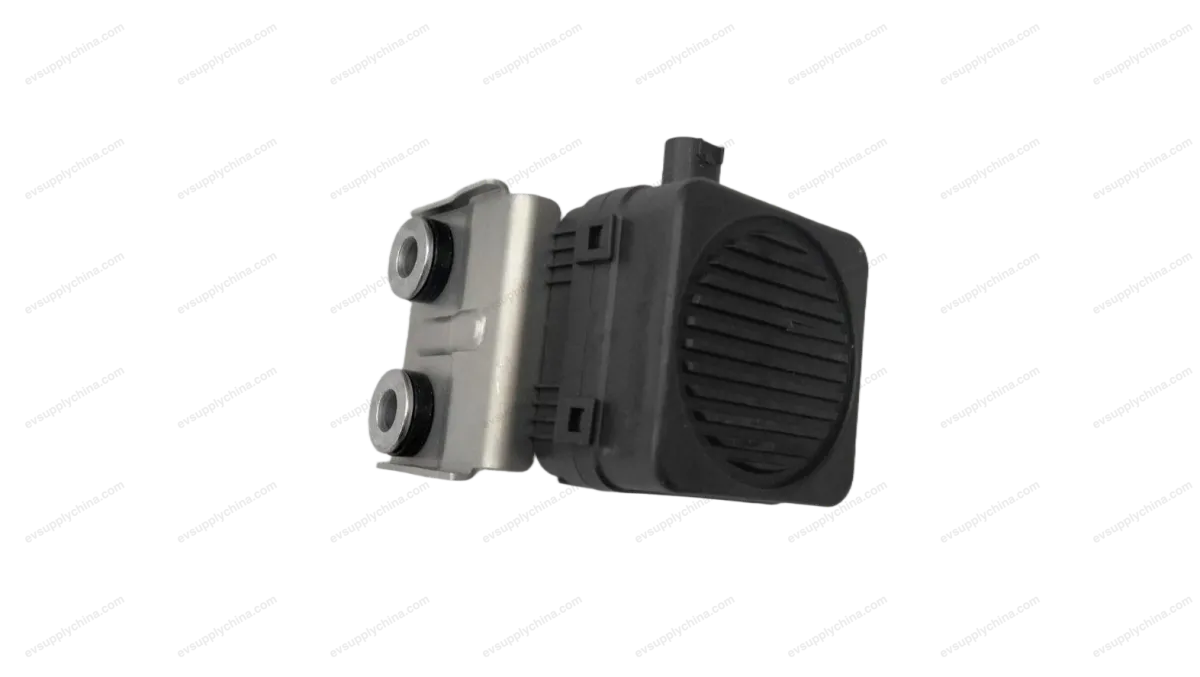
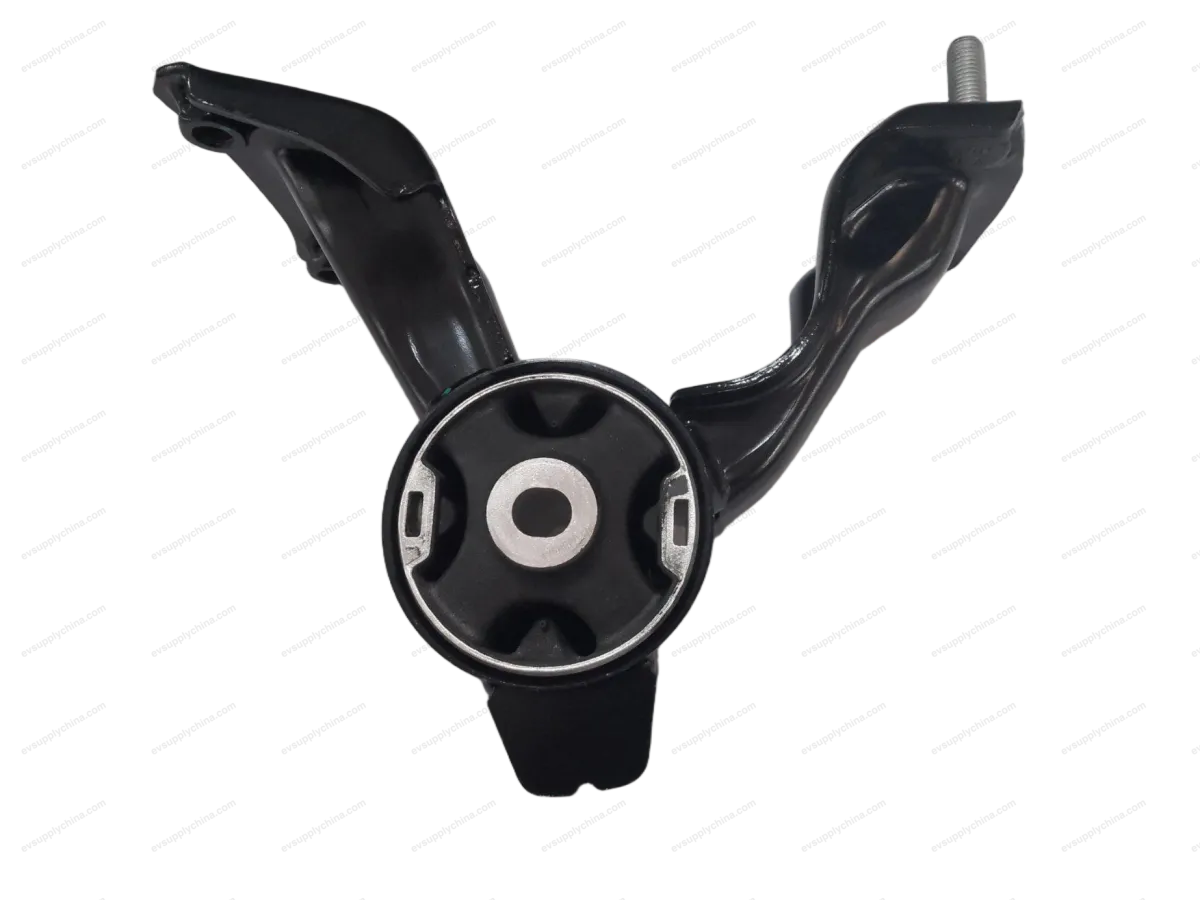
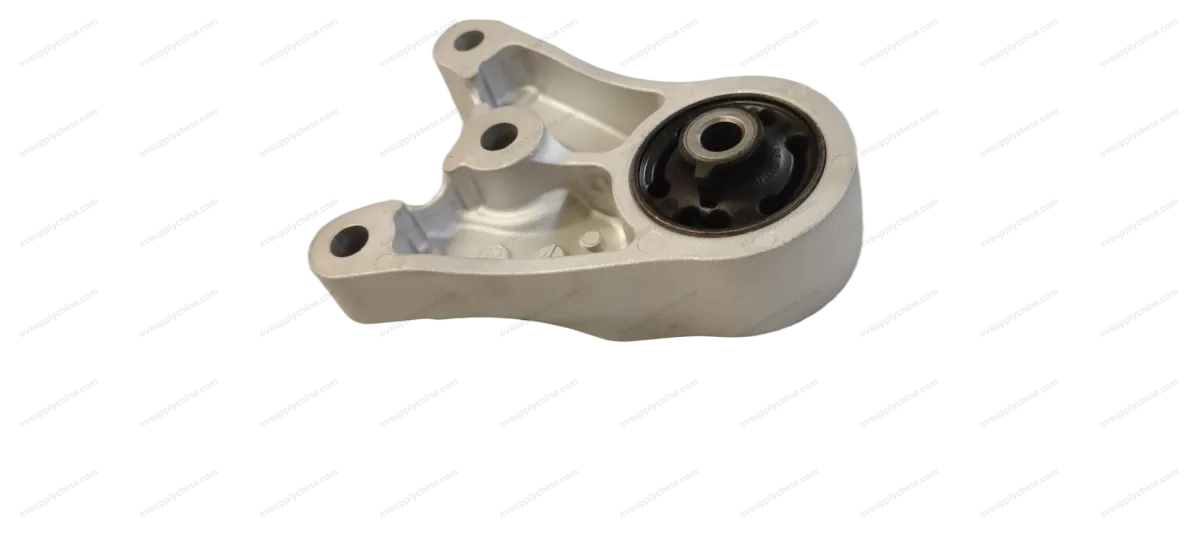
مجموعة وحدة المقدمة
أكواد OE / المواد
13443023-00SC2EM-5301290المواصفات الفنية
- موديل السيارة
- BYD Atto 3
- تكوين التوجيه
- مقود يسار ومقود يمين
الشحن والإرجاع
شحن عالمي من الصين جواً أو بحراً. التسليم القياسي 5–30 يوم عمل، السريع 2–10 أيام عمل. تحسب تكلفة الشحن عند الدفع.
نافذة إرجاع 7 أيام للقطع غير المستخدمة في عبوتها الأصلية. تواصل معنا قبل إرجاع أي قطعة.
السيارات المتوافقة — مجموعة وحدة المقدمة
مجموعة وحدة المقدمة دليل الورشة — BYD Atto 3
Front Seat Far-end Right Airbag Module- Removal and Installation
Removal
- Remove the plastic part 2 at the headrest. See Plastic Part 2 at Headrest - Removal and Installation
- Remove the driver seat right side guard. See Driver Seat Right Guard - Removal and Installation
- Remove the driver seat left side guard. See Driver Seat Left Side Guard - Removal and Installation
- Detach the seat wiring harness from the seat.
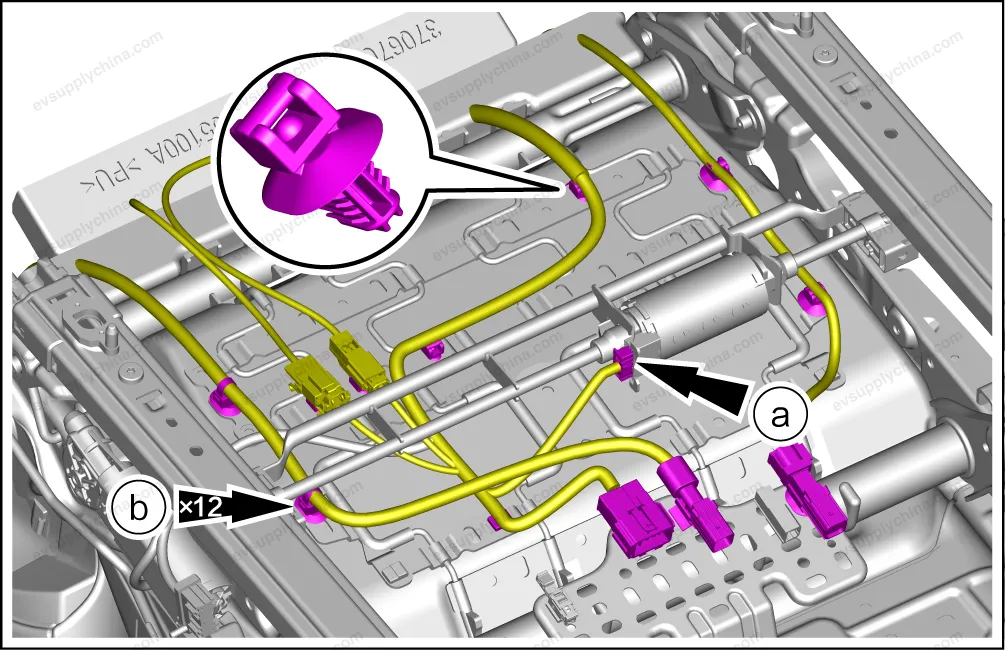
- Disconnect 1 connector.
- Pry up 12 wiring harness clips, and move away the seat wiring harness.
- Untie 2 backrest brace webs.
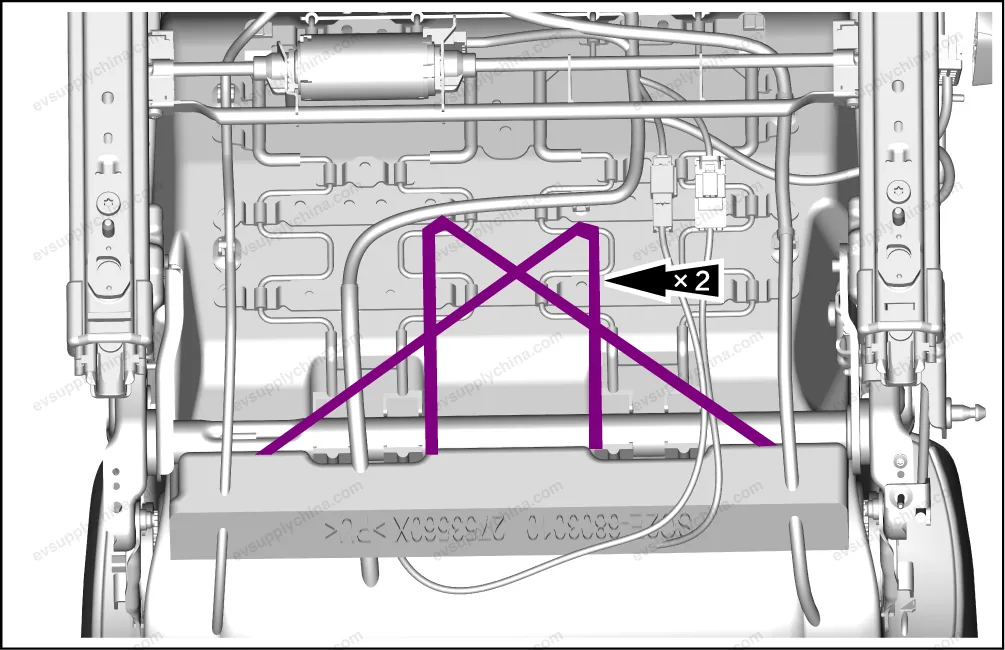
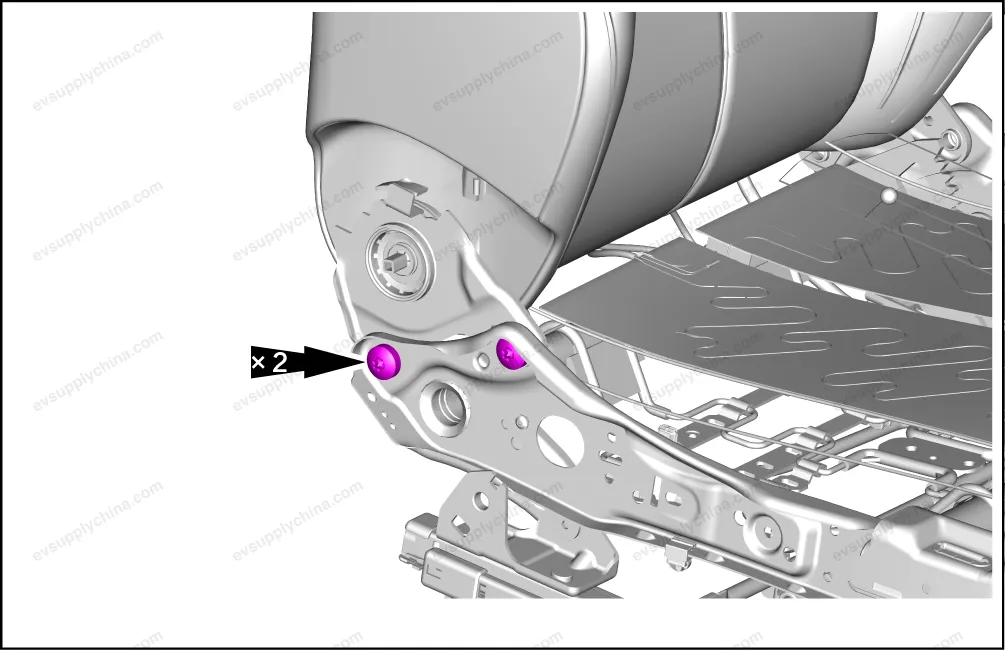
- Remove 2 fixing bolts from the left side of the backrest frame and cushion frame.
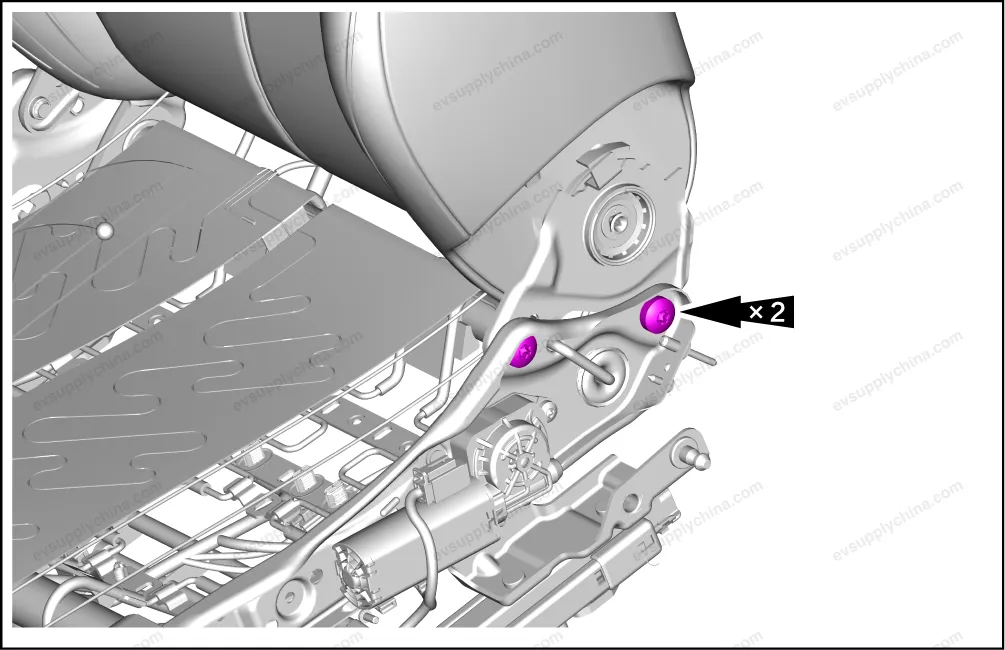
- Remove 2 fixing bolts from the right side of the backrest frame and cushion frame, and take out the backrest assembly.
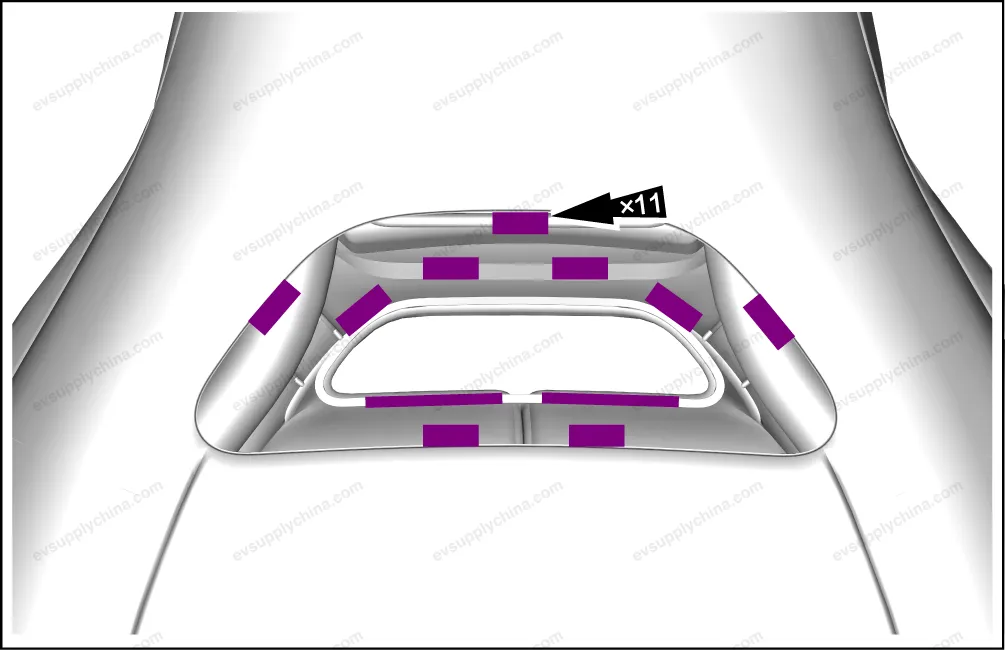
- Remove 11 fixing clips at the headrest.
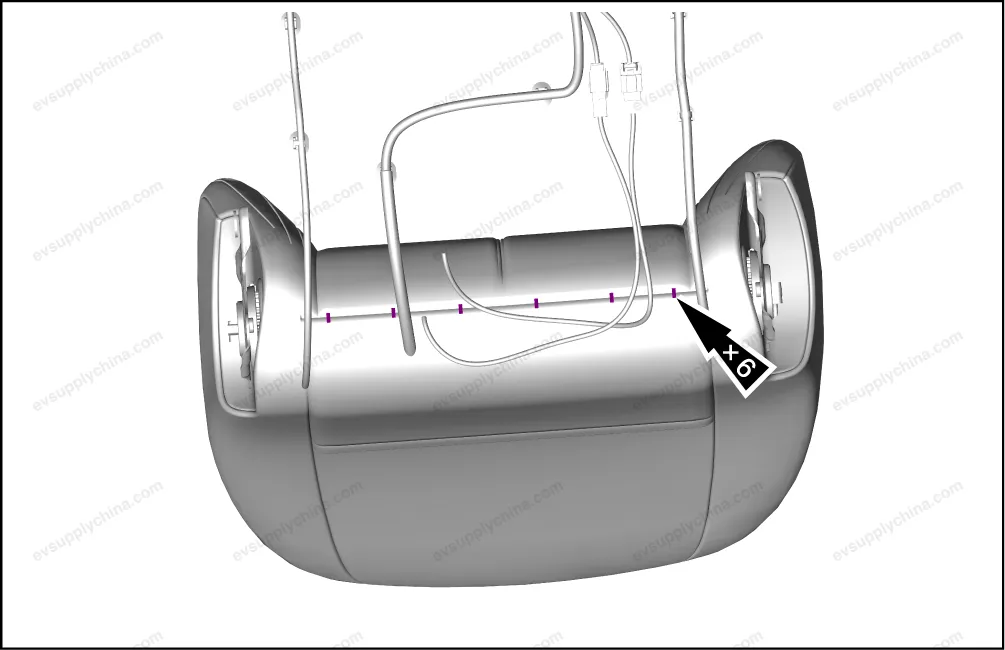
- Remove 6 metal clips, and take out the seat backrest foaming mask assembly.
- Remove the front seat far-end right airbag module.
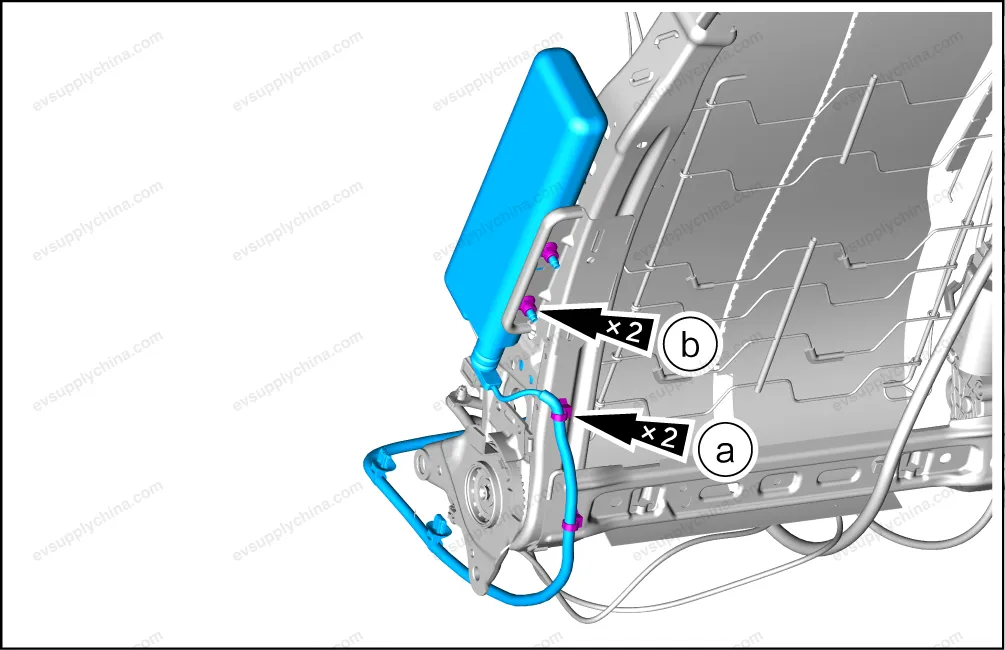
- Pry up 2 fixing clips.
- Remove 2 fixing nuts, and take out the front seat far-end right airbag module.
Warning The safety protection system (SRS) can still work for a period of time after the power is disconnected. Wait at least 3 min before disassembling or removing any SRS component. Ensure that the vehicle electrical system is completely powered off and that no other power is connected. Never expose SRS parts to high temperature or open fire. In case of SRS part falling off, cracks, dents or other defects, replace with new parts.
Installation
- Follow the removal steps in reverse order to install.