Оригинал
BYD Atto 3
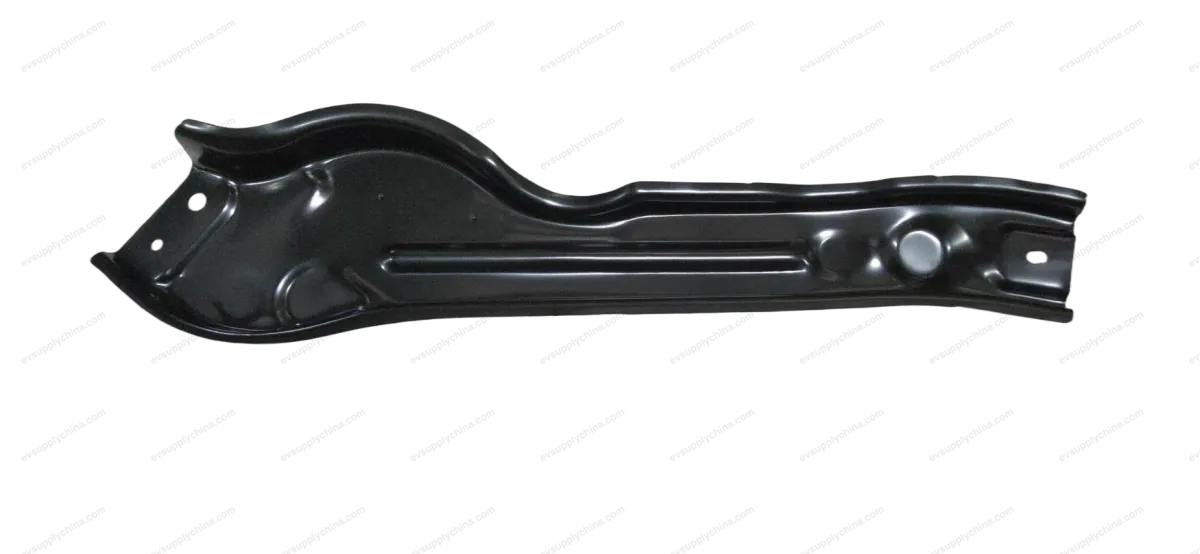
Верхняя поперечная балка правого соединительного узла резервуара для воды
OE / Каталожные коды
13443028-00SC2EM-5301579Цена по запросуВ наличии
Технические характеристики
- Модель
- BYD Atto 3
- Конфигурация рулевого
- Универсальный (LHD и RHD)
- Категория
- Радиатор и охлаждение
Доставка и возврат
Доставка по всему миру из Китая авиа или морем. Стандартная доставка 5–30 рабочих дней, экспресс 2–10 рабочих дней. Стоимость рассчитывается на оформлении заказа.
7-дневный возврат для неиспользованных товаров в оригинальной упаковке. Свяжитесь с нами до отправки возврата.
Совместимые автомобили — Верхняя поперечная балка правого соединительного узла резервуара для воды
BYDYuan PLUS/Atto 3
2024Верхняя поперечная балка правого соединительного узла резервуара для воды Руководство по ремонту — BYD Atto 3
Replacement of Right Side Wall Front Connecting Plate Assembly
Removal
- Clear 19 welding spots, and take out the right side wall front connecting plate assembly.
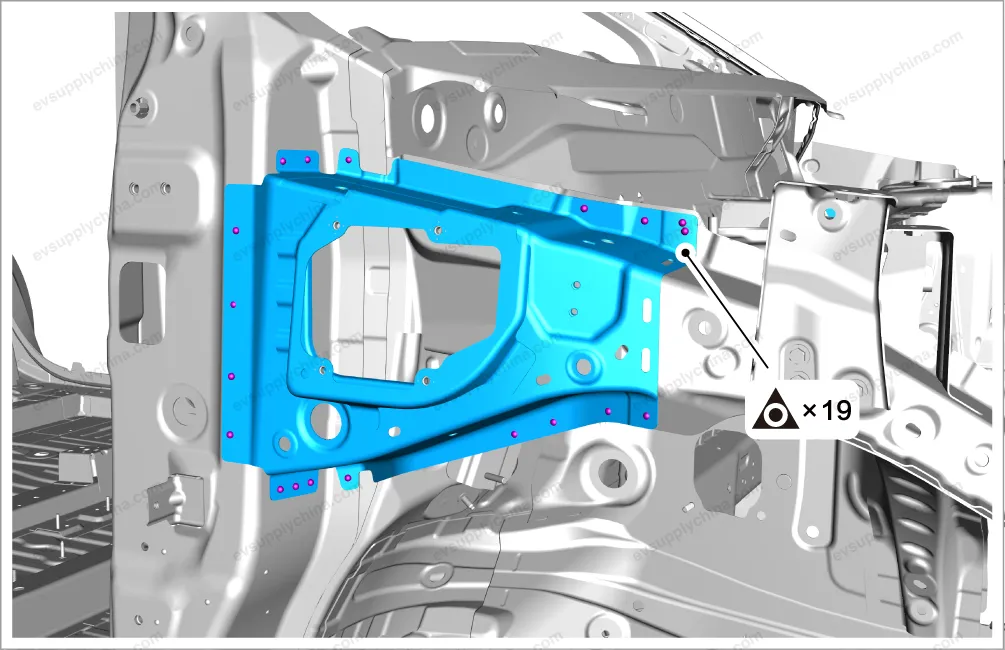
Installation
- Secure the right side wall front connecting plate assembly to the mounting position.
- Check and adjust the relative position and dimensions of the right side wall front connecting plate assembly and the surrounding parts. See Front Door
- Weld 19 welding spots on the right side wall front connecting plate assembly.

- Apply body sealant and internal coating at corresponding positions.
- After the external coating is applied, the anti rust agent shall be applied on the inner panel of the welding spots of the closed section structure.
Water Tank Upper Beam Right Connecting Plate Assembly - Removal and Installation
Removal
- Remove the front compartment right trim panel assembly. See Front Compartment Right Trim Panel Assembly - Removal and Installation
- Remove 5 fixing bolts, and take out the water tank upper beam right connecting plate assembly.
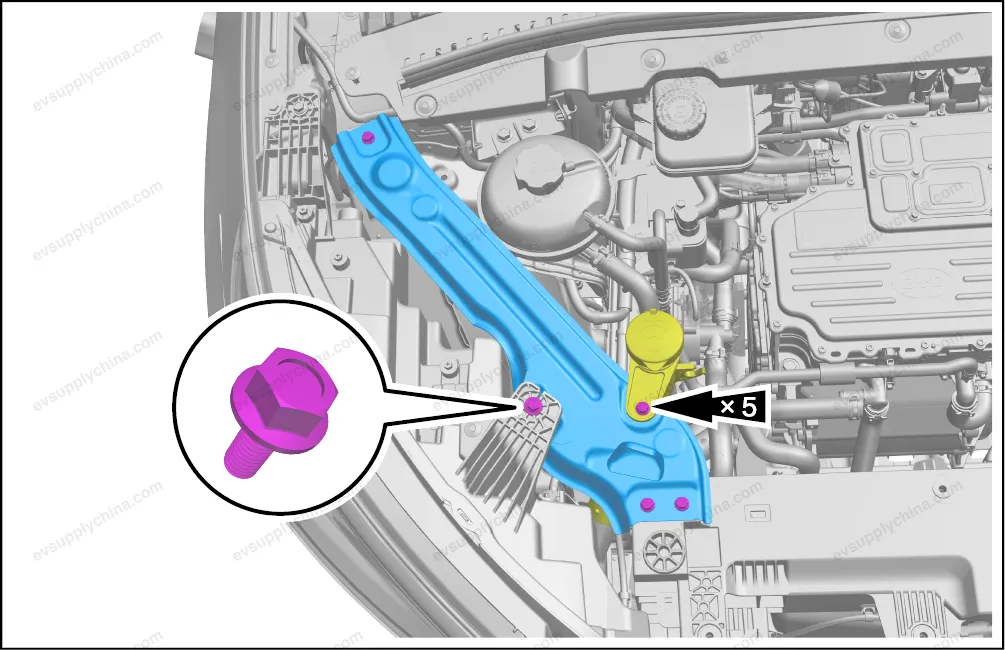
Installation
- The installation steps are opposite to the removal steps.
Left Connecting Plate of Upper Beam of Water Tank - Removal and Installation
Removal
- Remove the front compartment left trim panel assembly. See Front Compartment Left Trim Panel Assembly - Removal and Installation
- Remove 4 fixing bolts, and take out the left connecting plate of upper beam of water tank.
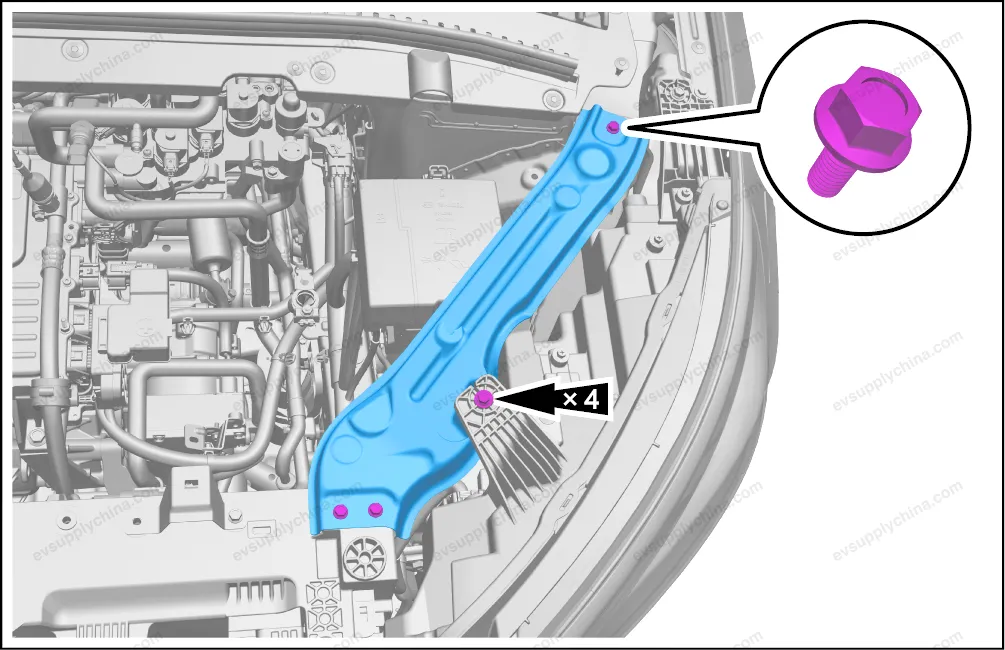
Installation
- The installation steps are opposite to the removal steps.