ОригиналАналогНеоригинал
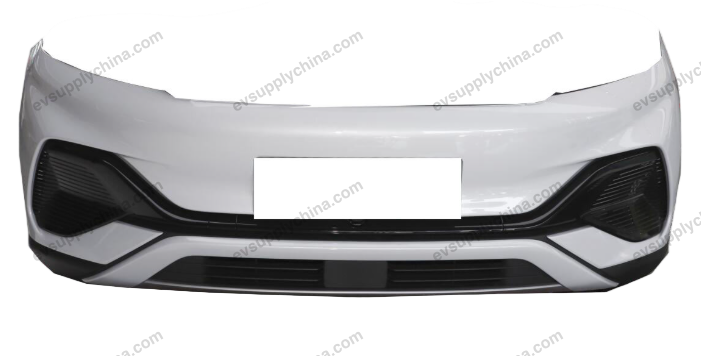
BYD Atto 3
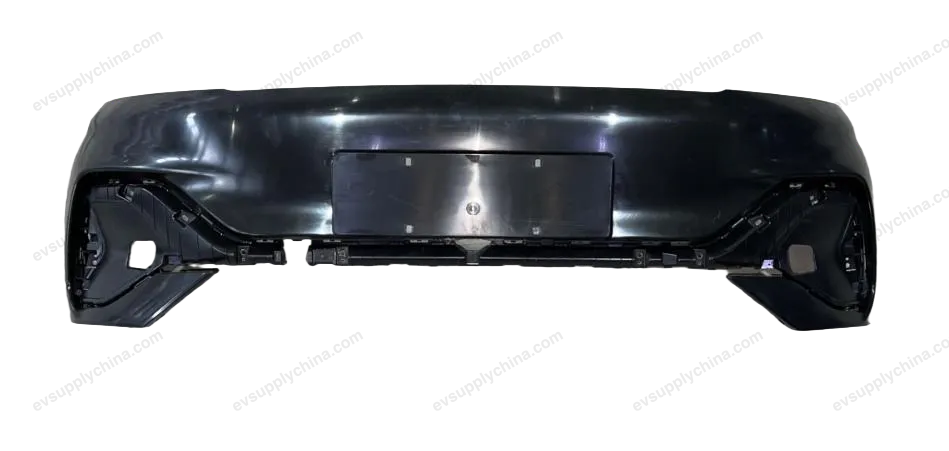
Правый кронштейн переднего бампера
OE / Каталожные коды
13161559-00SC2E-2803411$5USD
В наличииТехнические характеристики
- Модель
- BYD Atto 3
- Конфигурация рулевого
- Универсальный (LHD и RHD)
- Категория
- Бамперы
Доставка и возврат
Доставка по всему миру из Китая авиа или морем. Стандартная доставка 5–30 рабочих дней, экспресс 2–10 рабочих дней. Стоимость рассчитывается на оформлении заказа.
7-дневный возврат для неиспользованных товаров в оригинальной упаковке. Свяжитесь с нами до отправки возврата.
Совместимые автомобили — Правый кронштейн переднего бампера
BYDYuan PLUS/Atto 3
2022–2025Правый кронштейн переднего бампера Руководство по ремонту — BYD Atto 3
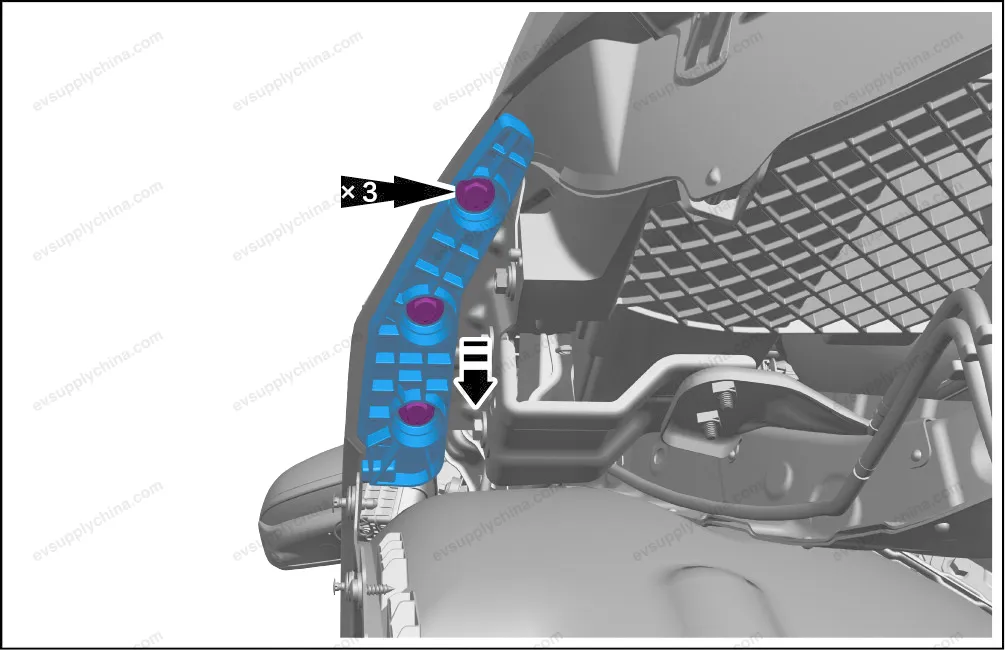
Front Bumper Right Bracket - Removal and Installation
Removal
- Remove the front bumper assembly. See Front Bumper Assembly - Removal and Installation
- Remove 3 fixing bolts, and take out the front bumper right bracket.
Installation
- The installation steps are opposite to the removal steps.
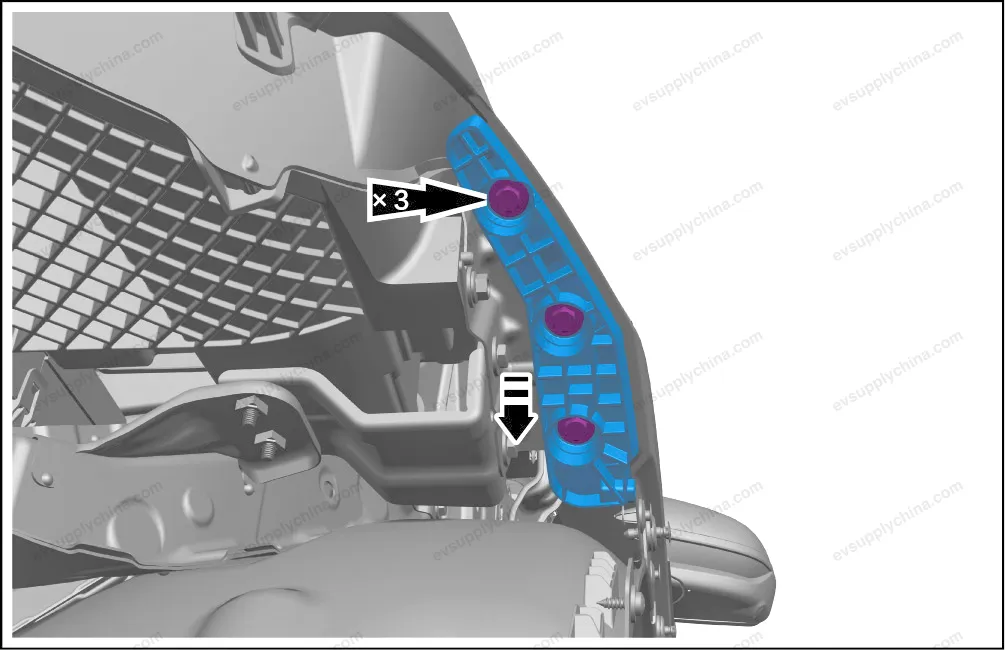
Front Bumper Left Bracket - Removal and Installation
Removal
- Remove the front bumper assembly. See Front Bumper Assembly - Removal and Installation
- Remove 3 fixing bolts, and take out the front bumper left bracket.
Installation
- The installation steps are opposite to the removal steps.
Upper Mounting Bracket of Front Bumper - Removal and Installation
Removal
- Remove the logo trim from the upper part of front bumper. See Logo Trim on the Upper Part of Front Bumper - Removal and Installation
- Detach the front bumper wiring harness.
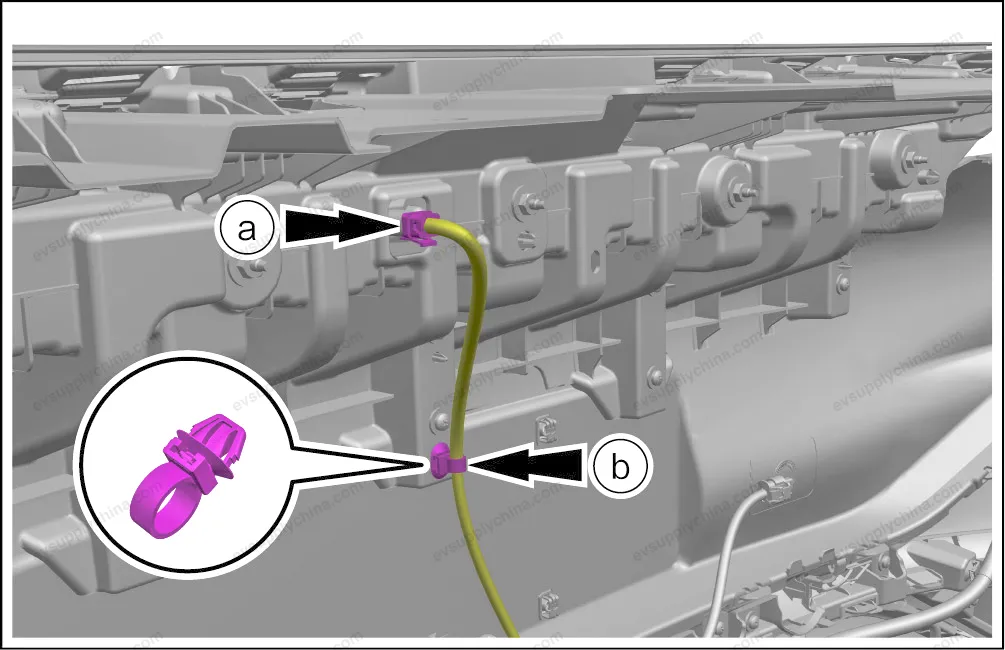
- Disconnect 1 connector.
- Detach 1 wiring harness clips.
- Remove the fasteners from the upper mounting bracket of front bumper.
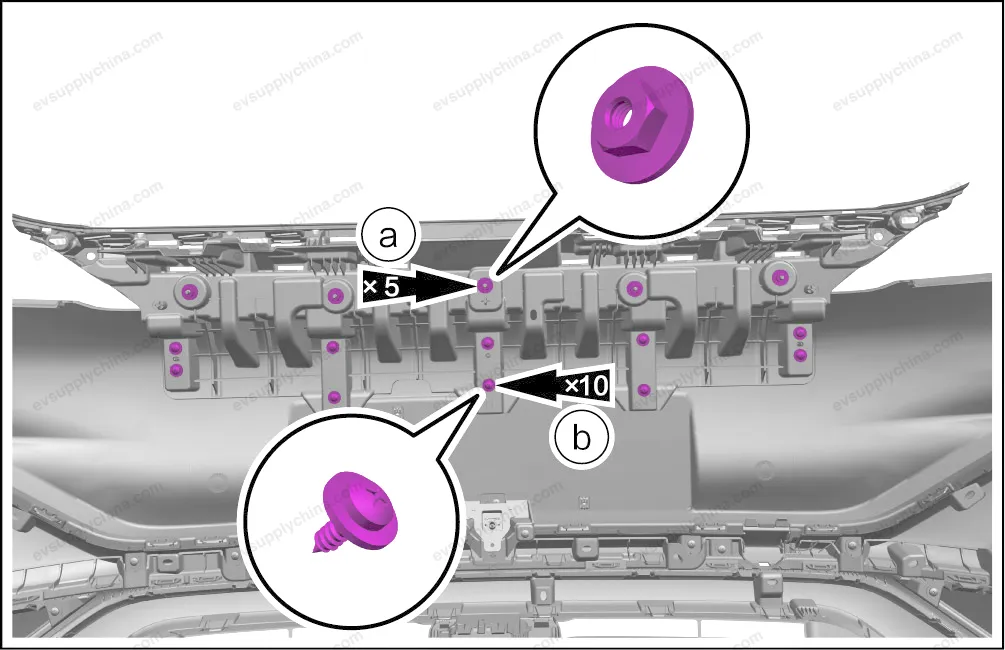
- Remove 5 fixing nuts.
- Remove 10 fixing screws.
- Take out the front bumper upper mounting bracket.

Installation
- The installation steps are opposite to the removal steps.