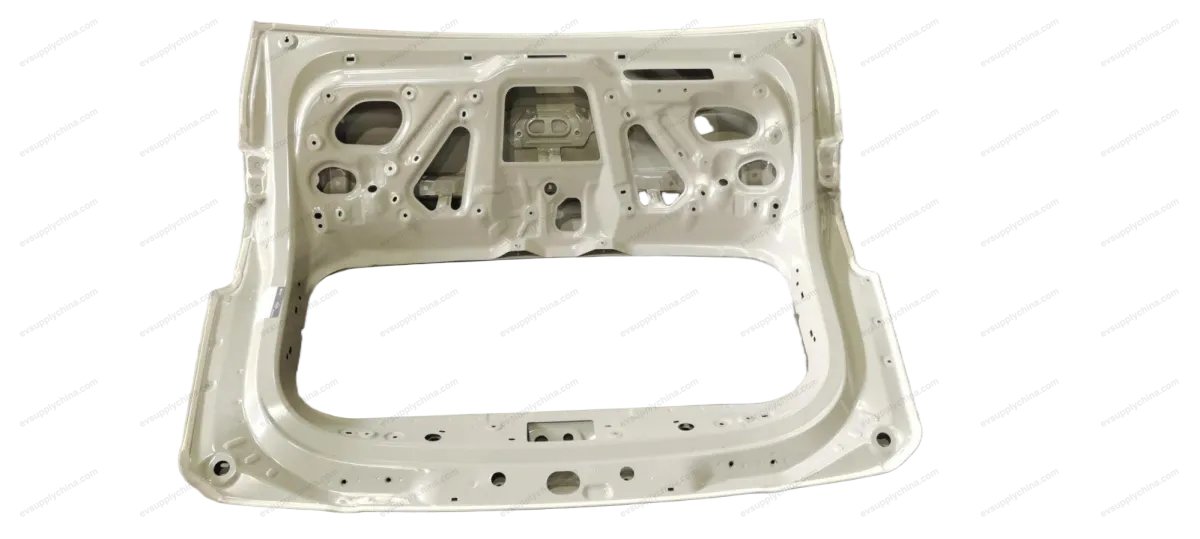
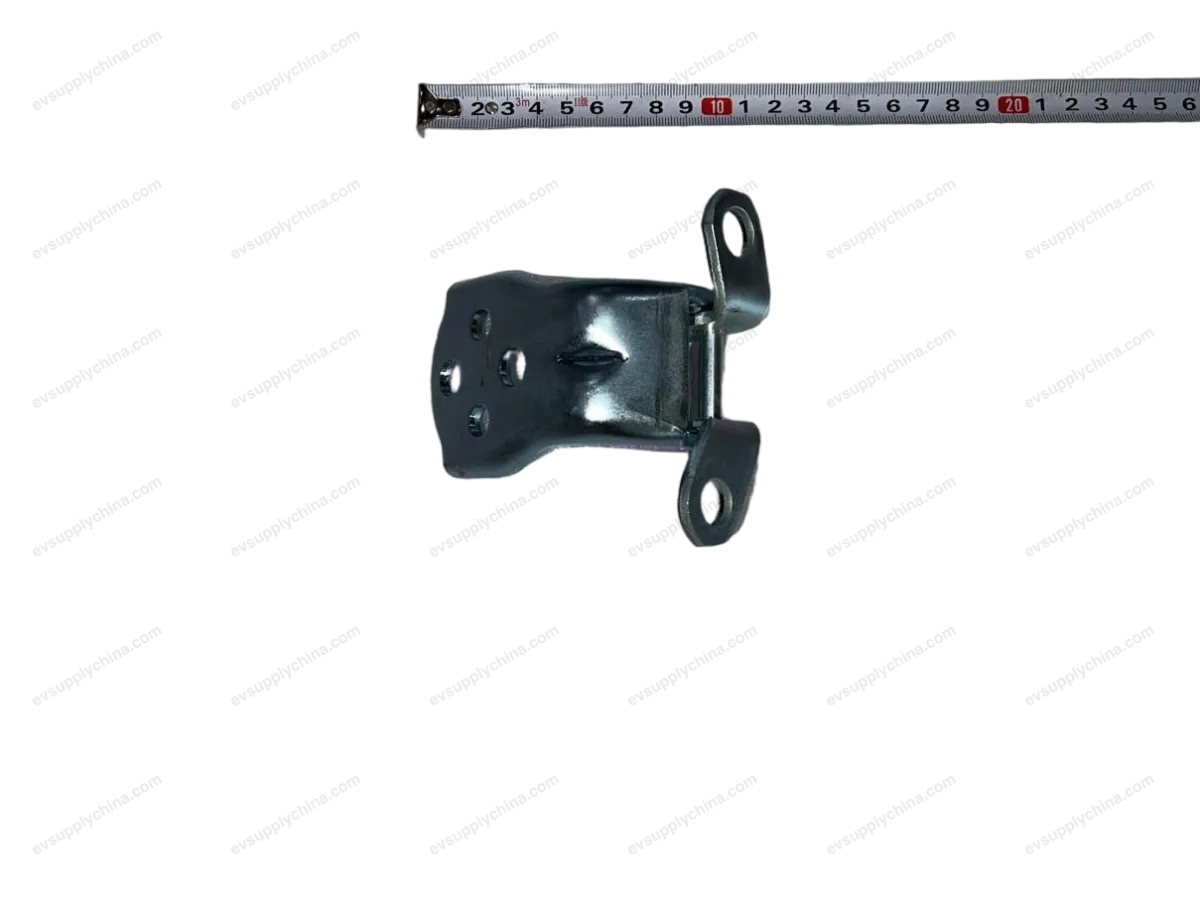
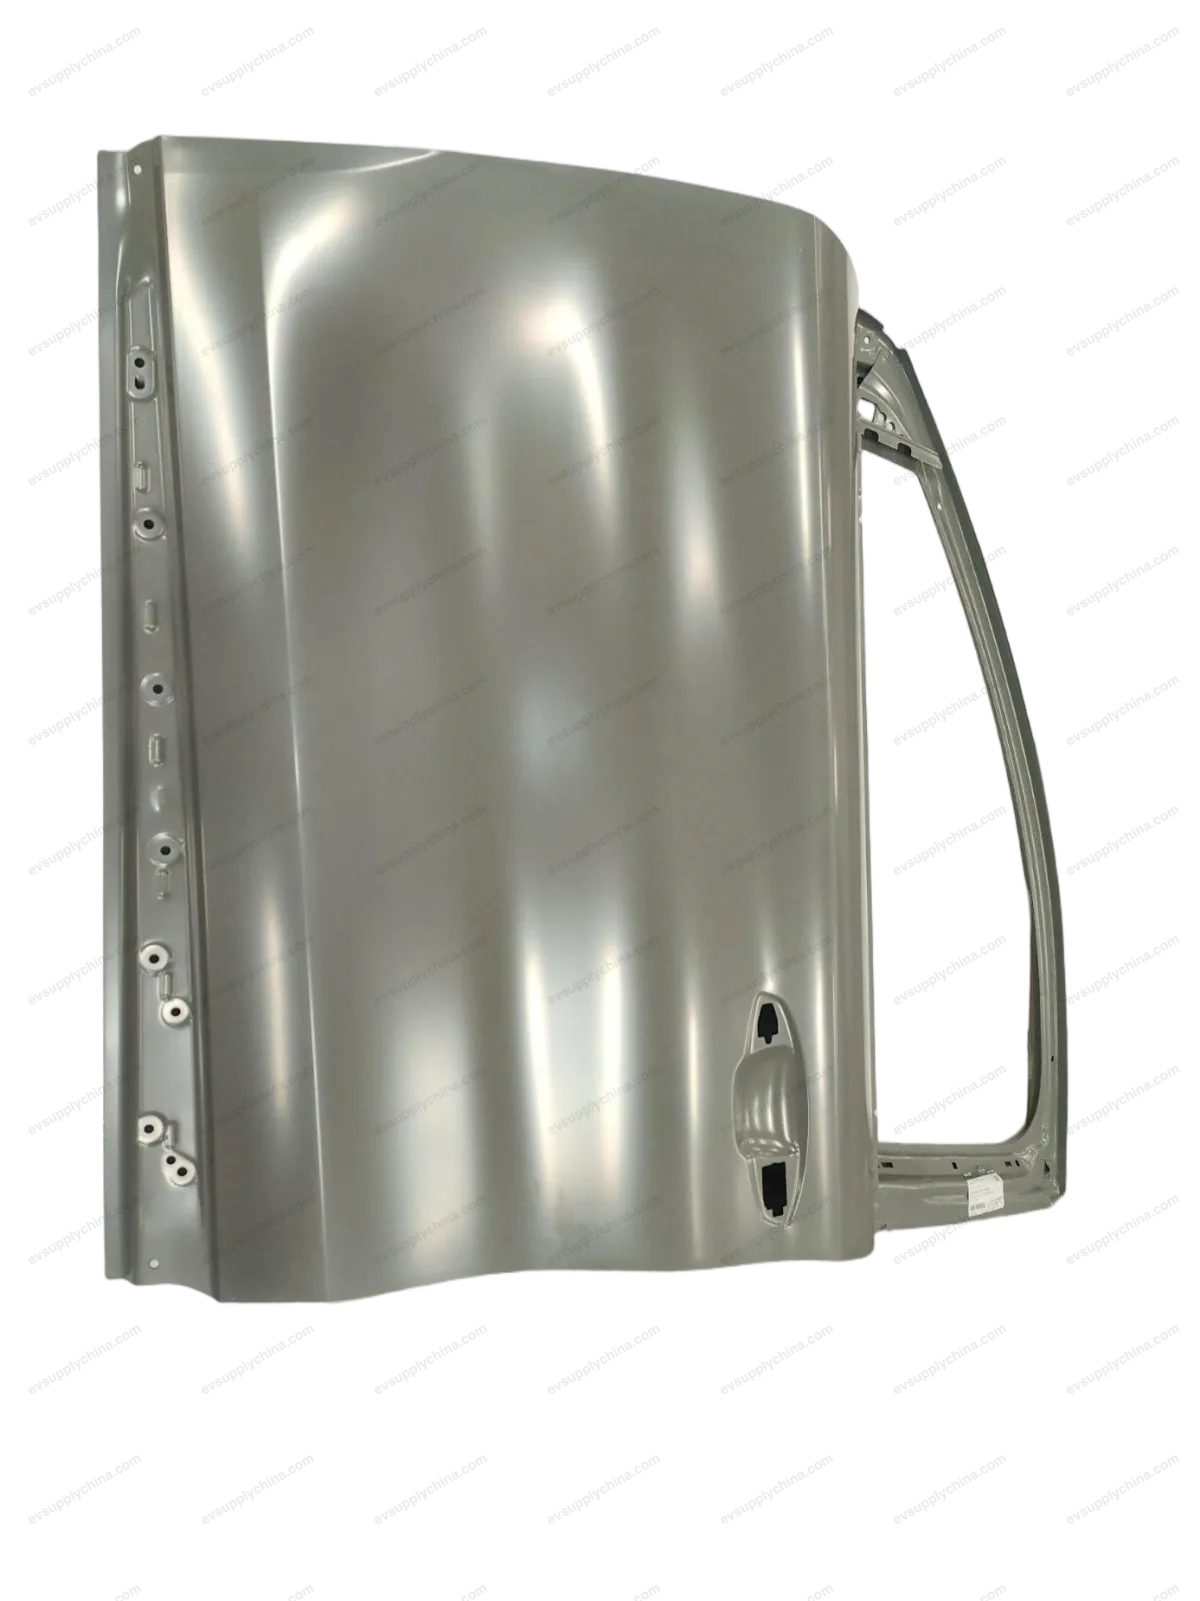
Корпус газового амортизатора правой задней двери
OE / Каталожные коды
13742183-00SC2EM-6309112Технические характеристики
- Модель
- BYD Atto 3
- Конфигурация рулевого
- Универсальный (LHD и RHD)
- Категория
- Двери и багажники
Доставка и возврат
Доставка по всему миру из Китая авиа или морем. Стандартная доставка 5–30 рабочих дней, экспресс 2–10 рабочих дней. Стоимость рассчитывается на оформлении заказа.
7-дневный возврат для неиспользованных товаров в оригинальной упаковке. Свяжитесь с нами до отправки возврата.
Совместимые автомобили — Корпус газового амортизатора правой задней двери
Корпус газового амортизатора правой задней двери Руководство по ремонту — BYD Atto 3
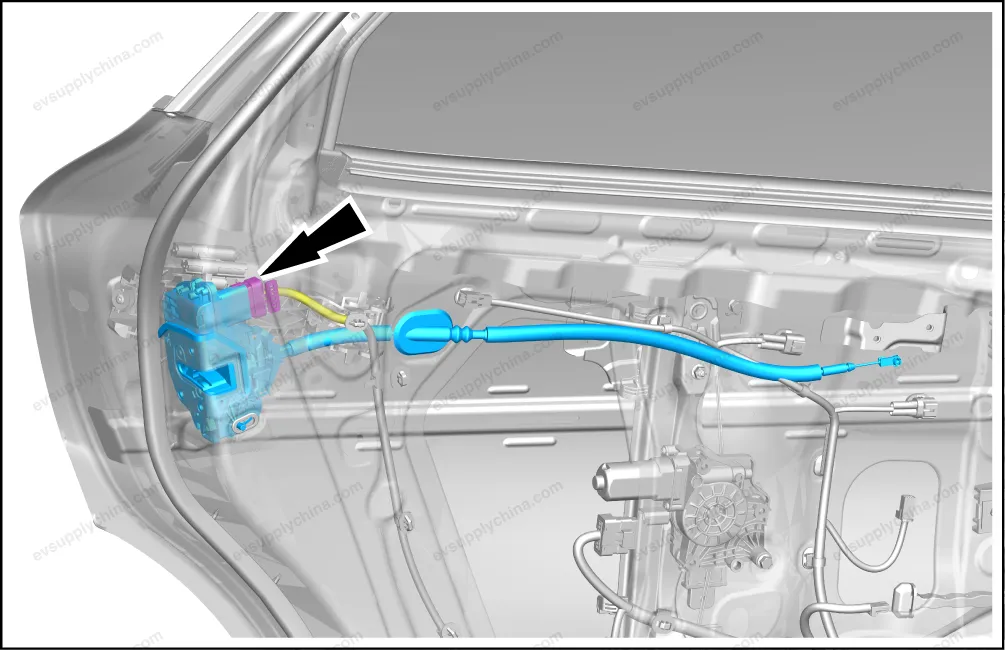
Right Rear Door Lock Body Assembly - Removal and Installation
Removal
- Remove the right rear door rear movable guide rail and mud tank assembly. See Right Rear Door Rear Movable Guide Rail and Mud Tank Assembly - Removal and Installation
- Detach one fixing clip, and detach the right rear door lock outward-opening lever from the right rear door lock body assembly.
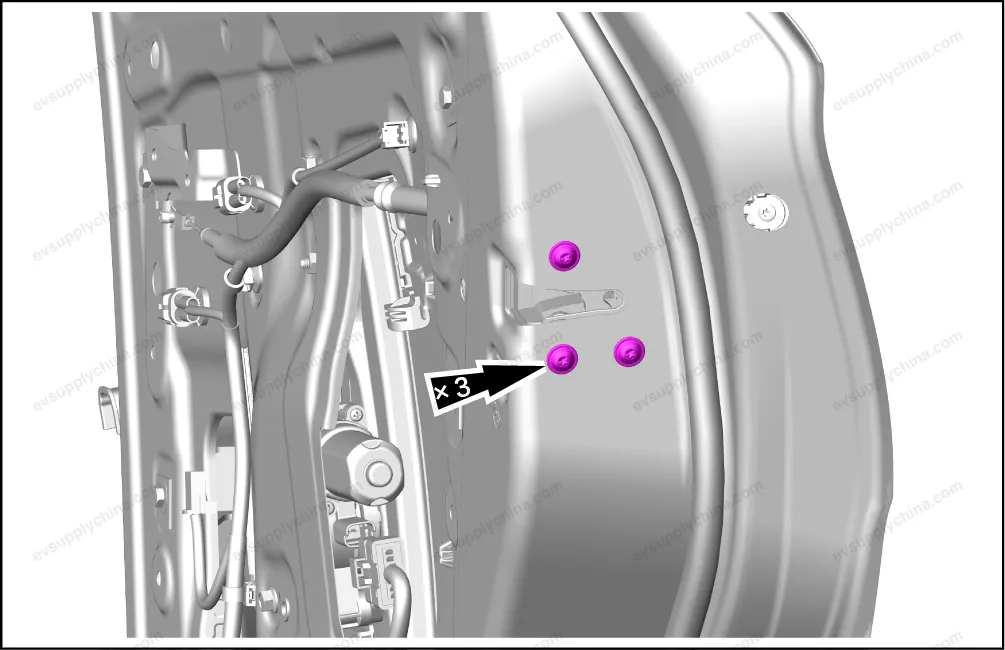
- Remove 3 fixing bolts of the right rear door lock body assembly.
- Disconnect one connector, and take out the right rear door lock body assembly.
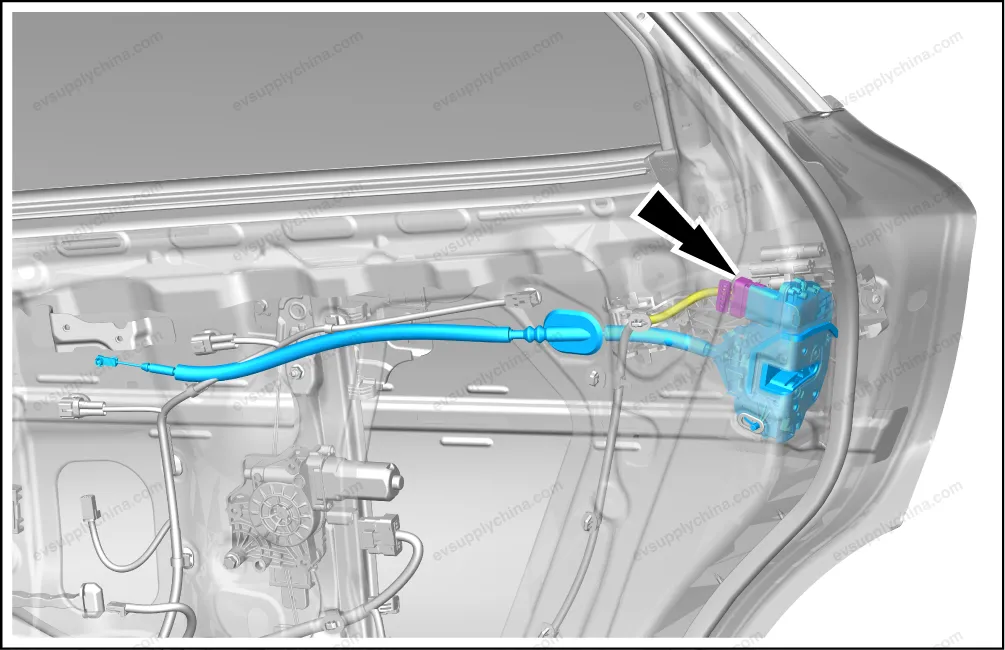
Caution To take out the rear door lock body assembly, the rubber plug connecting the rear door lock body assembly and the door shall be detached first.
Installation
- Follow the removal steps in reverse order to install.
Caution After the installation, check the functionality of the rear door lock body assembly.
Left Rear Door Lock Body Assembly - Removal and Installation
Removal
- Remove the left rear door rear movable guide rail and mud tank assembly. See Left Rear Door Rear Movable Guide Rail and Mud Tank Assembly - Removal and Installation
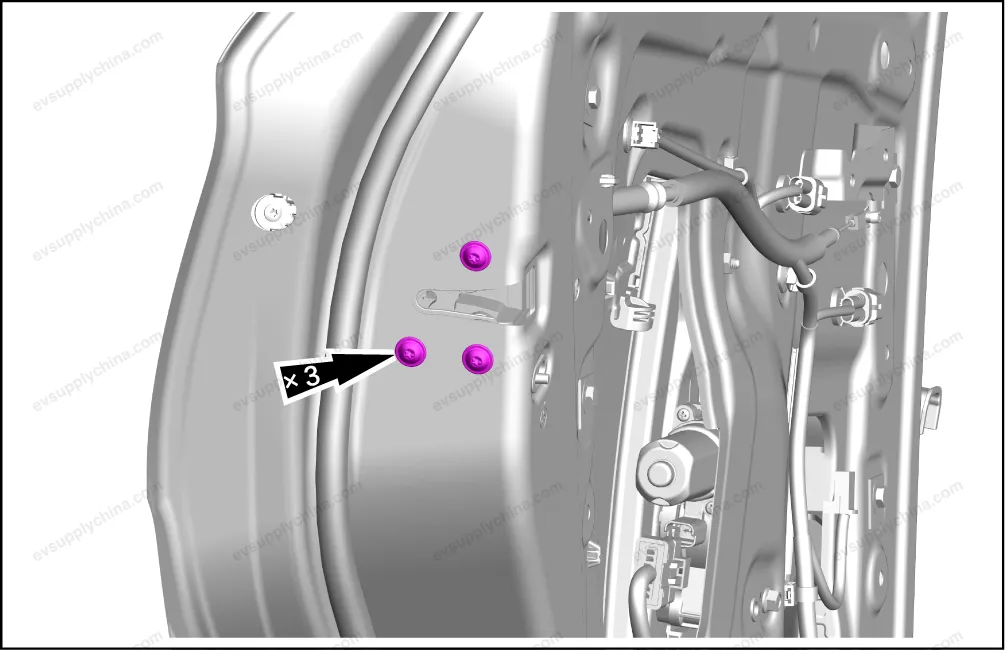
- Remove 3 fixing bolts of the left rear door lock body assembly.
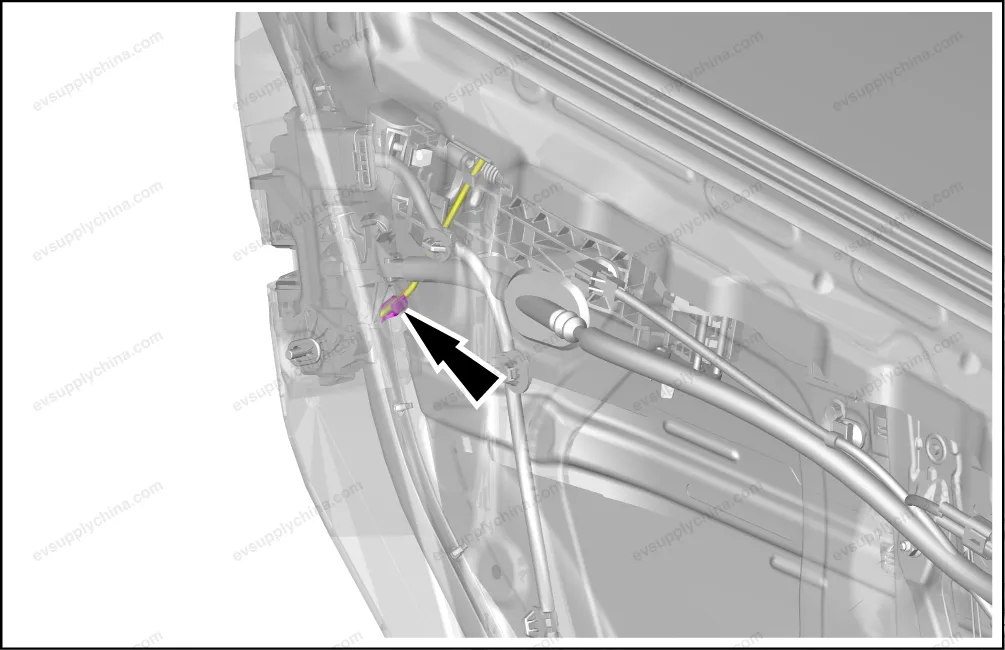
- Detach one fixing clip, and detach the left rear door lock outward-opening lever from the left rear door lock body assembly.
- Disconnect one connector, and take out the left rear door lock body assembly.
Caution To take out the rear door lock body assembly, the rubber plug connecting the rear door lock body assembly and the door shall be detached first.
Installation
- Follow the removal steps in reverse order to install.
Caution After the installation, check the functionality of the rear door lock body assembly.
Tailgate Right Electric Spring Body - Removal and Installation
Removal
- Remove the right C-pillar upper guard assembly. See Right C-Pillar Upper Guard Assembly - Removal and Installation
- Detach partial ceiling assembly from the roof.
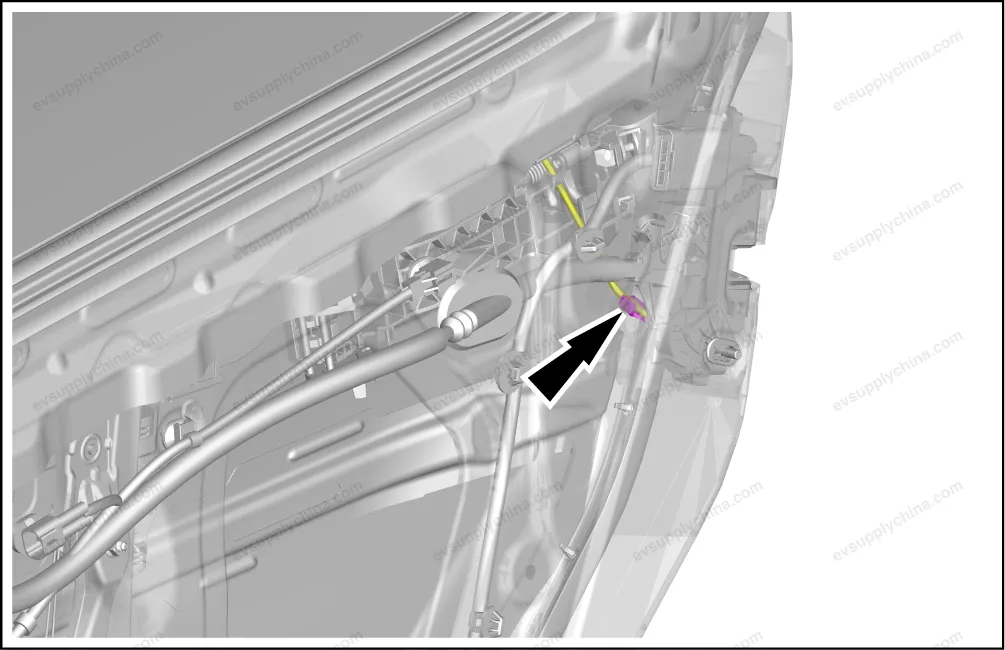
- Disconnect one connector of the tailgate right electric spring body.
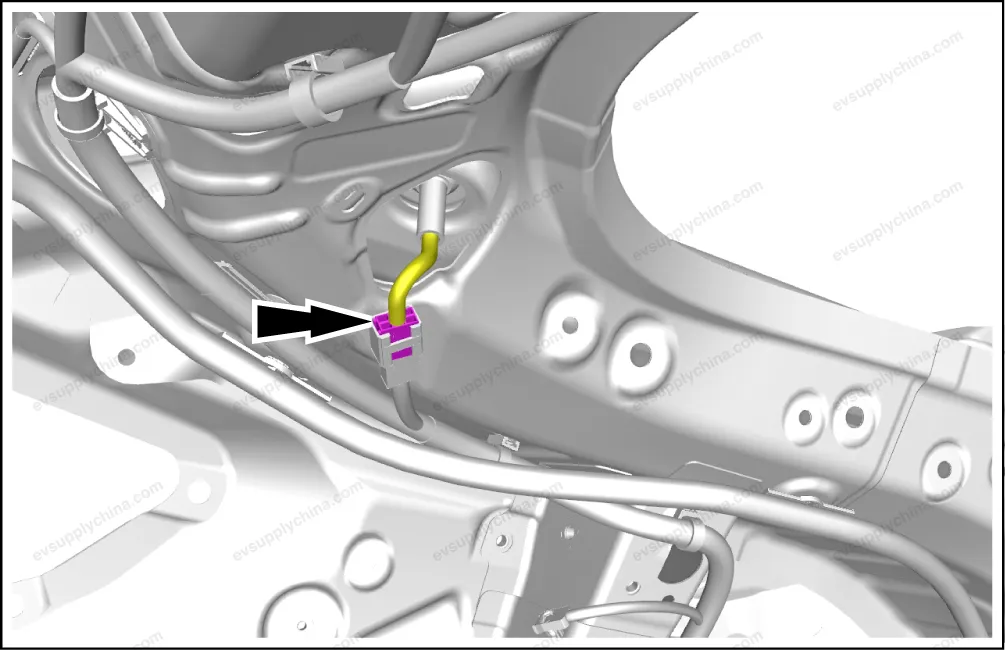
- Detach the waterproof plug from the vehicle body.
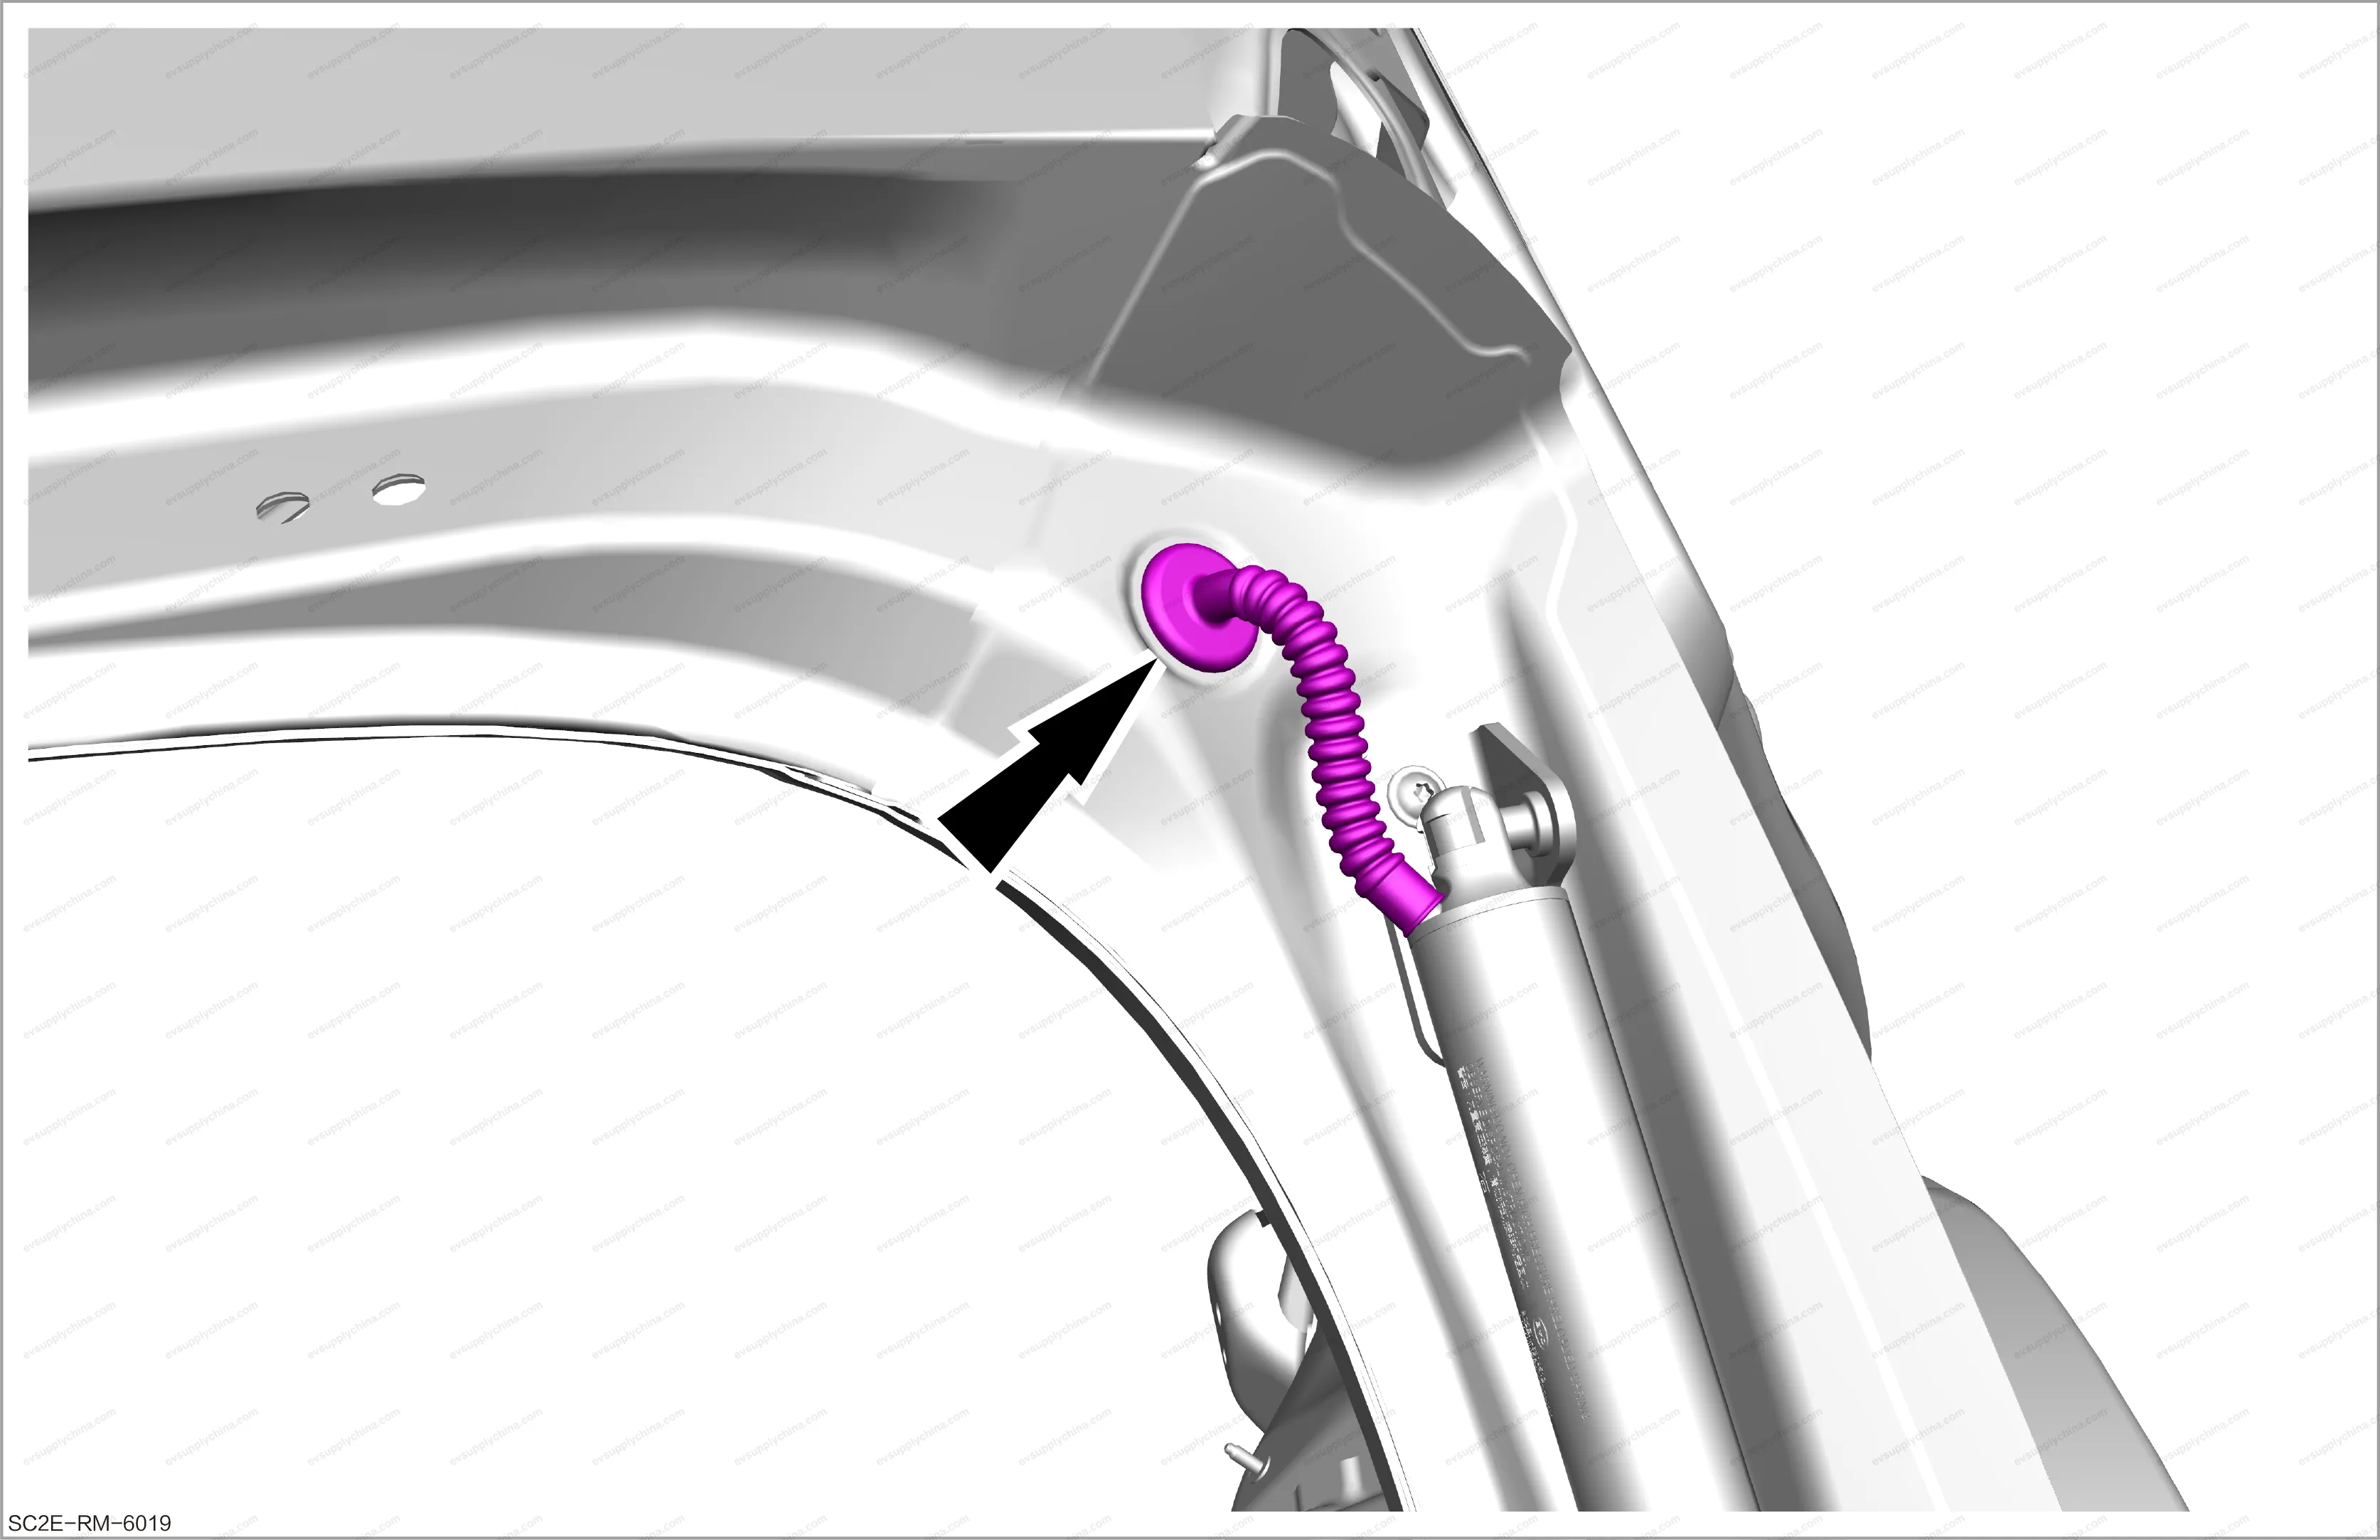
- Pry up the pin with a minisize flat-head screwdriver, and detach from the tailgate right electric spring body bracket.
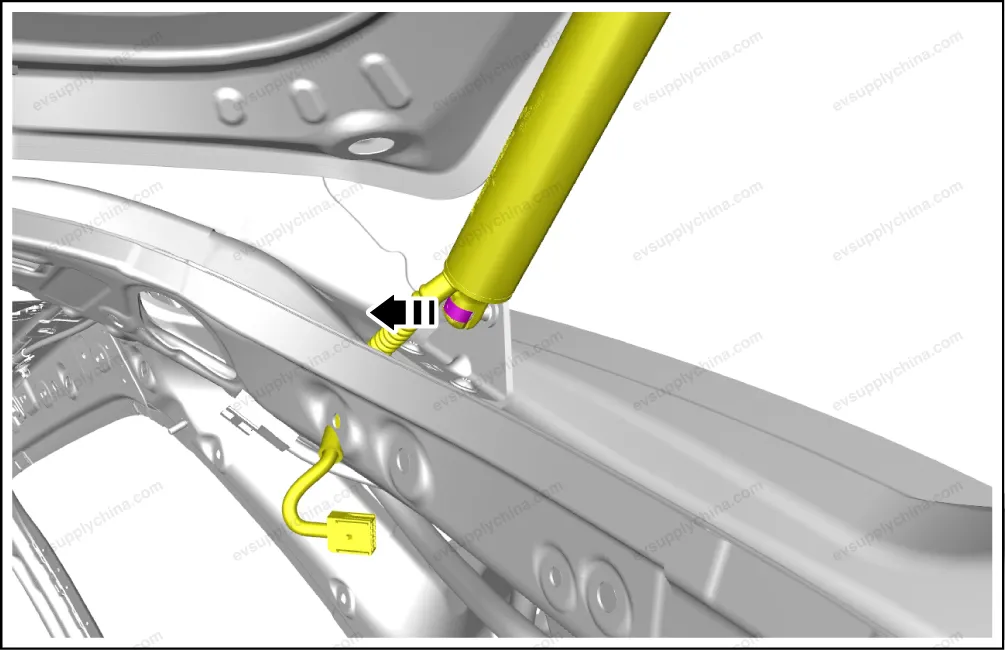
- Pry up the pin with a minisize flat-head screwdriver, and detach from the tailgate right electric spring body bracket, and
take out the tailgate right electric spring body.
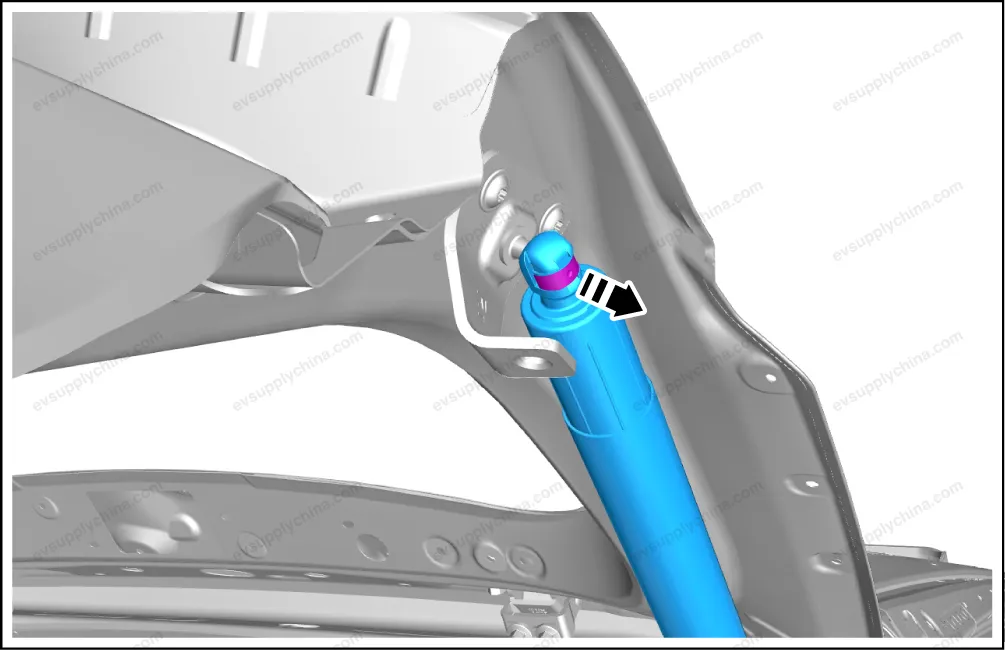
Caution It only needs to be lifted to a height required to disconnect the connectors.
Caution When removing the tailgate right electric spring body, the help of another technician is required to support the tailgate assembly. When prying up the pin with a minisize slot type screwdriver, do not pry up the pin completely from the CV joint.
Installation
- Follow the removal steps in reverse order to install.