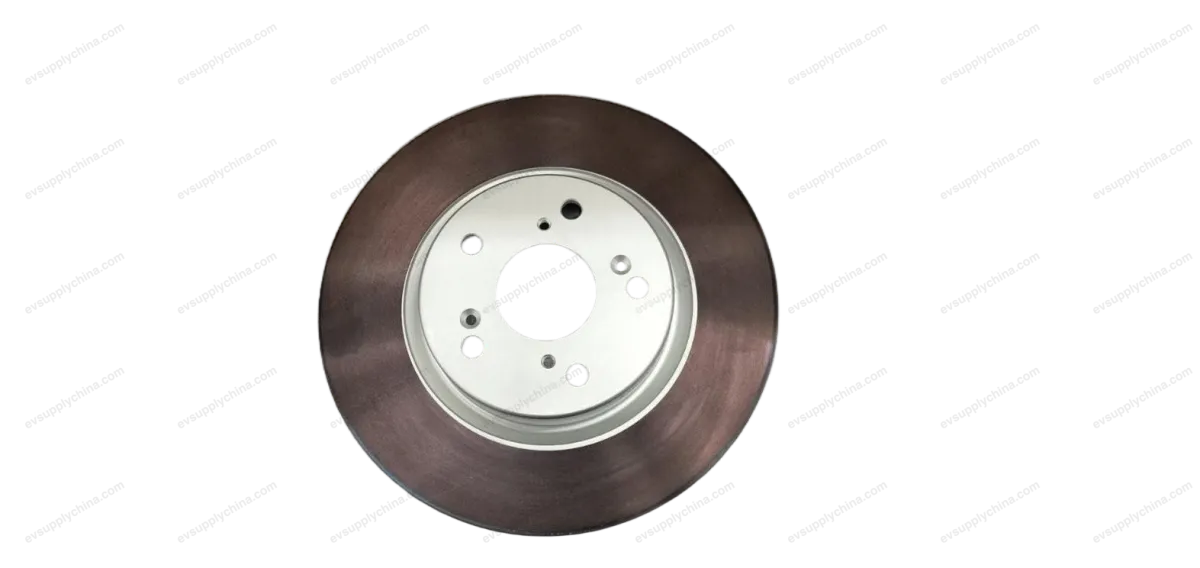
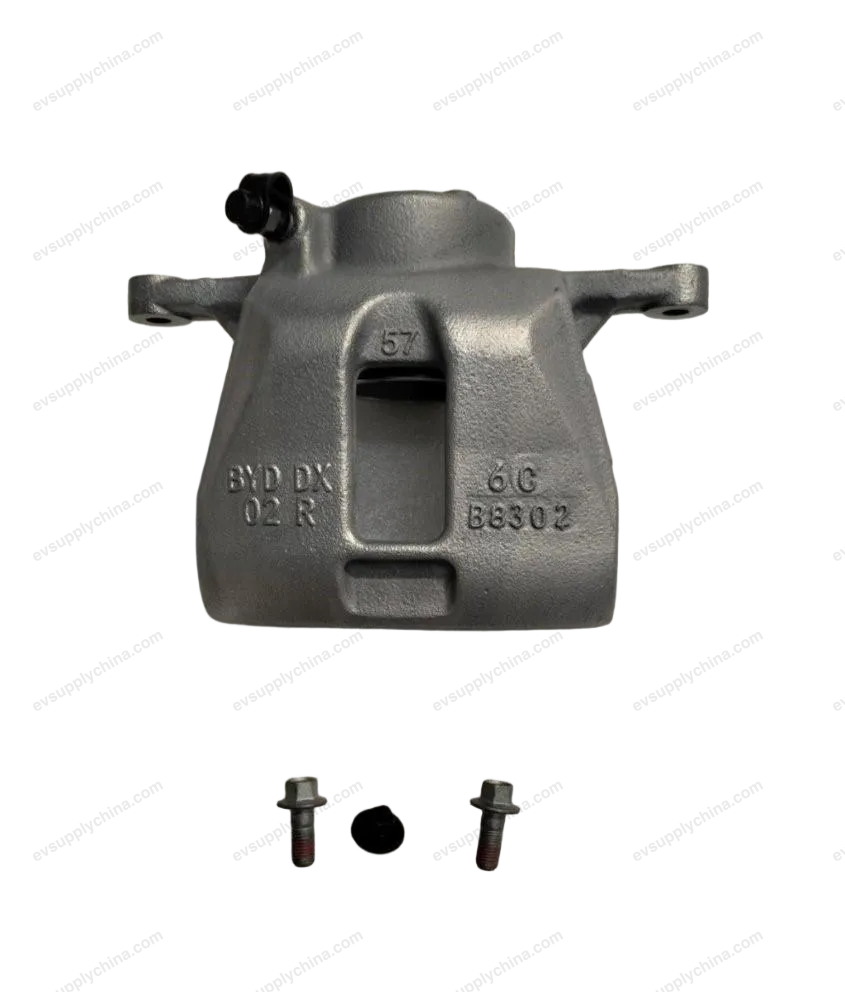
Paket purna jual sub rakitan kaliper rem kanan
Kode OE / Material
13835953-00SC2EM-3502162BSpesifikasi Teknis
- Model Kendaraan
- BYD Atto 3
- Konfigurasi Kemudi
- Setir Kiri & Kanan
- Kategori
- Rem
Pengiriman & Pengembalian
Dikirim ke seluruh dunia dari Tiongkok melalui pengiriman udara atau laut. Pengiriman standar 5–30 hari kerja, ekspres 2–10 hari kerja. Biaya pengiriman dihitung saat checkout.
Jendela pengembalian 7 hari untuk barang yang belum digunakan dalam kemasan asli. Hubungi kami sebelum mengembalikan barang apa pun.
Kendaraan yang Kompatibel — Paket purna jual sub rakitan kaliper rem kanan
Paket purna jual sub rakitan kaliper rem kanan Panduan Bengkel — BYD Atto 3
Right Rear Brake Caliper Sub-Assembly Aftersales Package - Removal and Installation
Removal
- Set the intelligent power brake system assembly to "installation mode". See Installation Mode of Intelligent Power Braking System
- Connect the vehicle with VDS and enter the "Maintenance Mode Release Condition" of the rear brake. EPB Applied and Released for Repair
- Power off the low voltage electrical system. See Power-off and Power-on of Low Voltage Electrical System
- Remove the right rear wheel assembly. See Wheel Assembly - Removal and Installation
- Discharge brake fluid. See Replacement of Brake Fluid
- Disconnect one connector of right rear brake caliper sub-assembly aftersales package.
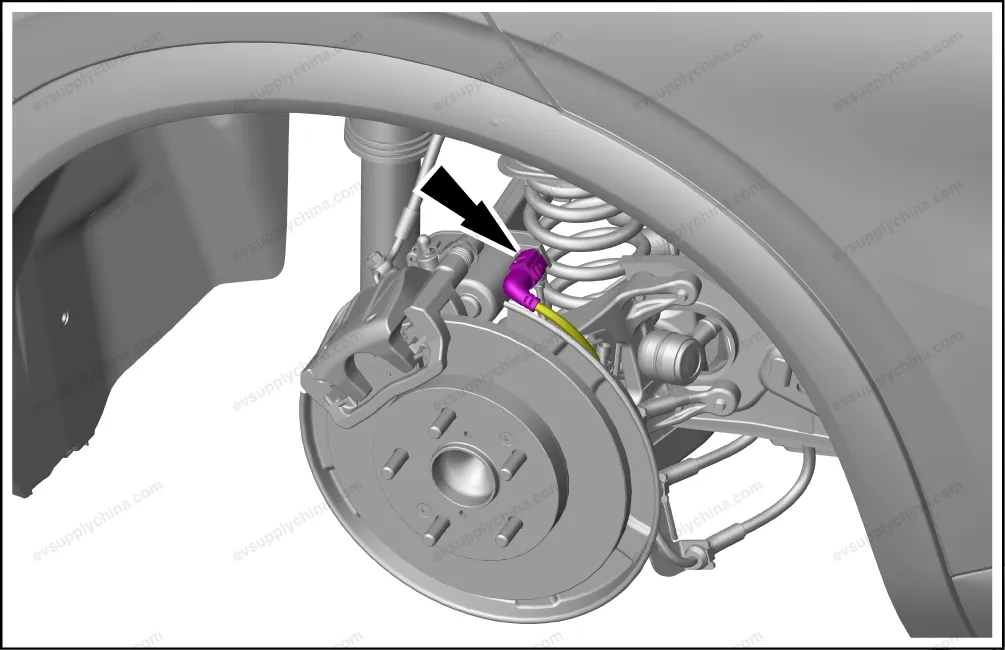
- Remove the right rear brake caliper sub-assembly aftersales package.
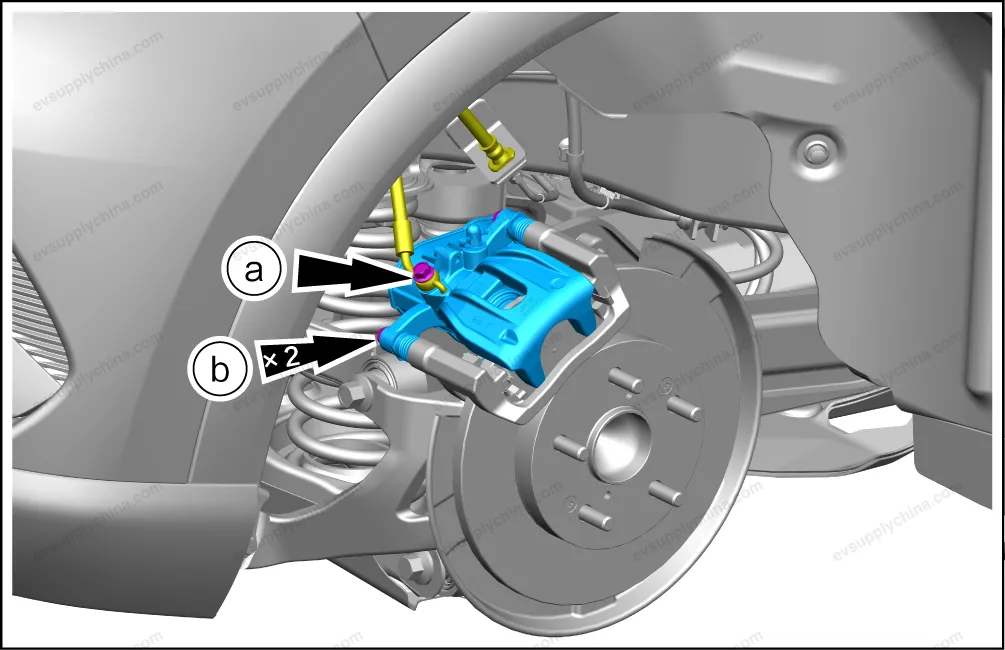
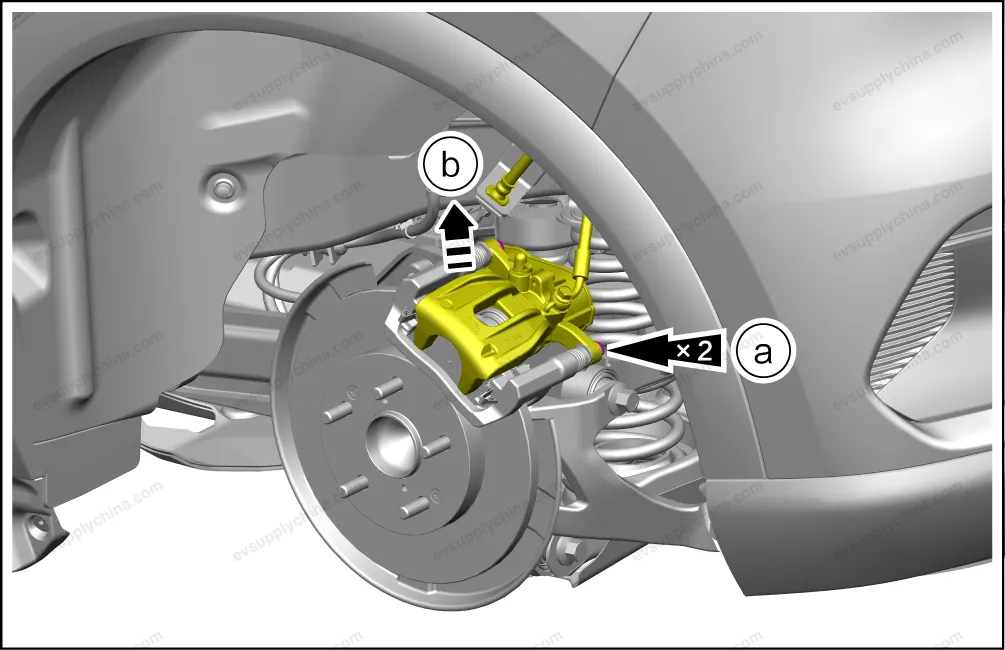
- Remove one fixing bolt and detach the right rear brake hose assembly.
- Remove 2 fixing bolts, take out the right rear brake caliper sub-assembly aftersales package.
- To replace the right rear brake caliper sub-assembly aftersales package, remove the following accessories from the sub-assembly:
Caution The brake fluid has a strong corrosive effect on the paint. If it is accidentally splashed on the paint of the vehicle body, it must be cleaned with a rag as soon as possible. Avoid oil contact with skin. If it is accidentally splashed into the eyes, immediately rinse with plenty of water and seek medical attention as soon as possible. Never discharge the oil at will, and recycle it according to local regulations.
Installation
- Follow the removal steps in reverse order to install.
- Fill the brake fluid and bleed the brake system. See Air Discharge of Braking System
Caution Add brake fluid to the level between the MAX and MIN scales of the brake fluid reservoir assembly. Ensure there is no oil leakage at the pipeline connection. If so, overhaul it again.
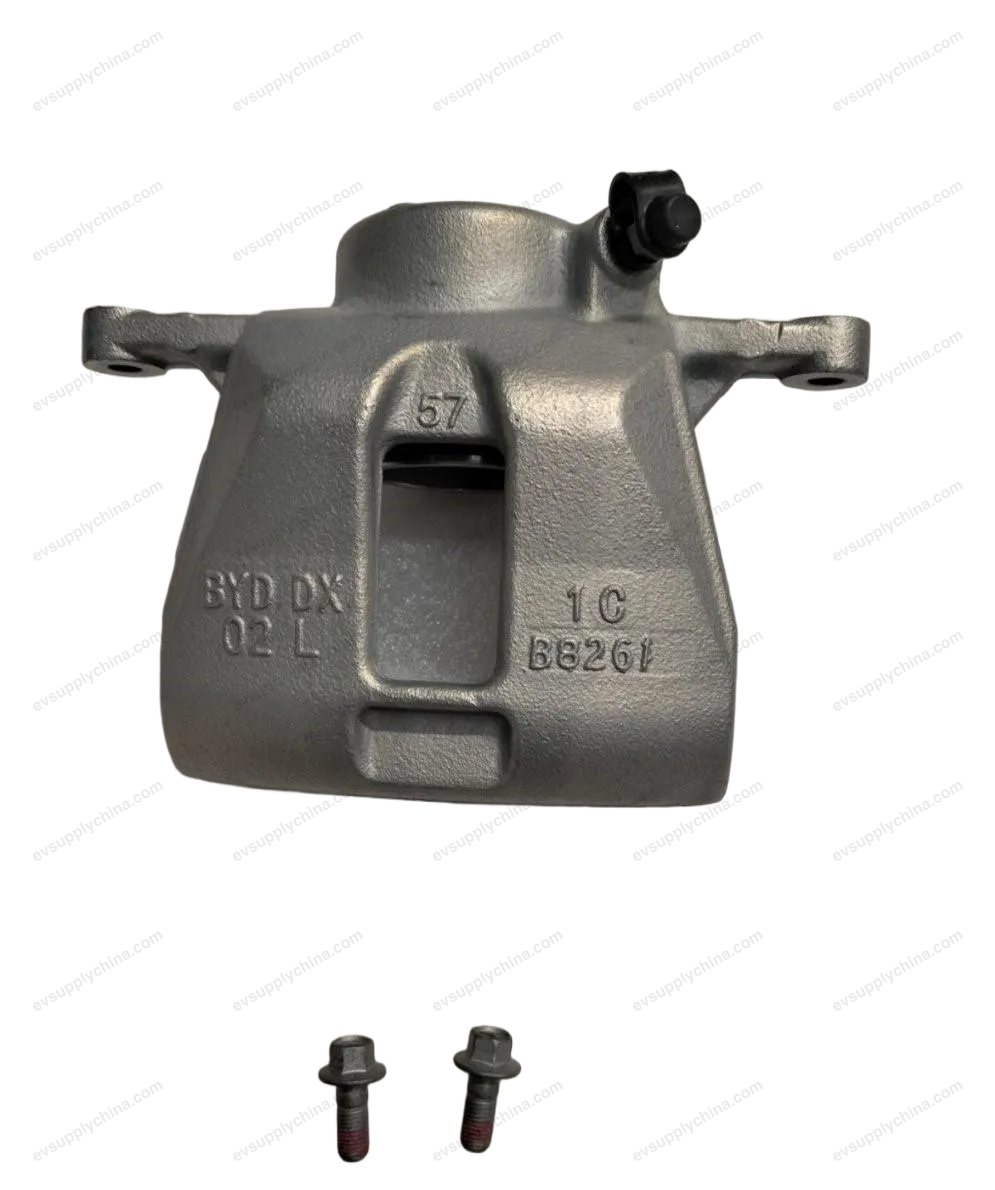
Left Rear Brake Caliper Sub-Assembly Aftersales Package - Removal and Installation
Removal
- Set the intelligent power brake system assembly to "installation mode". See Installation Mode of Intelligent Power Braking System
- Connect the vehicle with VDS and enter the "Maintenance Mode Release Condition" of the rear brake. EPB Applied and Released for Repair
- Power off the low voltage electrical system. See Power-off and Power-on of Low Voltage Electrical System
- Remove the left rear wheel assembly. See Wheel Assembly - Removal and Installation
- Discharge brake fluid. See Replacement of Brake Fluid
- Disconnect one connector of left rear brake caliper sub-assembly aftersales package.
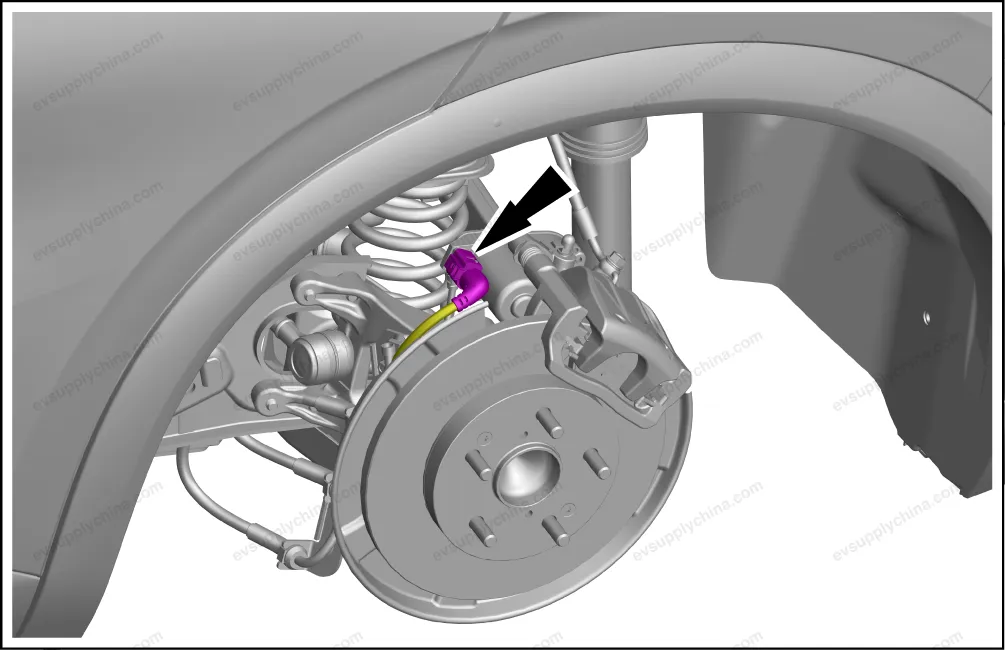
- Remove the left rear brake caliper sub-assembly aftersales package.
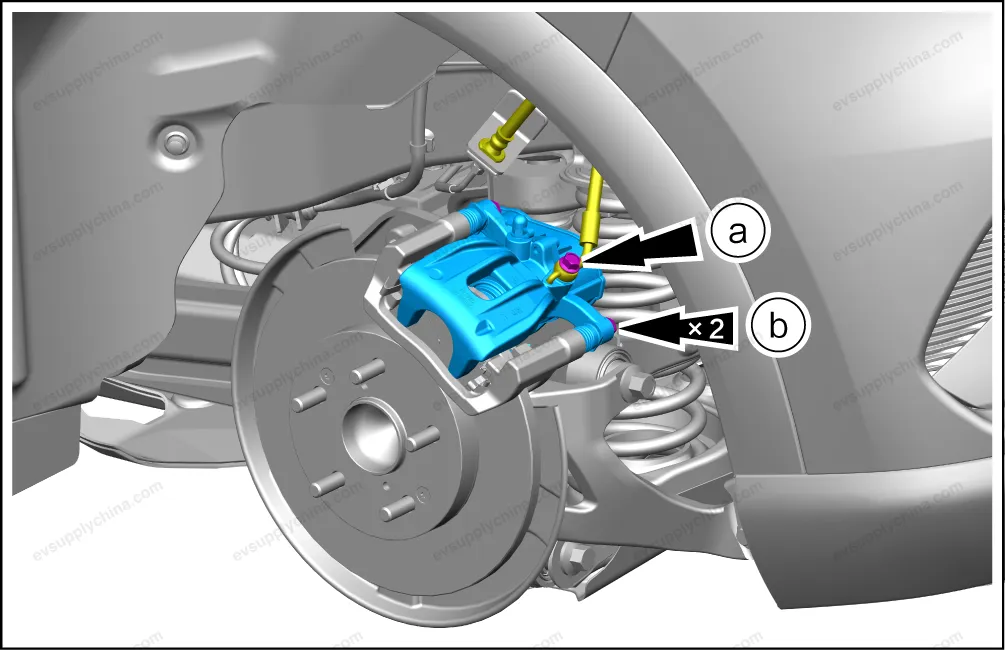
- Remove one fixing bolt, and detach the left rear brake hose assembly.
- Remove 2 fixing bolts, take out the left rear brake caliper sub-assembly aftersales package.
- To replace the left rear brake caliper sub-assembly aftersales package, remove the following accessories from the sub-assembly:
Caution The brake fluid has a strong corrosive effect on the paint. If it is accidentally splashed on the paint of the vehicle body, it must be cleaned with a rag as soon as possible. Avoid oil contact with skin. If it is accidentally splashed into the eyes, immediately rinse with plenty of water and seek medical attention as soon as possible. Never discharge the oil at will, and recycle it according to local regulations.
Installation
- Follow the removal steps in reverse order to install.
- Fill the brake fluid and bleed the brake system. See Air Discharge of Braking System
Caution Add brake fluid to the level between the MAX and MIN scales of the brake fluid reservoir assembly. Ensure there is no oil leakage at the pipeline connection. If so, overhaul it again.
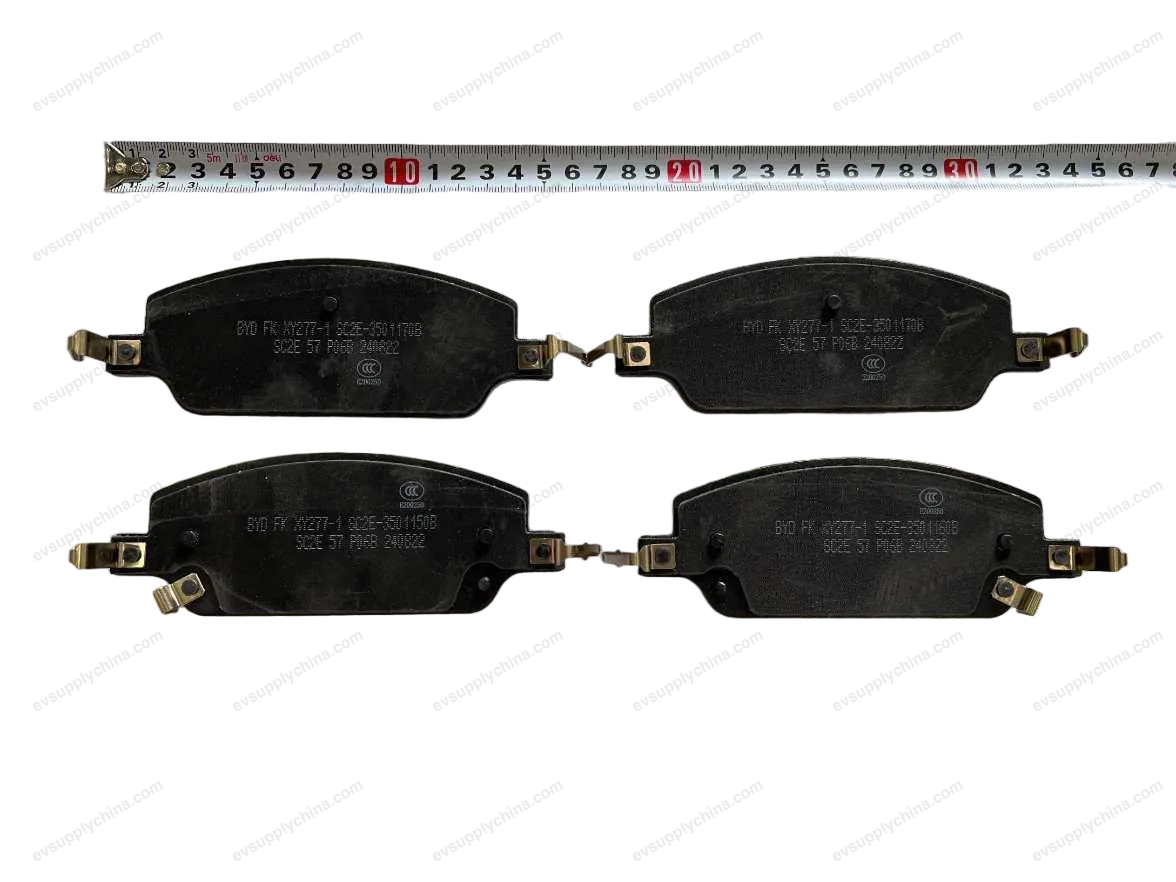
Rear Brake Pad Assembly Aftersales Package - Removal and Installation
Removal
- Connect the vehicle with VDS and enter the rear brake "Maintenance Mode Release".
- Remove the left rear wheel assembly. See Wheel Assembly - Removal and Installation
- Remove 2 fixing bolts, take out the left rear brake caliper sub-assembly aftersales package.
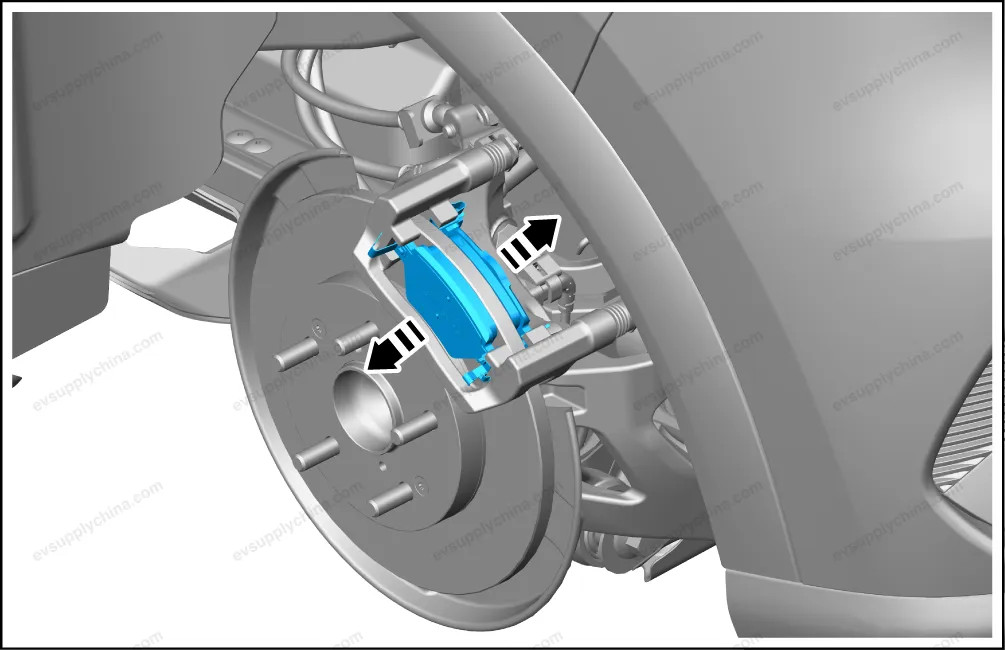
- Take out the rear brake pad assembly aftersales package.
Caution After taking out the rear brake caliper sub-assembly aftersales package, in case the brake pipeline is pulled and damaged, fix it on the vehicle body with a tie.
Caution After taking out the rear brake pad assembly aftersales package, replace the rear brake pad return bayonet pin on the brake caliper bracket as well.
Installation
- The installation steps are opposite to the removal steps.
Caution After replacing the rear brake pad assembly aftersales package, reset the piston of the rear brake caliper sub-assembly with a reset tool.