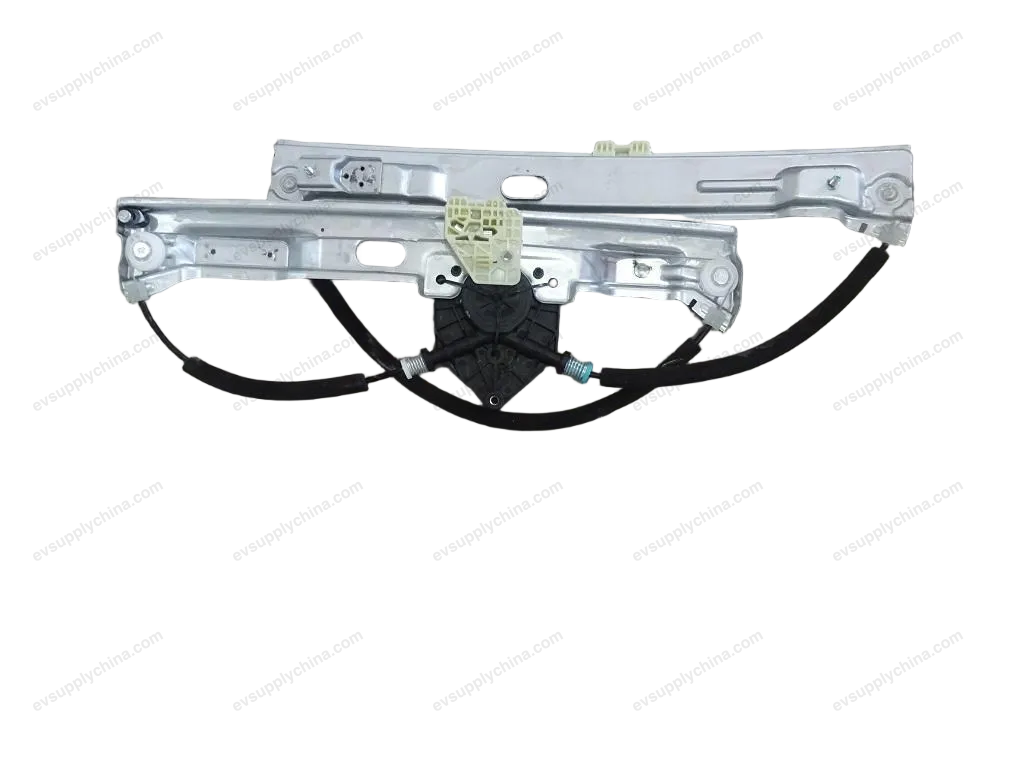
Rakitan braket pengatur jendela pintu depan kanan
Kode OE / Material
13182904-00SC2E-6104120Spesifikasi Teknis
- Model Kendaraan
- BYD Atto 3
- Konfigurasi Kemudi
- Universal (Setir Kiri & Kanan)
- Kategori
- Regulator Jendela
Pengiriman & Pengembalian
Dikirim ke seluruh dunia dari Tiongkok melalui pengiriman udara atau laut. Pengiriman standar 5–30 hari kerja, ekspres 2–10 hari kerja. Biaya pengiriman dihitung saat checkout.
Jendela pengembalian 7 hari untuk barang yang belum digunakan dalam kemasan asli. Hubungi kami sebelum mengembalikan barang apa pun.
Kendaraan yang Kompatibel — Rakitan braket pengatur jendela pintu depan kanan
Rakitan braket pengatur jendela pintu depan kanan Panduan Bengkel — BYD Atto 3
Right Front Window Regulator Bracket Assembly - Removal and Installation
Removal
- Remove the right front door glass assembly. See Right Front Door Glass Assembly - Removal and Installation
- Remove the right front door sealing plug II. SeeRight Front Door Sealing Plug II - Removal and Installation
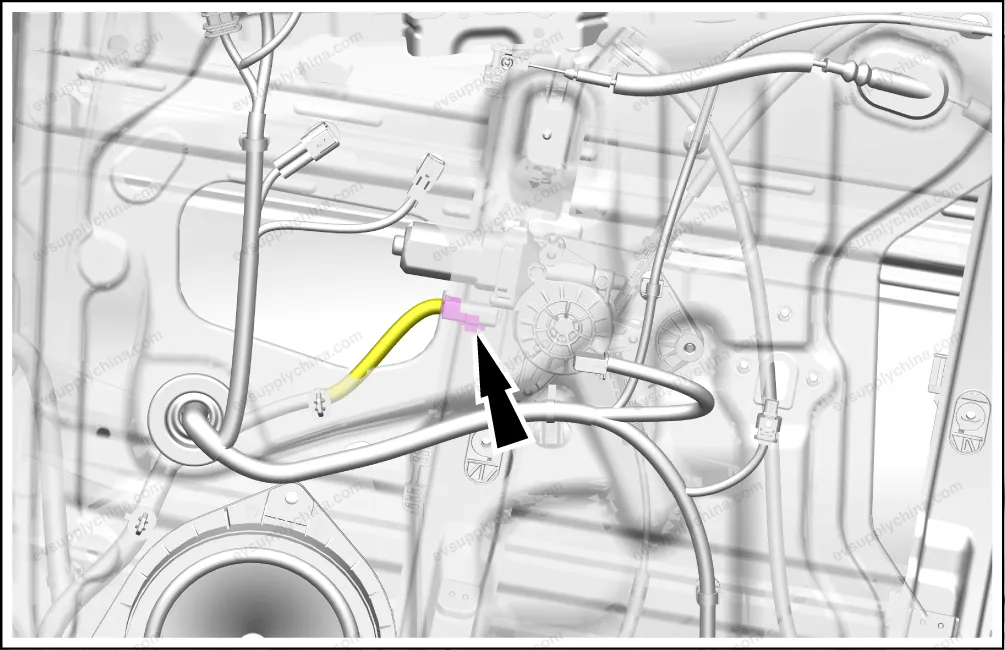
- Disconnect one connector of the right front window regulator bracket assembly.
- Remove the right front window regulator bracket assembly.
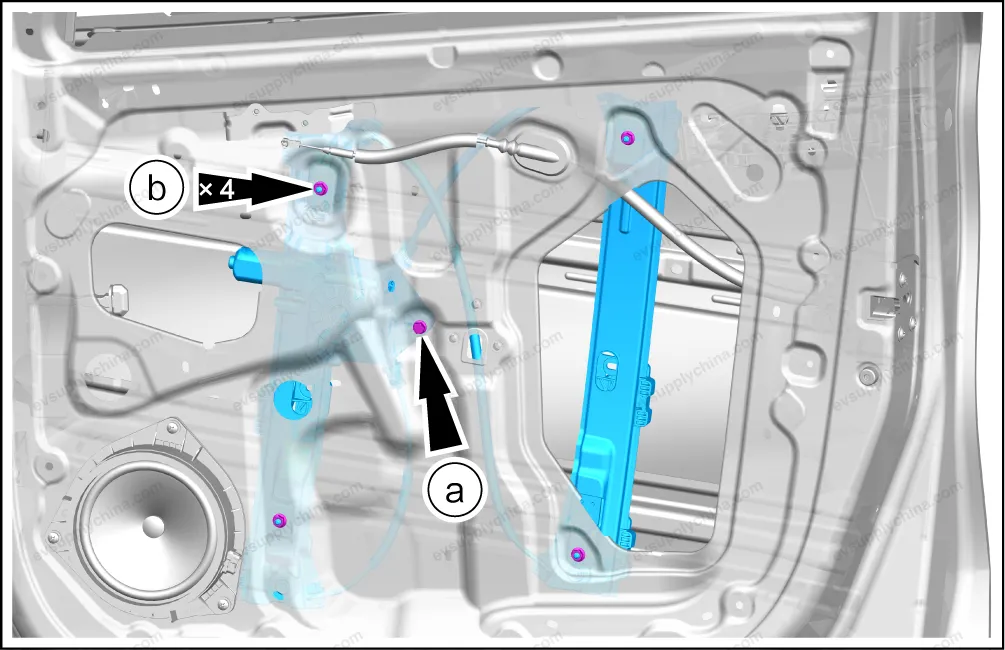
- Remove one fixing bolt.
- Remove 4 fixing nuts, and take out the right front window regulator bracket assembly.
- Where replacing the right front window regulator bracket assembly is required, remove the following accessories of the right front window regulator bracket assembly:
Installation
- Follow the removal steps in reverse order to install.
Caution After the installation, test the front window regulator bracket assembly for normal function.
Left Front Window Regulator Bracket Assembly - Removal and Installation
Removal
- Remove the left front door glass assembly. See Left Front Door Glass Assembly - Removal and Installation
- Remove the left front door sealing plug II. SeeLeft Front Door Sealing Plug II - Removal and Installation
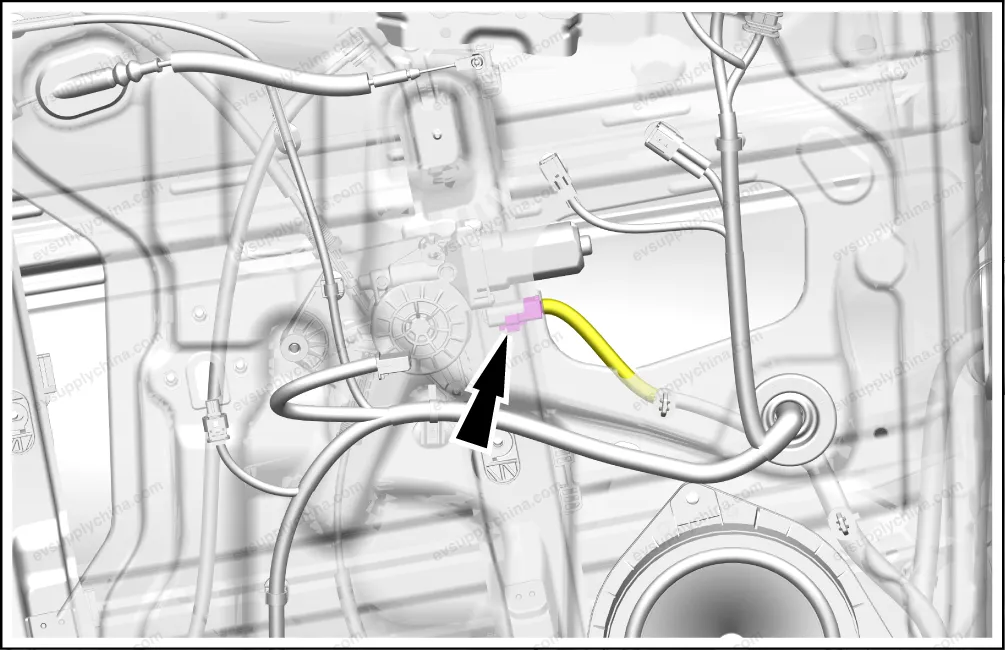
- Disconnect one connector of the left front window regulator bracket assembly.
- Remove the left front window regulator bracket assembly.

- Remove one fixing bolt.
- Remove 4 fixing nuts, and take out the left front window regulator bracket assembly.
- Where replacing the left front window regulator bracket assembly is required, remove the following accessories of the left front window regulator bracket assembly:
Installation
- Follow the removal steps in reverse order to install.
Caution After the installation, test the front window regulator bracket assembly for normal function.
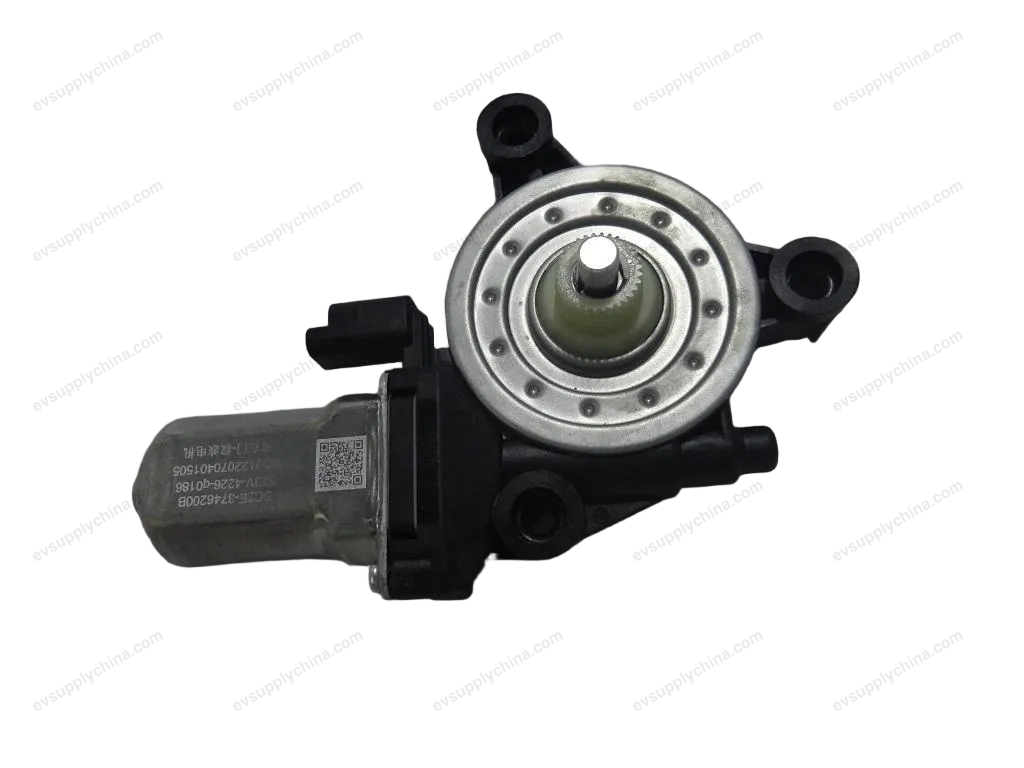
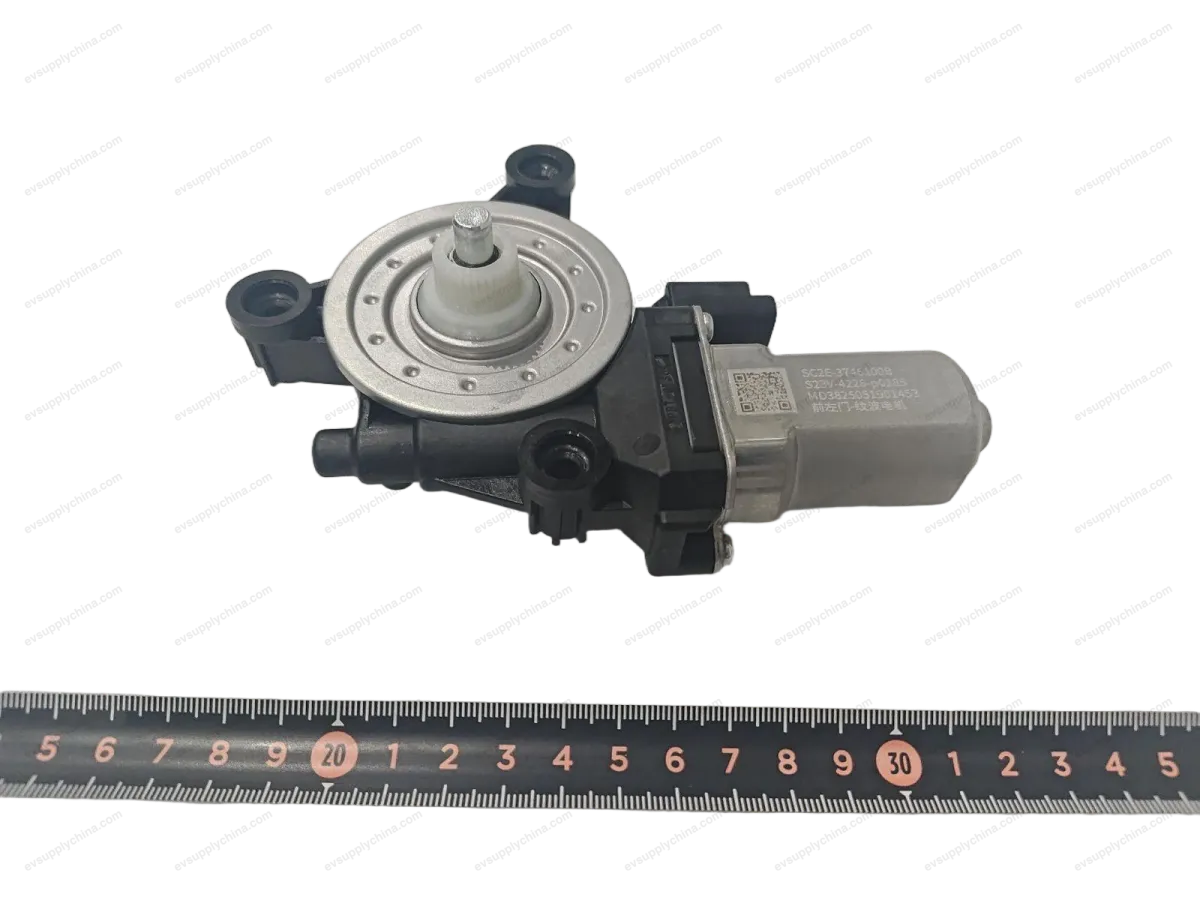
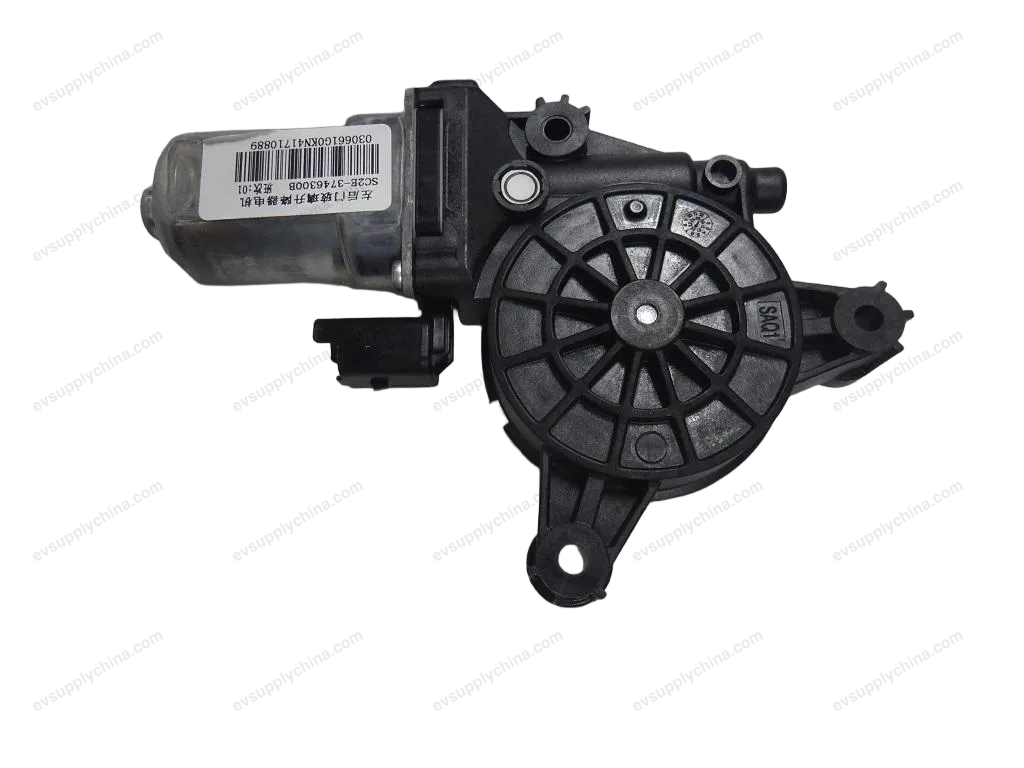
Right Front Window Regulator Motor - Removal and Installation
Removal
- Remove the right front window regulator bracket assembly. See Right Front Window Regulator Bracket Assembly - Removal and Installation
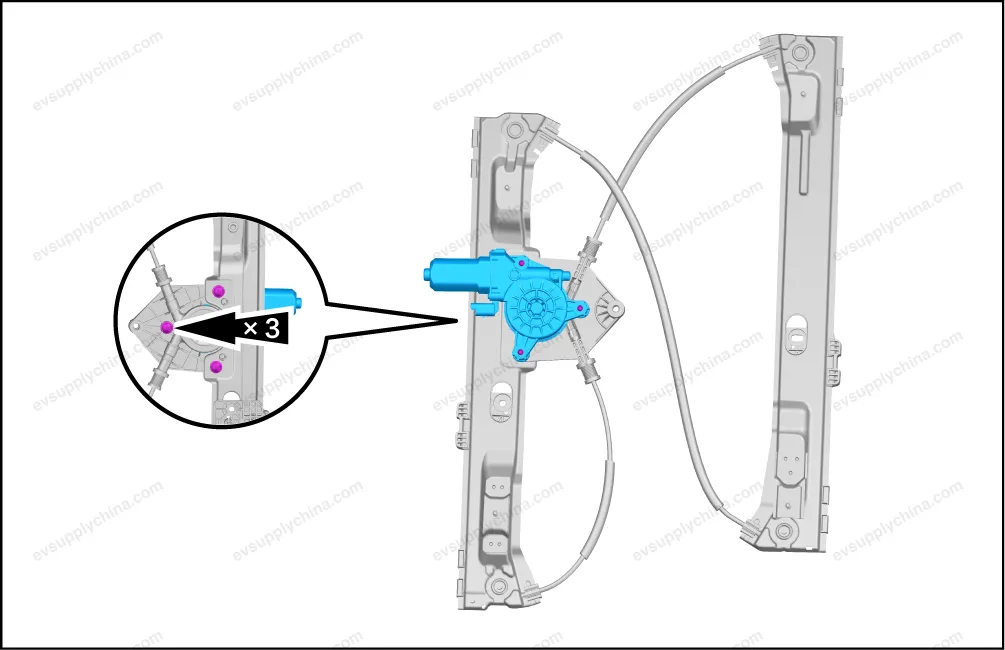
- Remove 3 fixing bolts, and take out the right front window regulator motor.
Installation
- Follow the removal steps in reverse order to install.
Caution After the installation, conduct a functional test on the front window regulator motor.