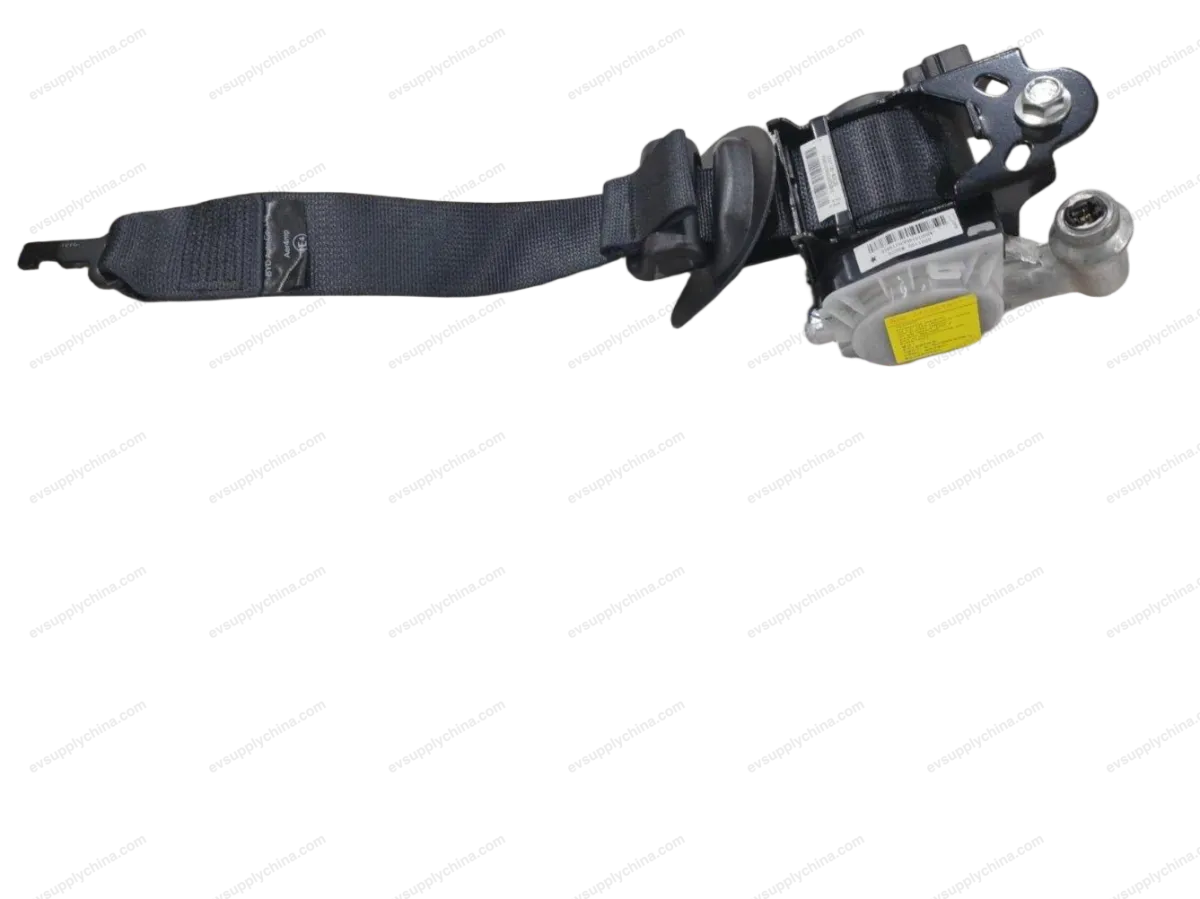
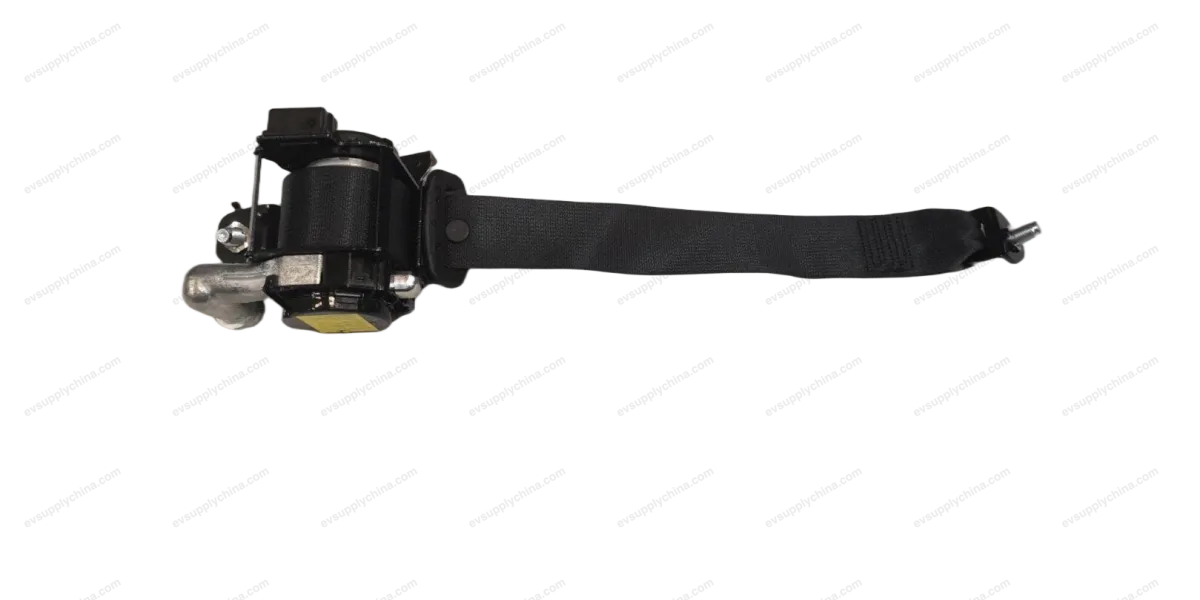
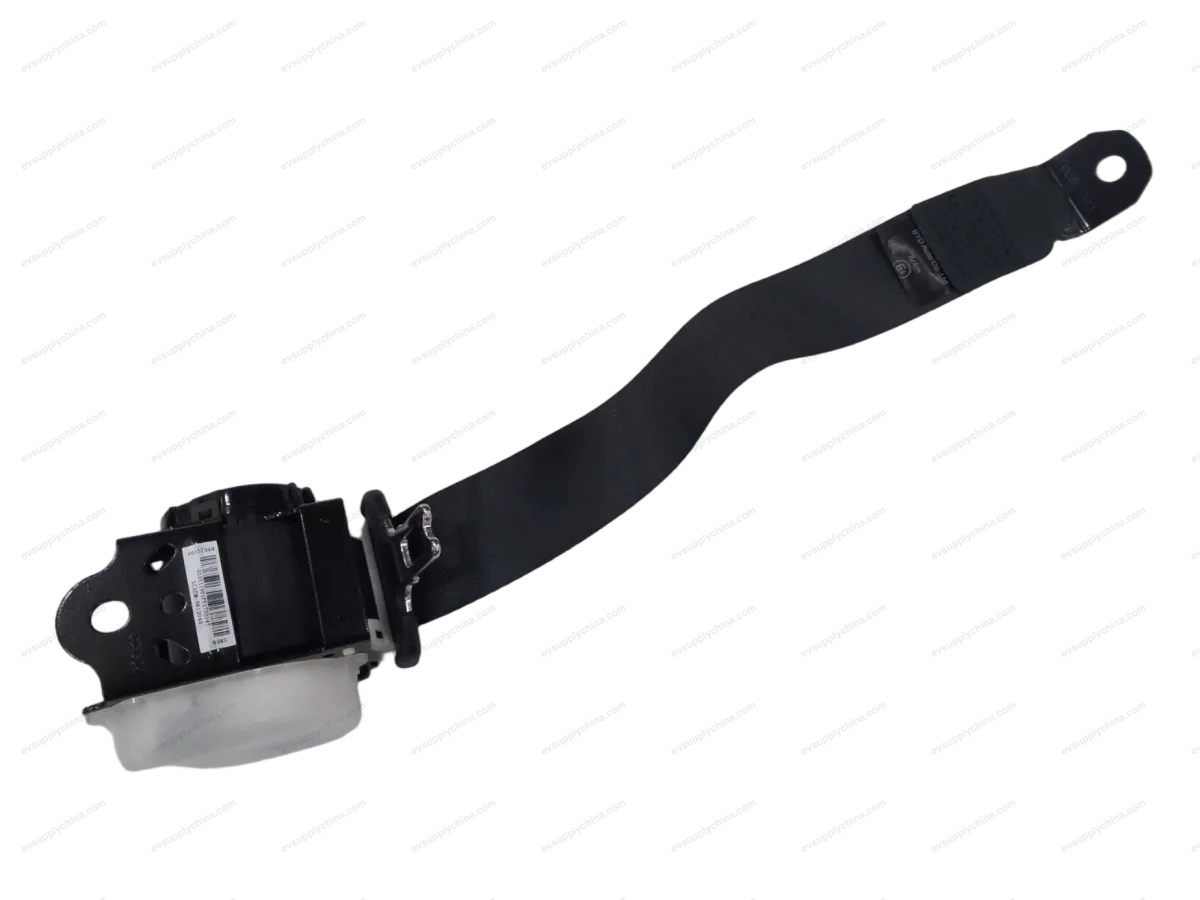
Rakitan sabuk pengaman depan kiri
Kode OE / Material
15973719-00SC2EAT-5811010Spesifikasi Teknis
- Model Kendaraan
- BYD Atto 3
- Konfigurasi Kemudi
- Setir Kiri & Kanan
- Kategori
- Kursi & Sabuk Pengaman
Pengiriman & Pengembalian
Dikirim ke seluruh dunia dari Tiongkok melalui pengiriman udara atau laut. Pengiriman standar 5–30 hari kerja, ekspres 2–10 hari kerja. Biaya pengiriman dihitung saat checkout.
Jendela pengembalian 7 hari untuk barang yang belum digunakan dalam kemasan asli. Hubungi kami sebelum mengembalikan barang apa pun.
Rakitan sabuk pengaman depan kiri Panduan Bengkel — BYD Atto 3
Left Front Seat Belt Assembly - Removal and Installation
Installation
- Power off the low voltage electrical system. See Power-off and Power-on of Low Voltage Electrical System
- Remove the left B-pillar upper guard assembly. See Left B-Pillar Upper Guard Assembly - Removal and Installation
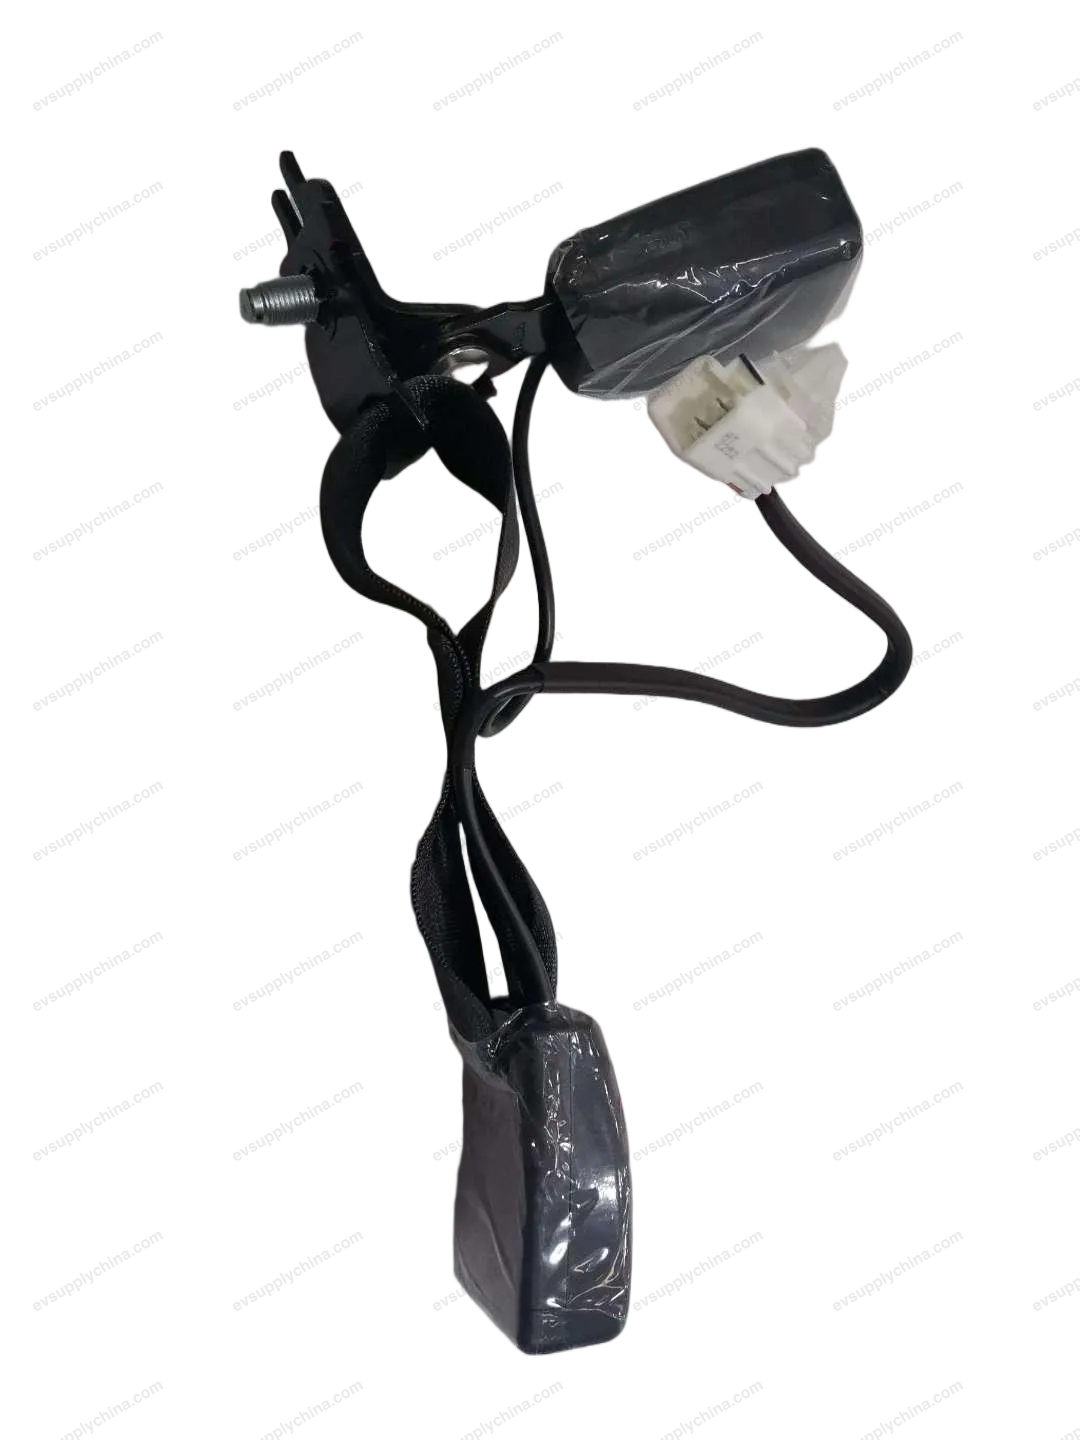
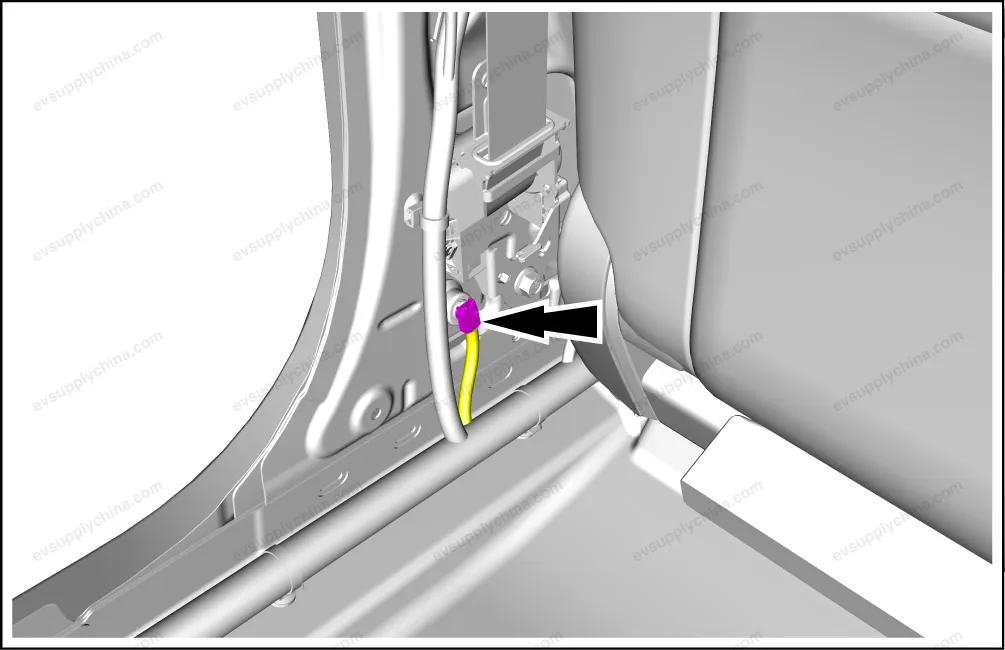
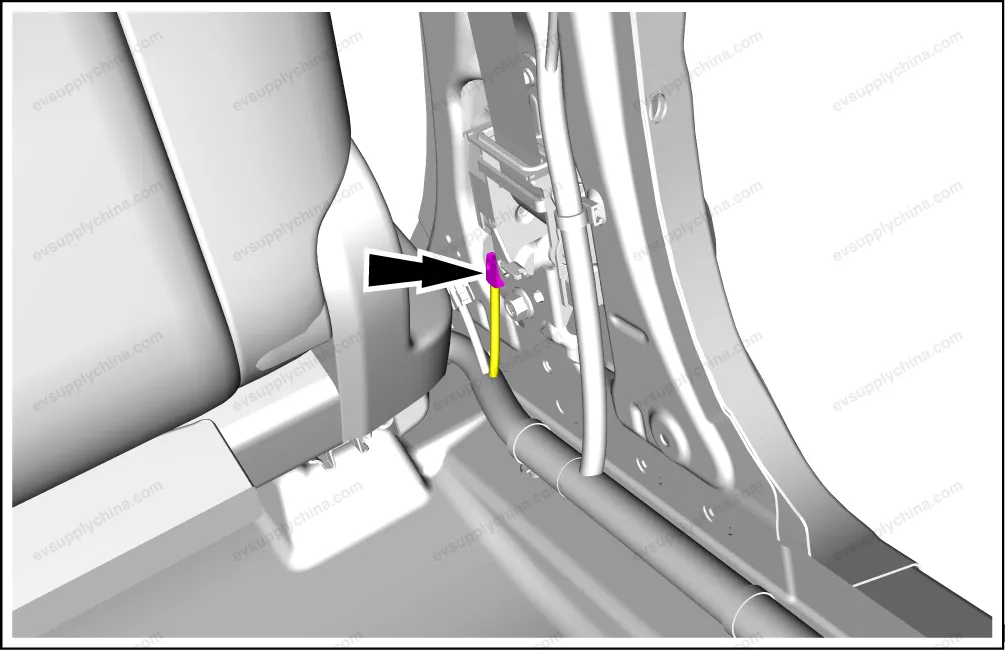
- Disconnect 1 connector of the left front seat belt assembly.
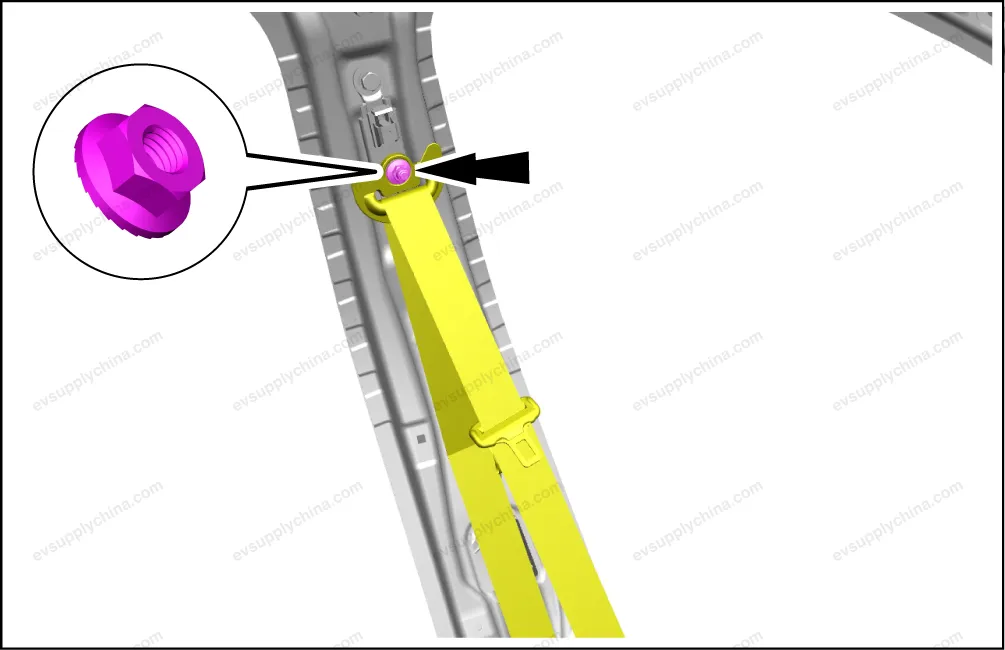
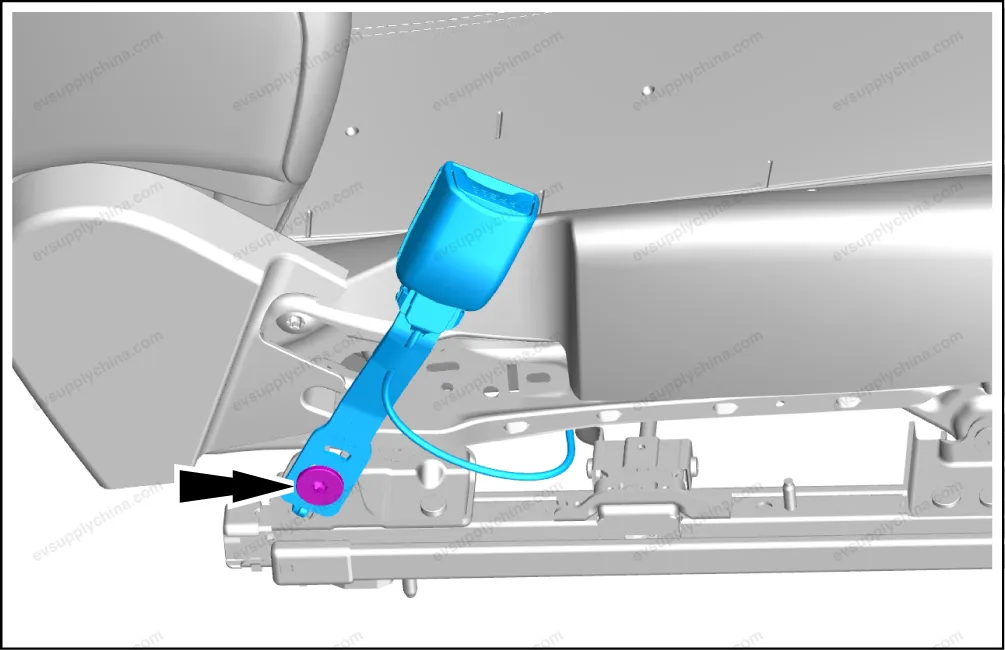
- Remove 1 fixing nut from the upper part of the left front seat belt assembly.
- Remove the left front seat belt assembly.
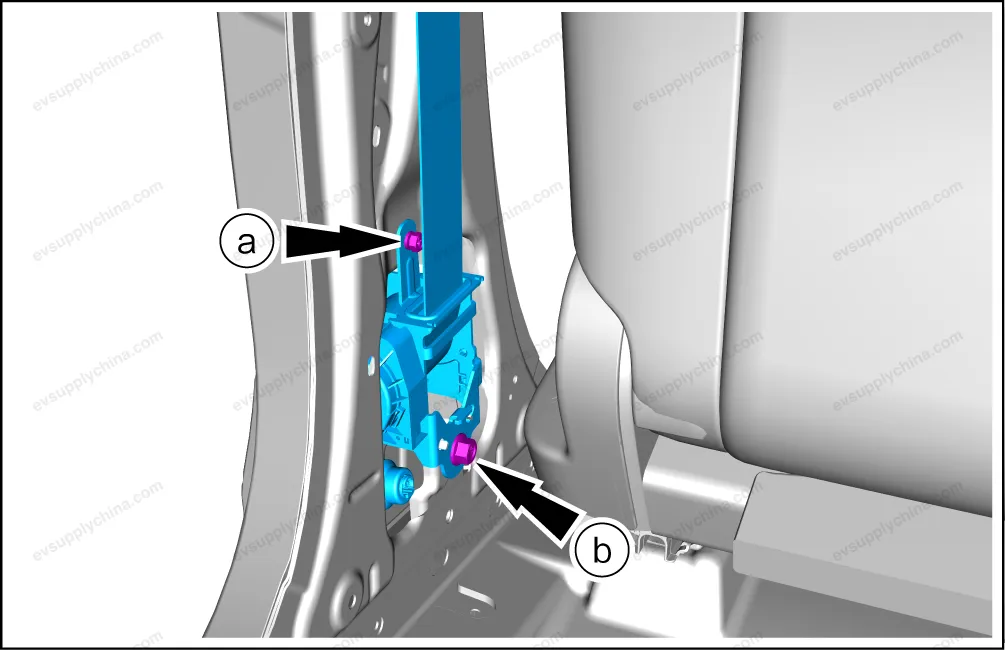
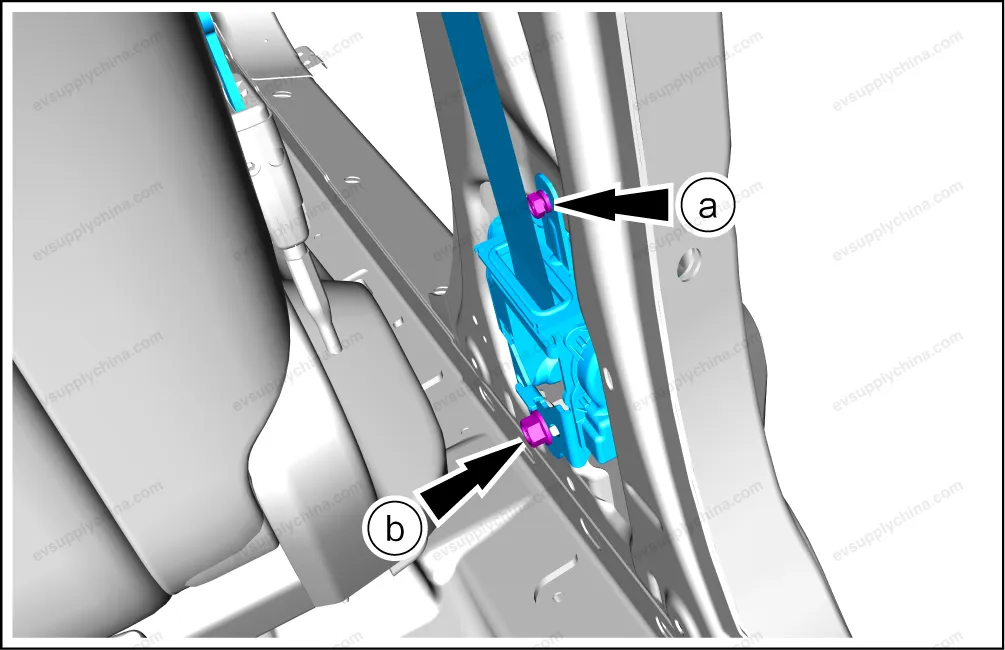
- Remove 1 fixing bolt.
- Remove 1 fixing bolt, and take out the left front seat belt assembly.
Caution When disconnecting the connector, insert the small screwdriver wrapped with tape into the connector slot to pry up the striker, and then pull out the connector.
Installation
- The installation steps are opposite to the removal steps.
Caution After installation, check whether the seat belt is installed in place to ensure that there is no distortion or seizure.
Left Front Seat Belt Buckle Assembly - Removal and Installation
Removal
- Remove the front passenger seat assembly. See Front Passenger Seat Assembly - Removal and Installation
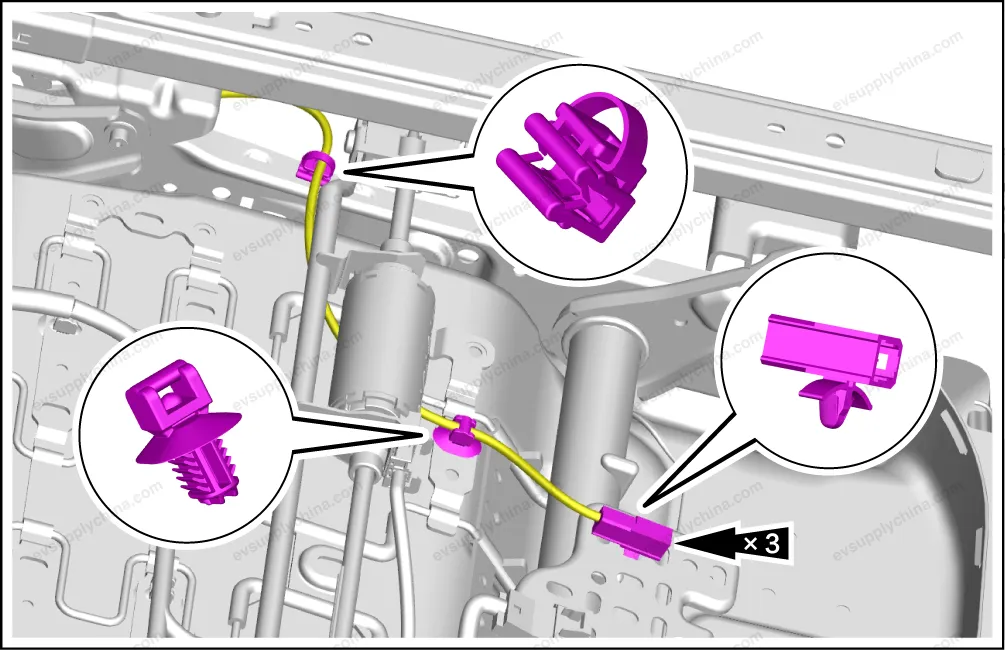
- Detach 3 wiring harness clips from the left front seat belt buckle assembly.
- Remove one fixing bolt, and take out the left front seat belt buckle assembly.
Installation
- Follow the removal steps in reverse order to install.
Right Front Seat Belt Assembly - Removal and Installation
Removal
- Power off the low voltage electrical system. See Power-off and Power-on of Low Voltage Electrical System
- Remove the right B-pillar upper guard assembly. See Right B-Pillar Upper Guard Assembly - Removal and Installation
- Disconnect 1 connector of the right front seat belt assembly.
- Remove 1 fixing nut from the upper part of the right front seat belt assembly.

- Remove the right front seat belt assembly.
- Remove 1 fixing bolt.
- Remove 1 fixing bolt, and take out the right front seat belt assembly.
Caution When disconnecting the connector, insert the small screwdriver wrapped with tape into the connector slot to pry up the striker, and then pull out the connector.
Installation
- The installation steps are opposite to the removal steps.
Caution After installation, check whether the seat belt is installed in place to ensure that there is no distortion or seizure.