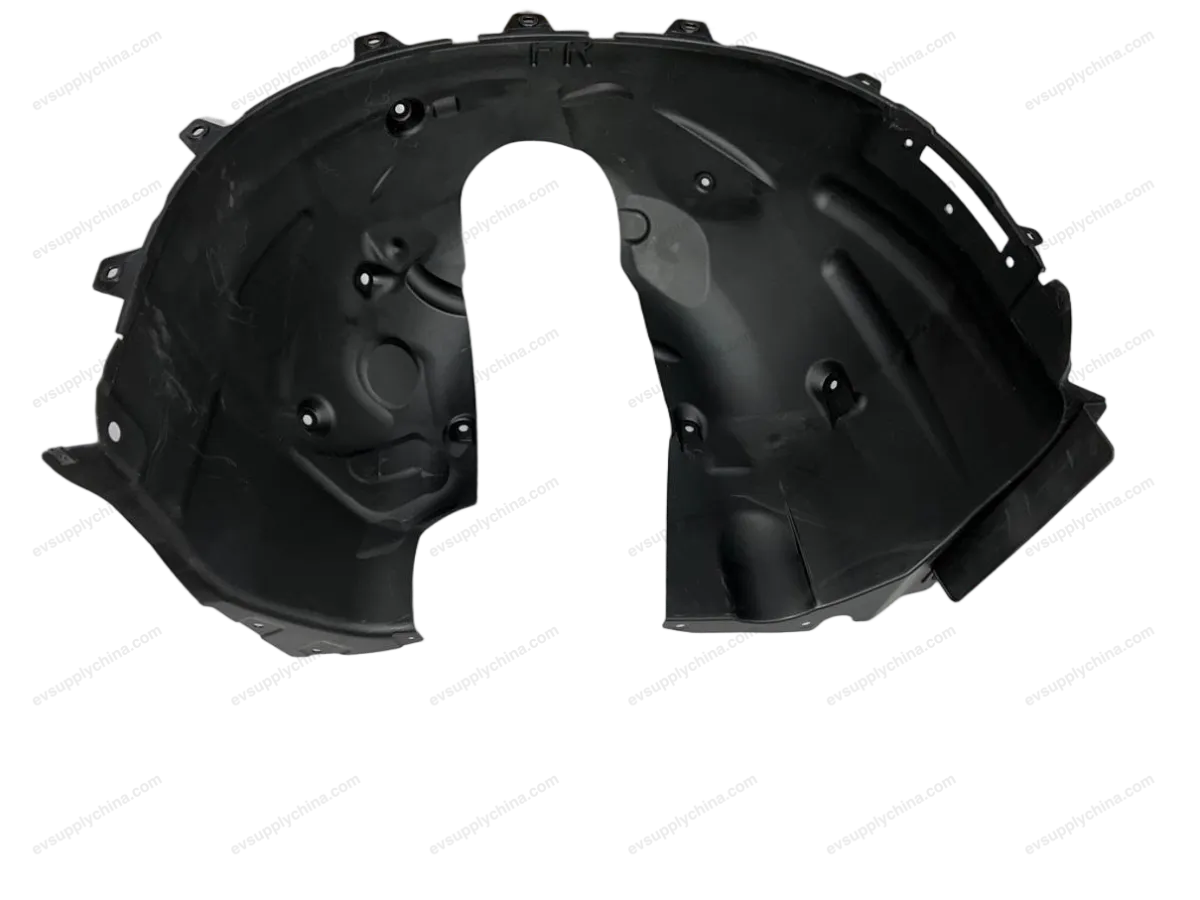
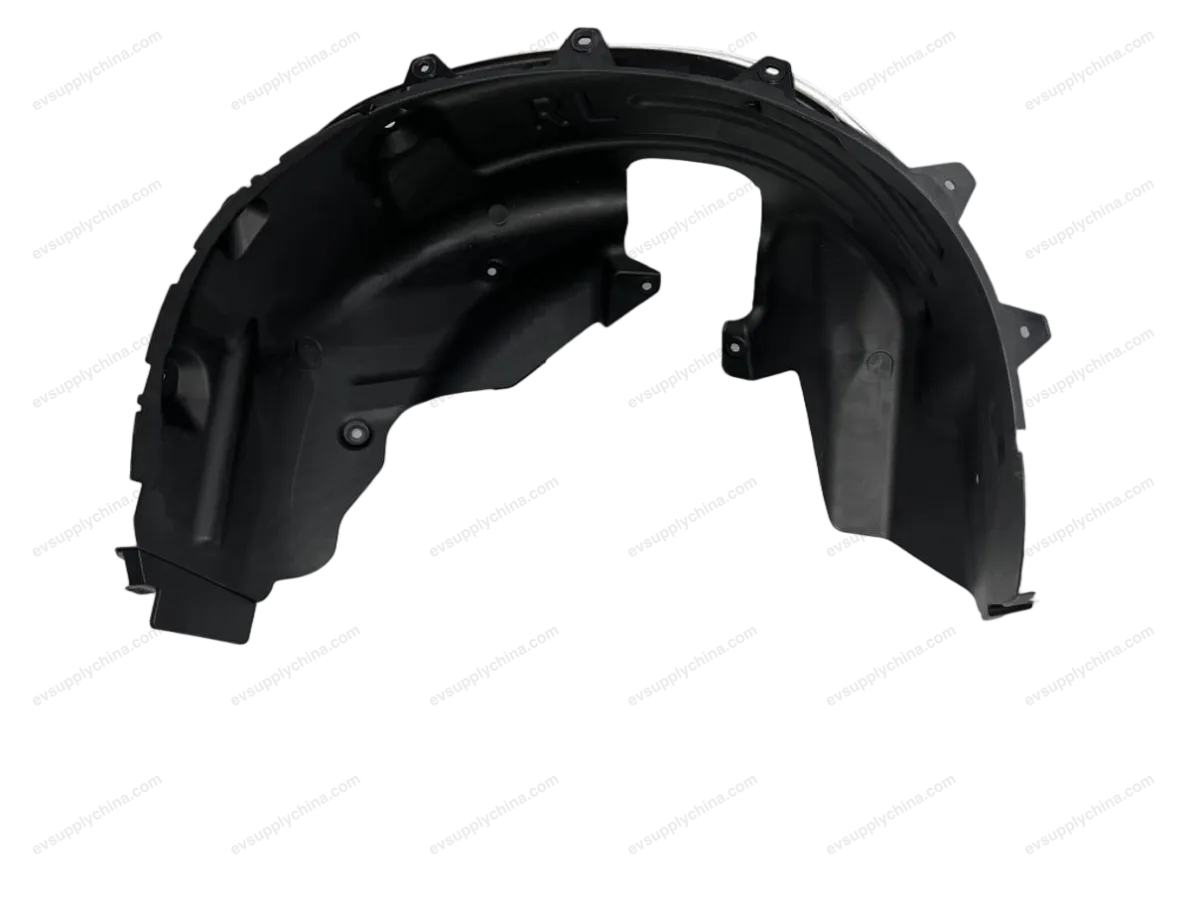
Rakitan trim sudut sepatbor kiri
Kode OE / Material
15171395-00SC2E-5302330CSpesifikasi Teknis
- Model Kendaraan
- BYD Atto 3
- Konfigurasi Kemudi
- Universal (Setir Kiri & Kanan)
- Kategori
- Fender & Spakbor
Pengiriman & Pengembalian
Dikirim ke seluruh dunia dari Tiongkok melalui pengiriman udara atau laut. Pengiriman standar 5–30 hari kerja, ekspres 2–10 hari kerja. Biaya pengiriman dihitung saat checkout.
Jendela pengembalian 7 hari untuk barang yang belum digunakan dalam kemasan asli. Hubungi kami sebelum mengembalikan barang apa pun.
Kendaraan yang Kompatibel — Rakitan trim sudut sepatbor kiri
Rakitan trim sudut sepatbor kiri Panduan Bengkel — BYD Atto 3
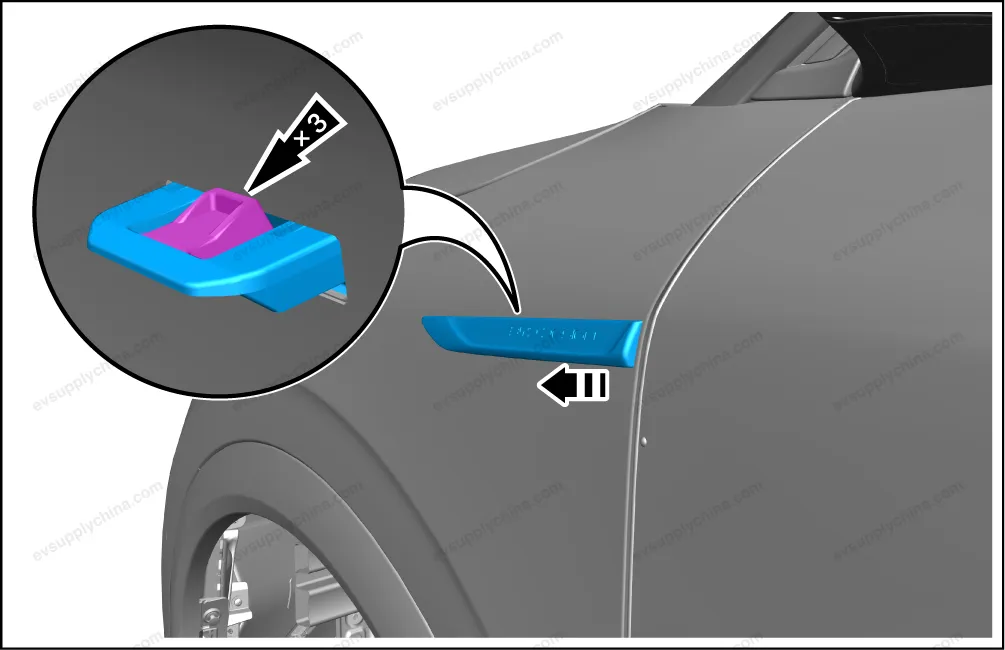
Left Fender Corner Trim Assembly - Removal and Installation
Removal
- Pry up the left fender corner trim assembly with a plastic lever.
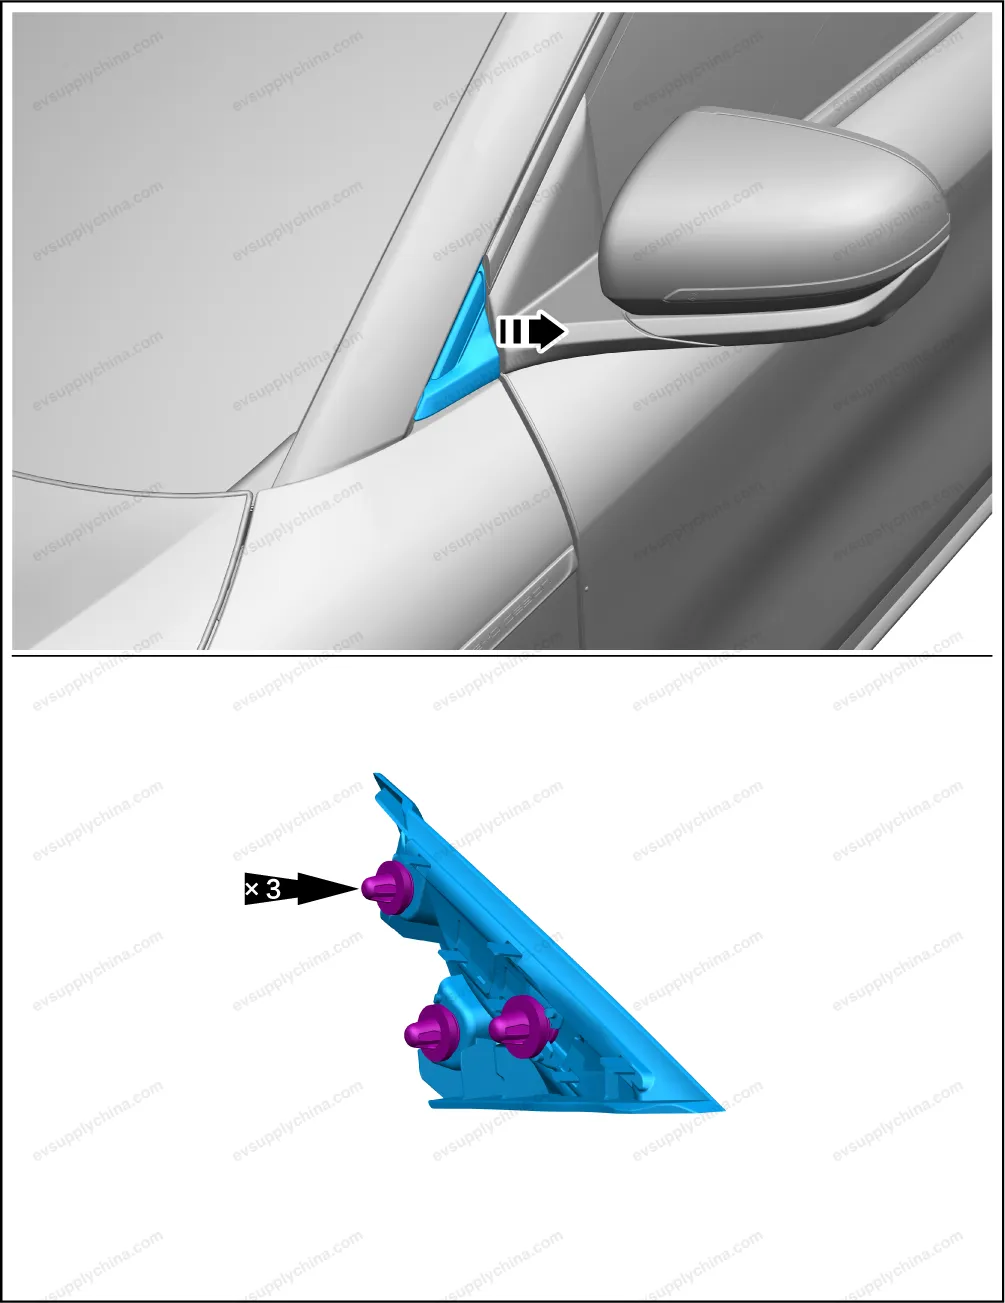
Caution When removing the trim panel, be careful not to damage the vehicle paint.
Installation
- The installation steps are opposite to the removal steps.
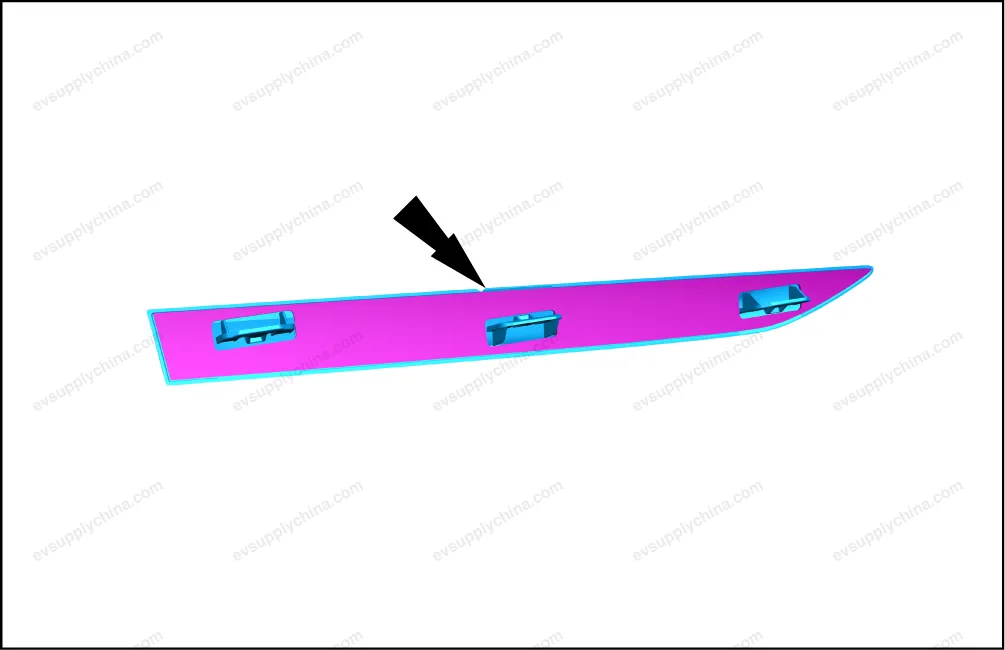
Caution Before installation, it is necessary to check whether all the clips are missing or damaged, and if so, install new clips, and then install the trim panel; After installation, check whether all clips are installed in place. The installation position of the trim panel may deviate, resulting in warping or abnormal gaps.
Right Fender Corner Trim Assembly - Removal and Installation
Removal
- Pry up the right fender corner trim assembly with a plastic lever.
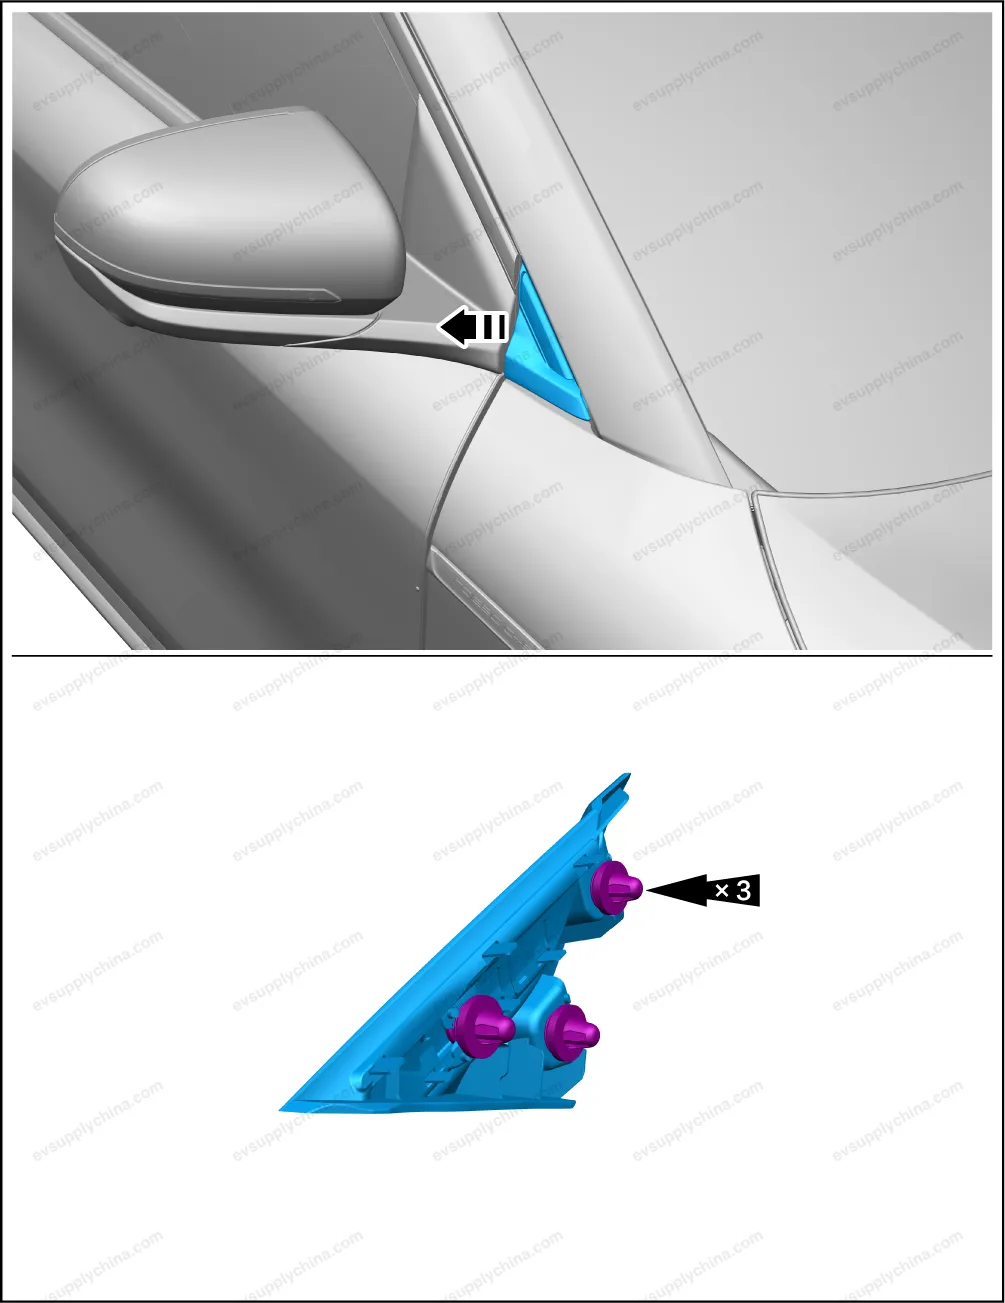
Caution When removing the trim panel, be careful not to damage the vehicle paint.
Installation
- The installation steps are opposite to the removal steps.
Caution Before installation, it is necessary to check whether all the clips are missing or damaged, and if so, install new clips, and then install the trim panel; After installation, check whether all clips are installed in place. The installation position of the trim panel may deviate, resulting in warping or abnormal gaps.
Left Fender Trim Strip Assembly - Removal and Installation
Removal
- Remove the left front wheel mudguard assembly. See Left Front Wheel Mudguard Assembly - Removal and Installation
- Pry up the left fender trim strip assembly.
- Remove the adhesive left on the contact surface between the left fender trim strip assembly and the left fender.
Caution Before the operation, place a buffering material between the tool and the surface of the fender, so as to prevent paint damage by the tool.
Installation
- Install new double-sided adhesive tape onto the left fender trim strip assembly.
- The installation steps are opposite to the removal steps.