Orisinil
BYD Atto 3
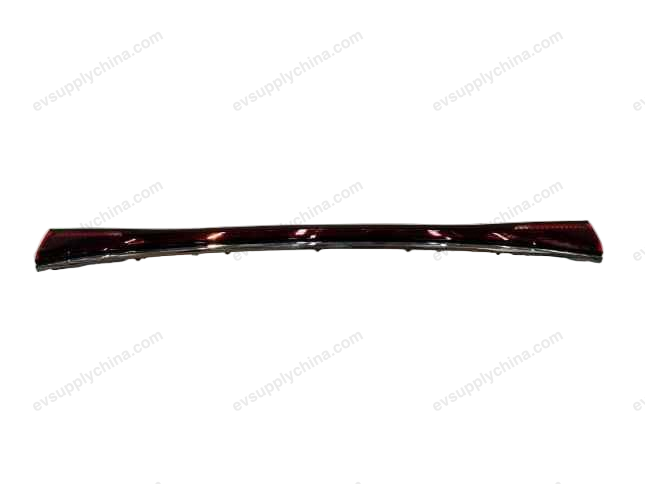
Lampu rem yang dipasang tinggi
Kode OE / Material
13093494-00SC2E-4134100Harga atas permintaanTersedia
Spesifikasi Teknis
- Model Kendaraan
- BYD Atto 3
- Konfigurasi Kemudi
- Universal (Setir Kiri & Kanan)
- Kategori
- Lampu Belakang
Pengiriman & Pengembalian
Dikirim ke seluruh dunia dari Tiongkok melalui pengiriman udara atau laut. Pengiriman standar 5–30 hari kerja, ekspres 2–10 hari kerja. Biaya pengiriman dihitung saat checkout.
Jendela pengembalian 7 hari untuk barang yang belum digunakan dalam kemasan asli. Hubungi kami sebelum mengembalikan barang apa pun.
Kendaraan yang Kompatibel — Lampu rem yang dipasang tinggi
BYDYuan PLUS/Atto 3
2022–2025BYDSong Pro New Energy DM-i
2023–2025BYDSealion 05 DM-i
2025Lampu rem yang dipasang tinggi Panduan Bengkel — BYD Atto 3
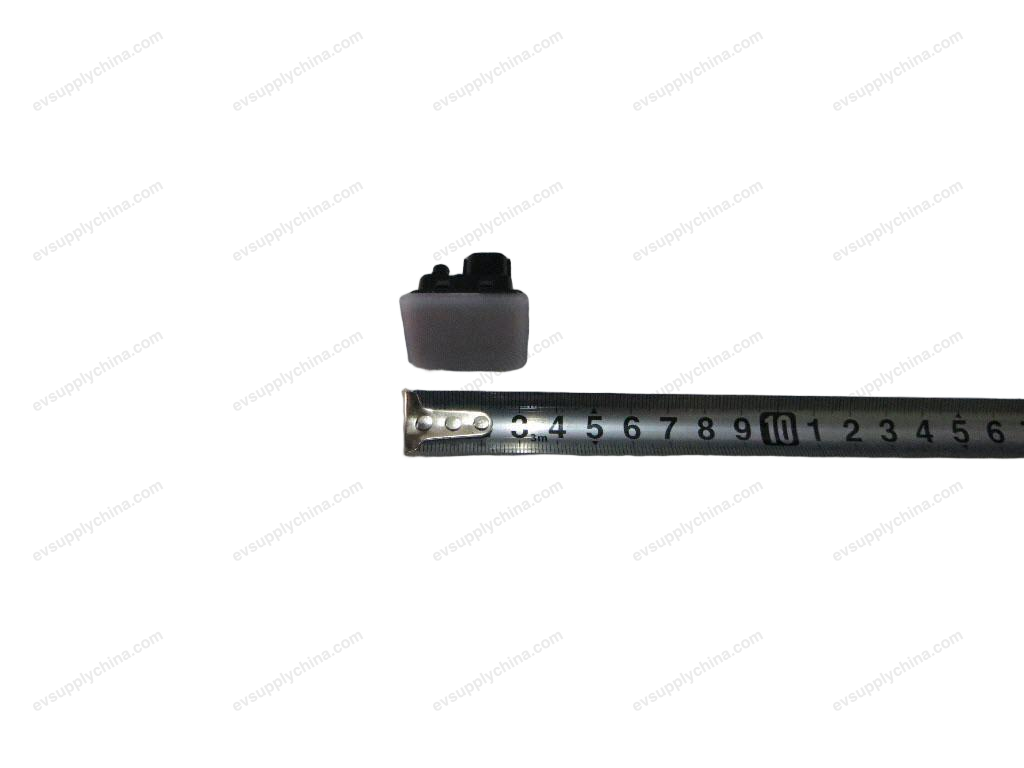
Brake Light Switch - Removal and Installation
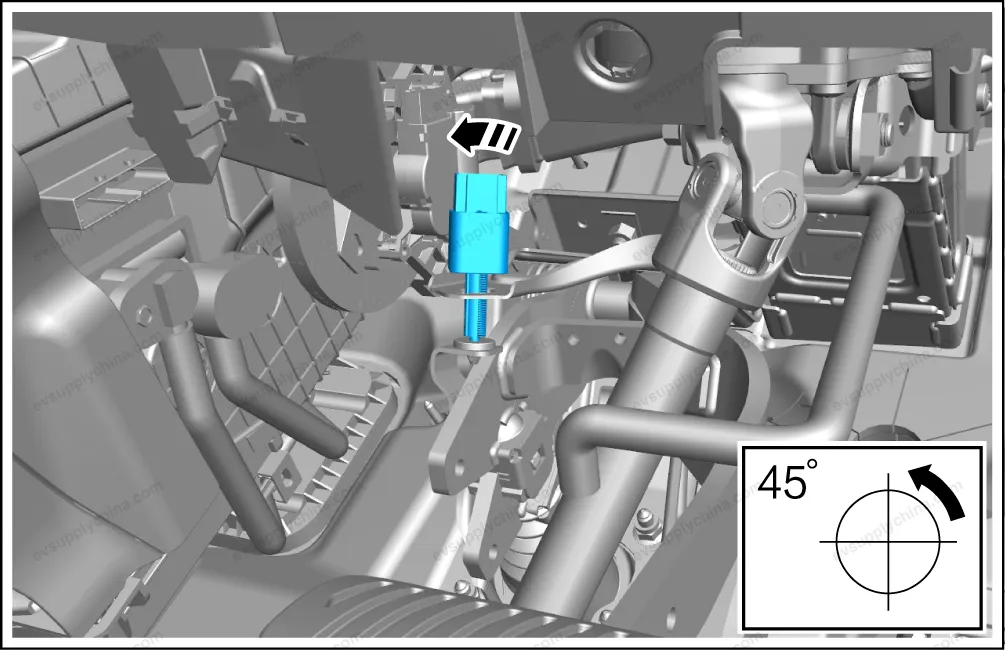
Removal
- Power off the low voltage electrical system. See Power-off and Power-on of Low Voltage Electrical System
- Disconnect 1 connector of brake light switch.
- Turn the brake light switch counterclockwise by 45 ° and take it out.
Installation
- The installation steps are opposite to the removal steps.
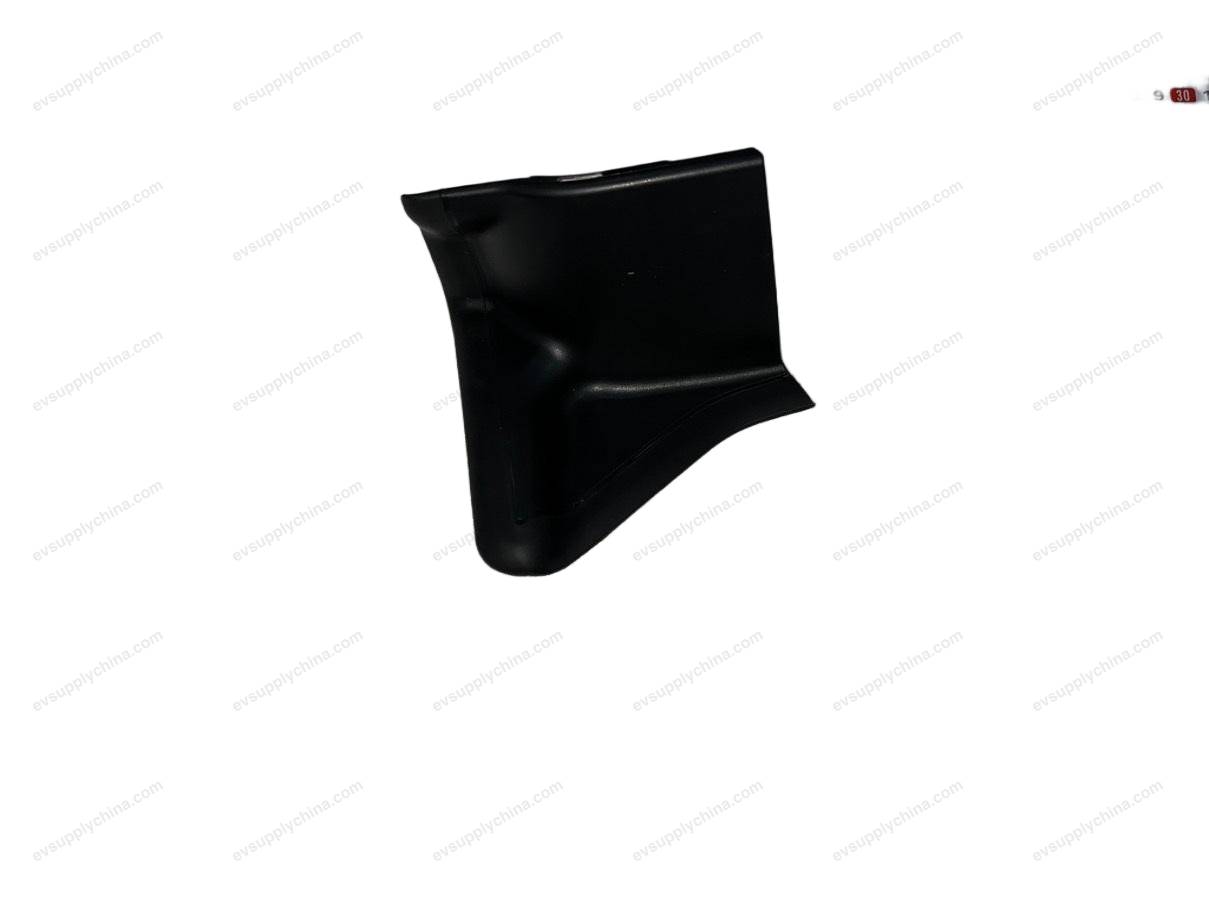
High-mount Stop Light - Removal and Installation
Removal
- Power off the low voltage electrical system. See Power-off and Power-on of Low Voltage Electrical System
- Remove the tailgate upper guard assembly. See Tailgate Upper Guard Assembly - Removal and Installation
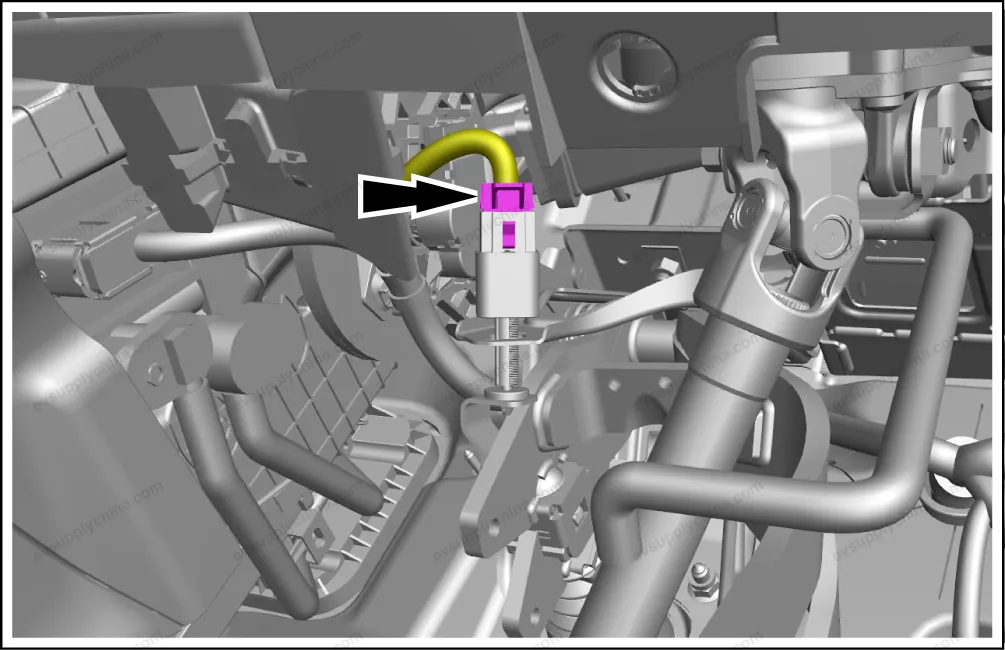
- Disconnect the wiring harness of spoiler assembly.
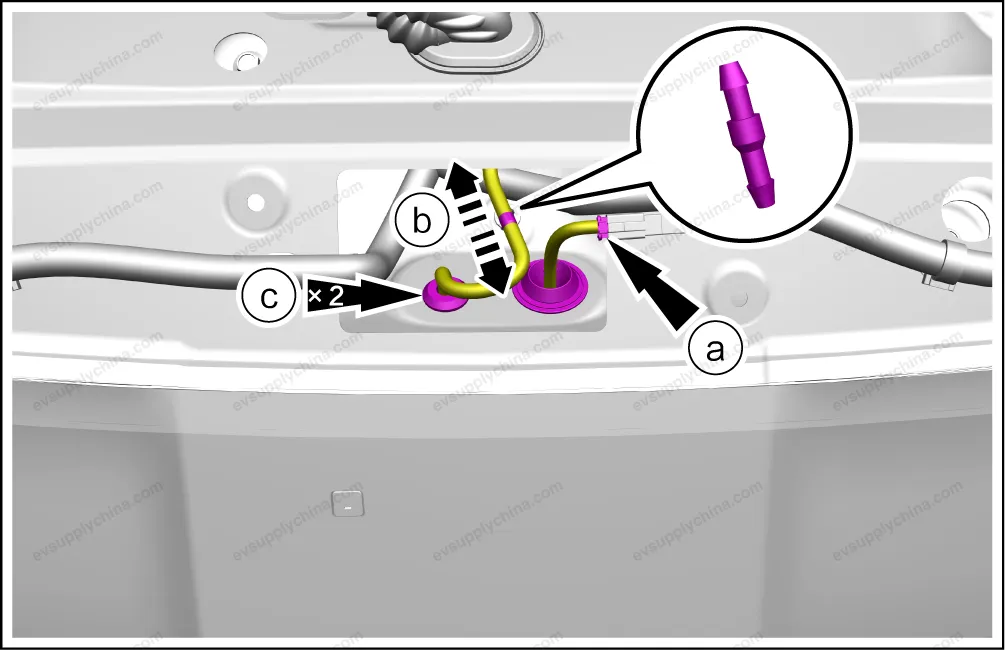
- Disconnect 1 connectors.
- Detach the rear wash line sub-assembly IV from the rear wash line sub-assembly III.
- Detach 2 silicon seals.
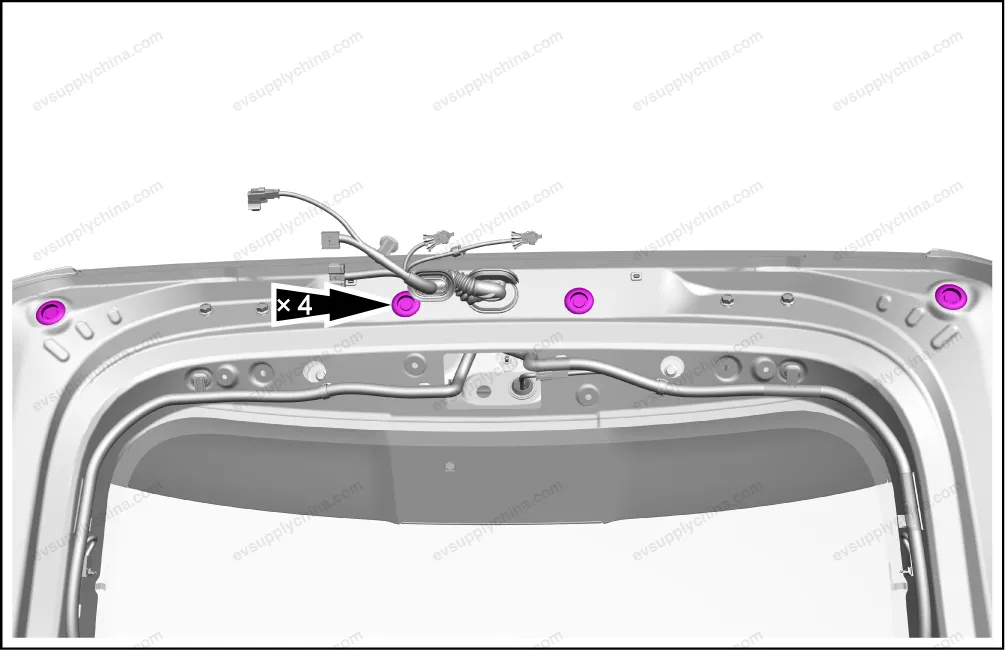
- Remove 4 rubber covers from the tailgate.
- Remove the fasteners from the spoiler assembly and its accessories.

- Remove 6 fixing screw.
- Remove 6 fixing bolts
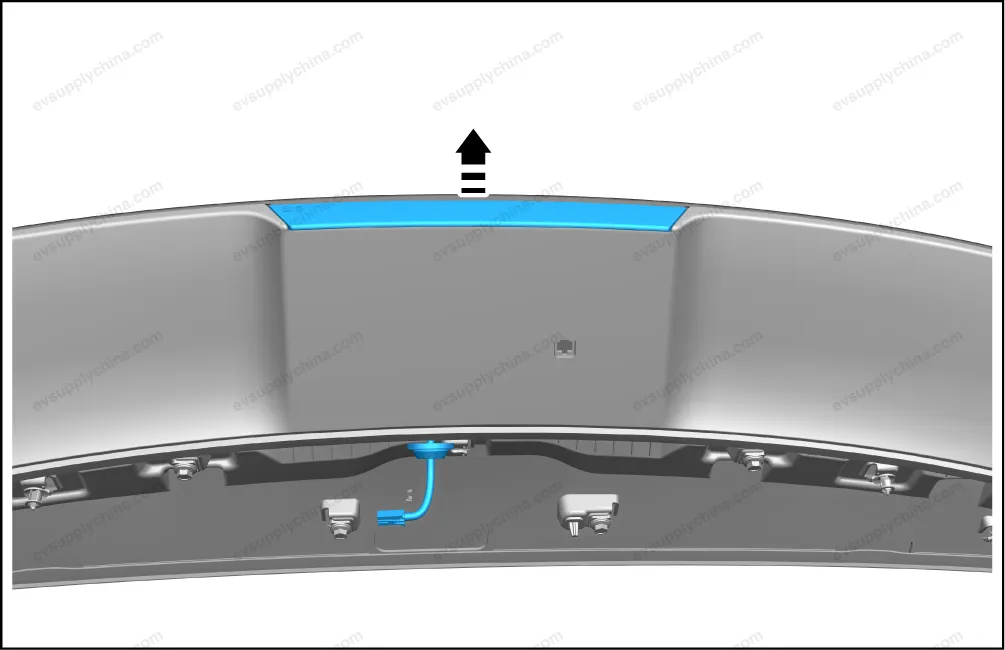
- Pry up the spoiler assembly and its accessories.
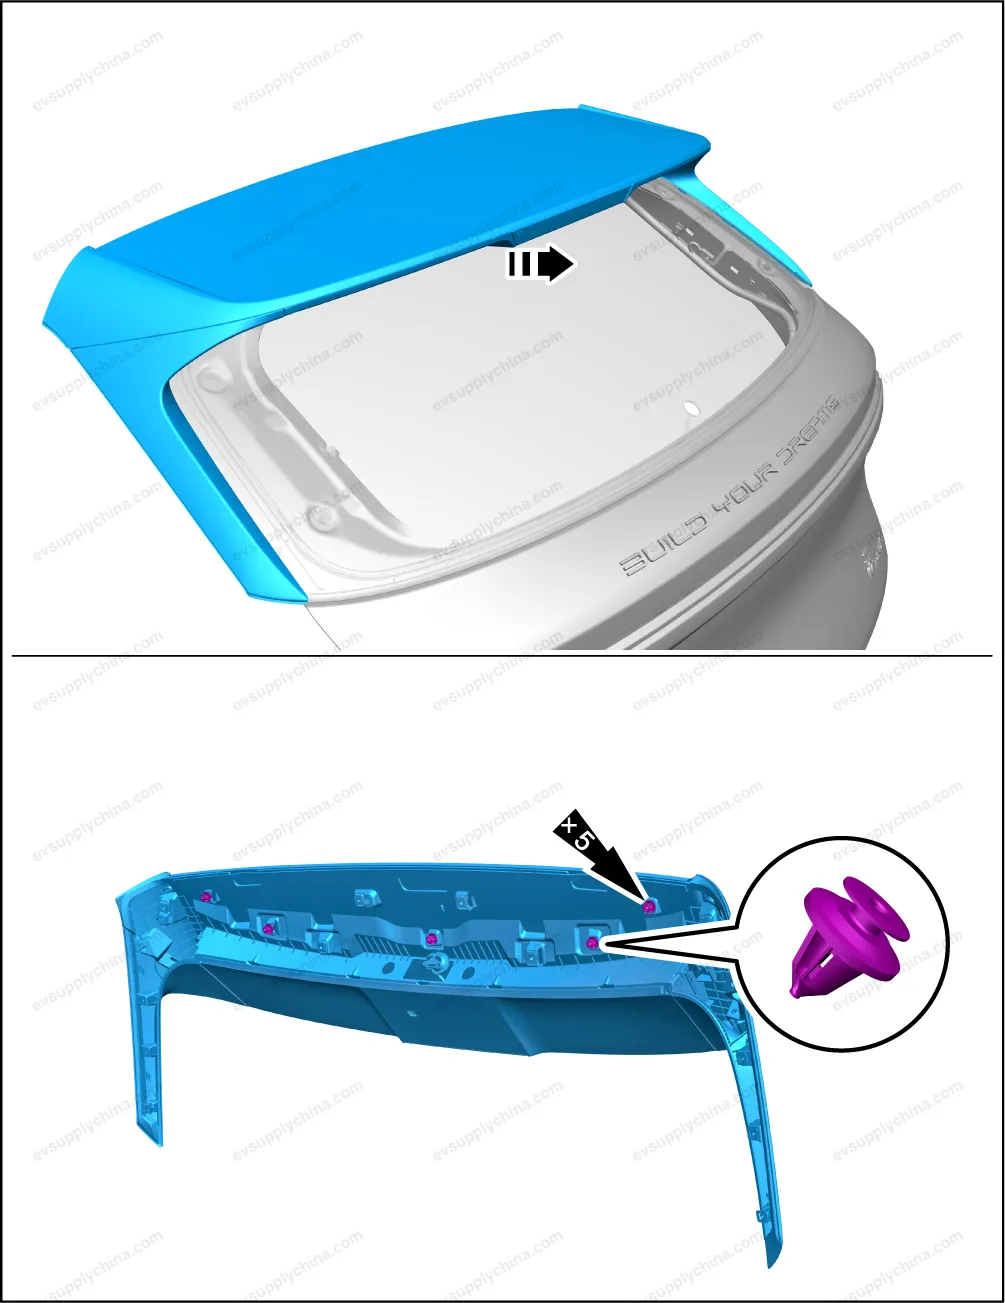
- Remove the fasteners from the high-mount stop light.
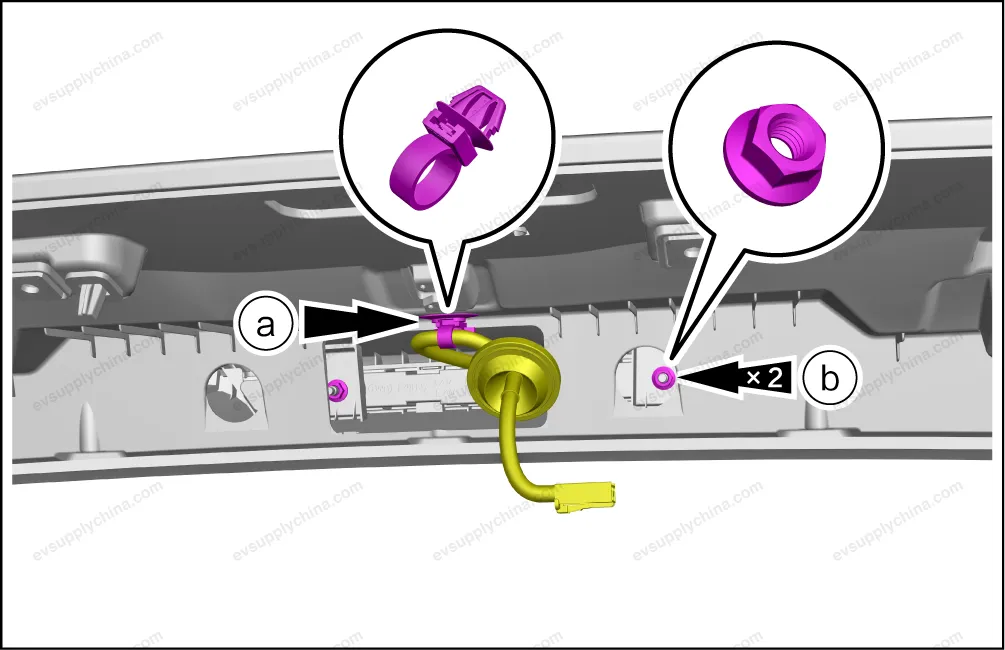
- Detach one wiring harness clips.
- Remove 2 fixing nut.
- Pry up the high-mount stop light.
Installation
- Follow the removal steps in reverse order to install.