وكالة
BYD Atto 3
مجموعة مقبض الباب الأمامي الأيمن
أكواد OE / المواد
13451191-00SC2EM-6105109السعر عند الطلبمتوفر
المواصفات الفنية
- موديل السيارة
- BYD Atto 3
- تكوين التوجيه
- مقود يسار ومقود يمين
- الفئة
- قطع الجسم الخارجية
الشحن والإرجاع
شحن عالمي من الصين جواً أو بحراً. التسليم القياسي 5–30 يوم عمل، السريع 2–10 أيام عمل. تحسب تكلفة الشحن عند الدفع.
نافذة إرجاع 7 أيام للقطع غير المستخدمة في عبوتها الأصلية. تواصل معنا قبل إرجاع أي قطعة.
مجموعة مقبض الباب الأمامي الأيمن دليل الورشة — BYD Atto 3
Right Front Door Outer Handle Assembly - Removal and Installation
Removal
- Lift the right front door glass to the limit position.
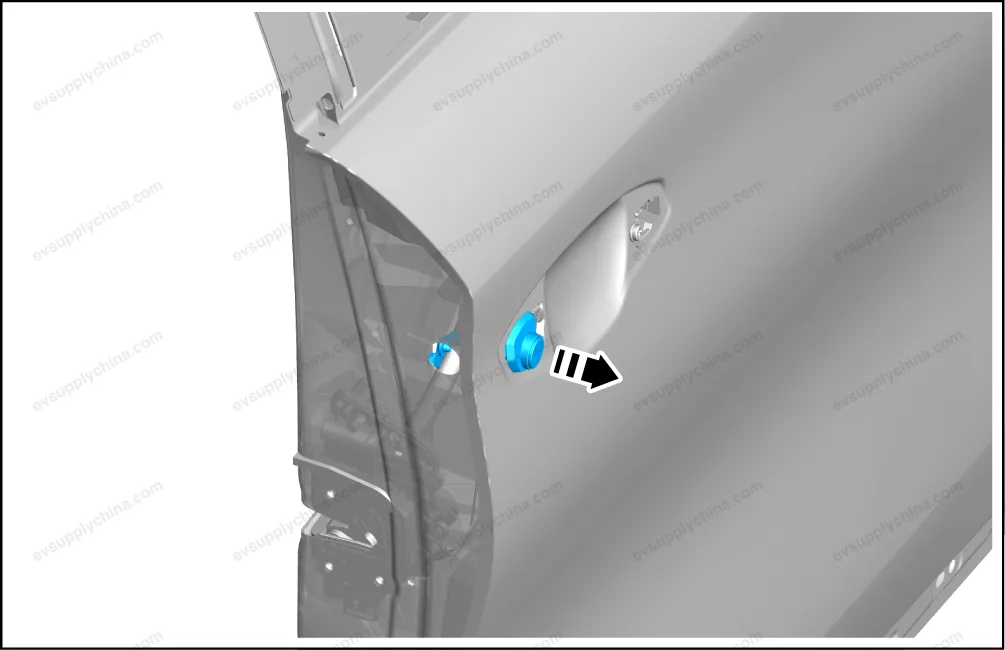
- Remove the right front door sealing plug I. See Right Front Door Sealing Plug I - Removal and Installation
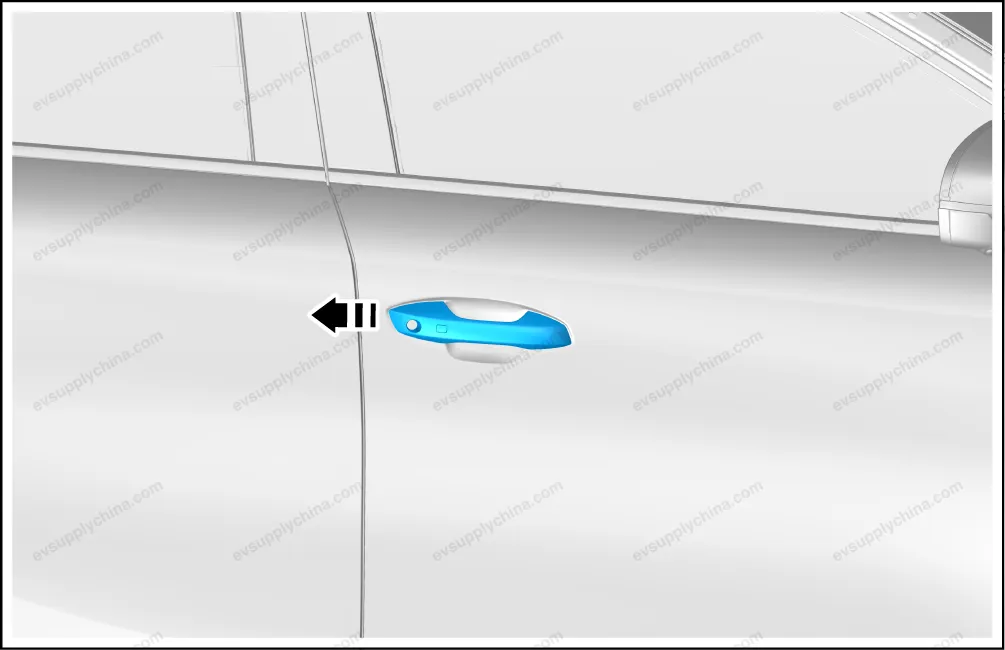
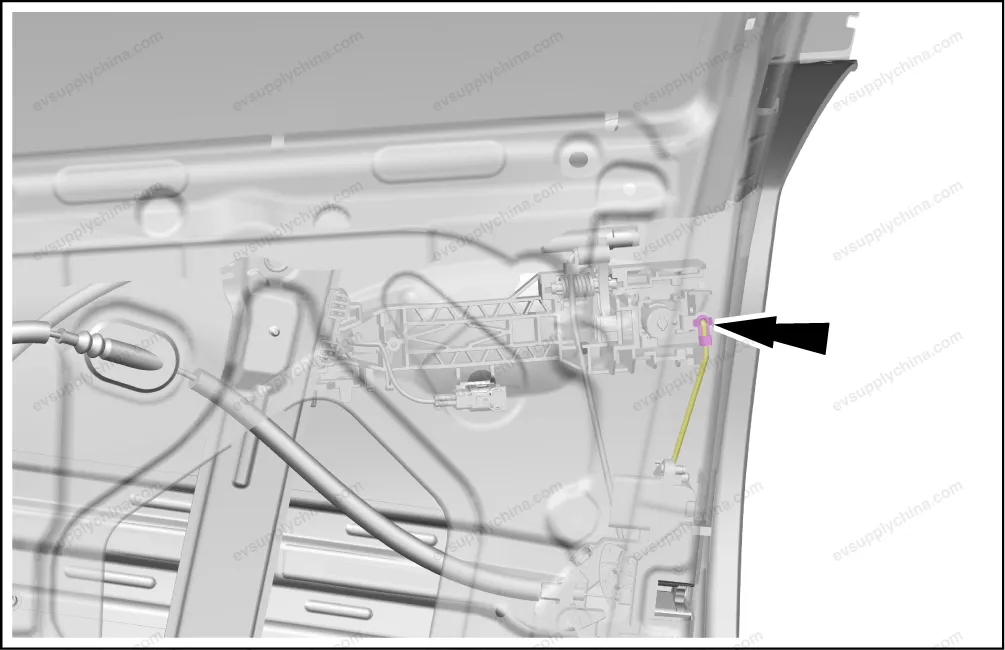
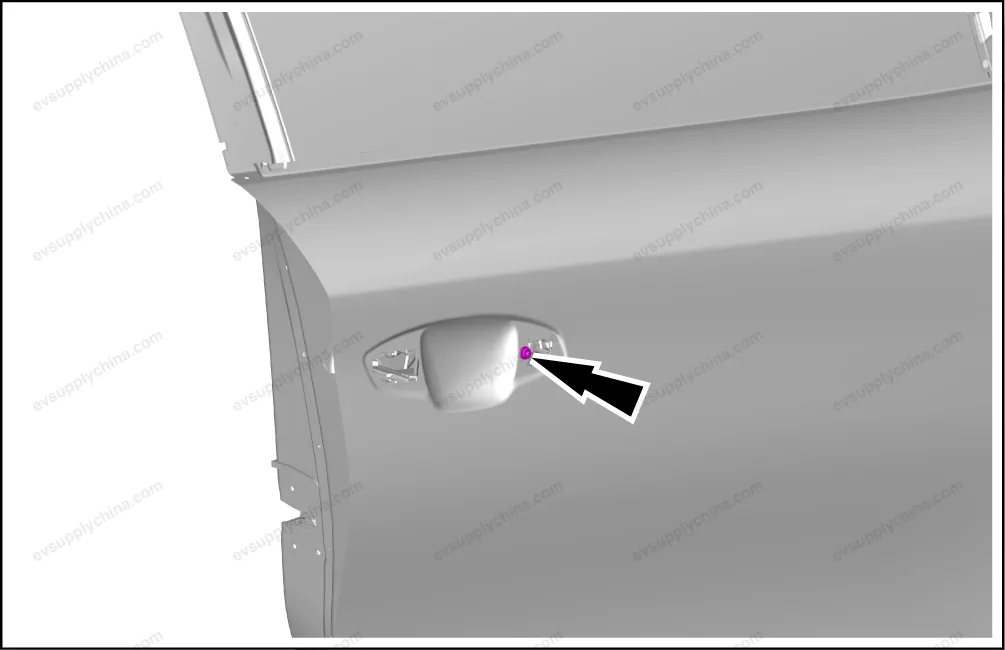
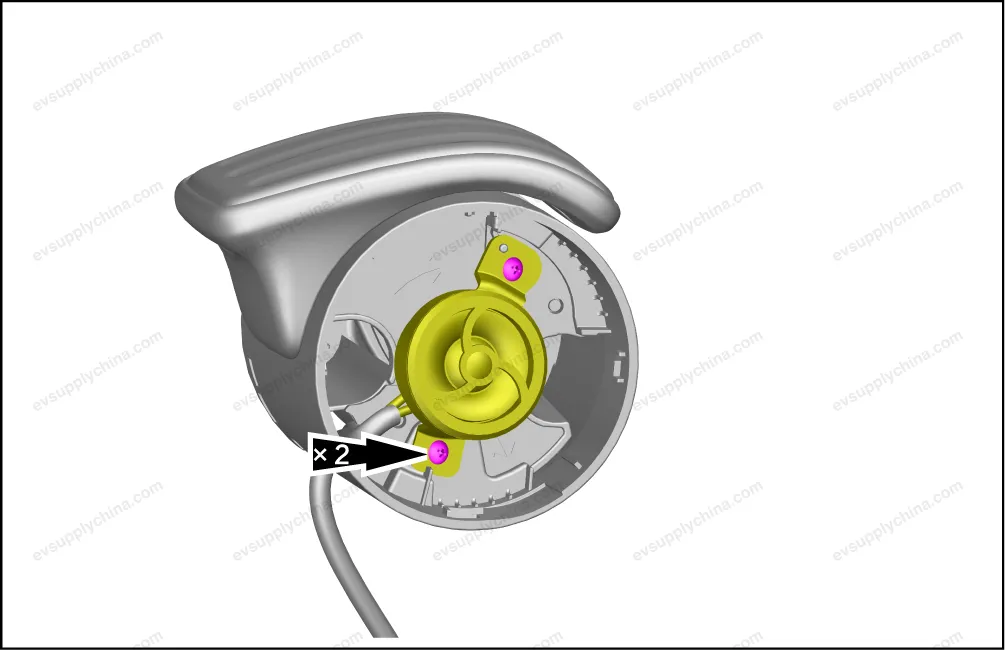
- Take out 1 screw cover, and loosen 1 fixing screw of the right front door outer handle assembly.
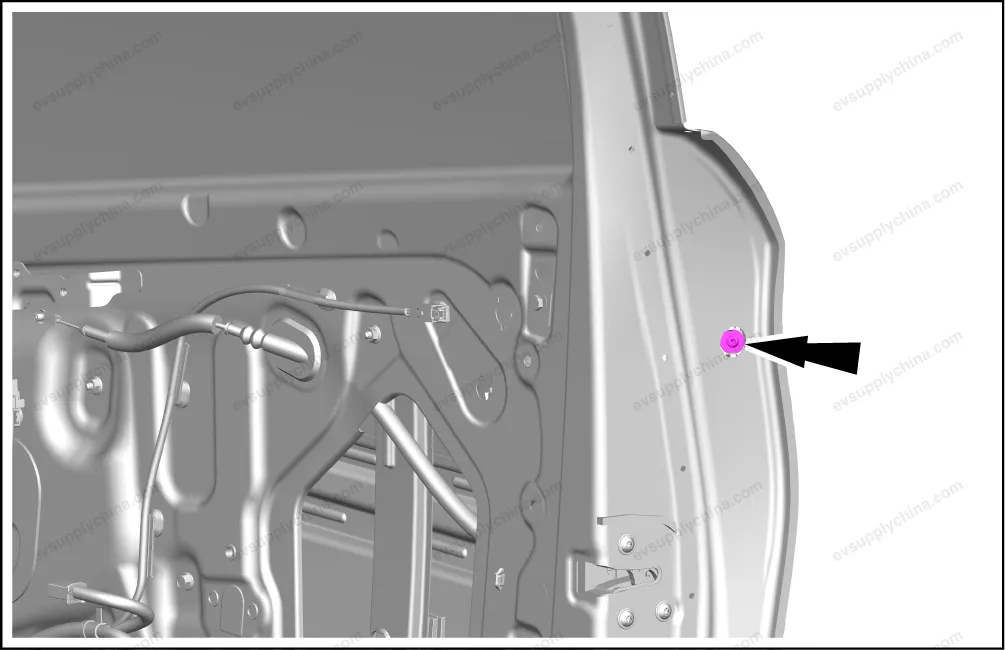
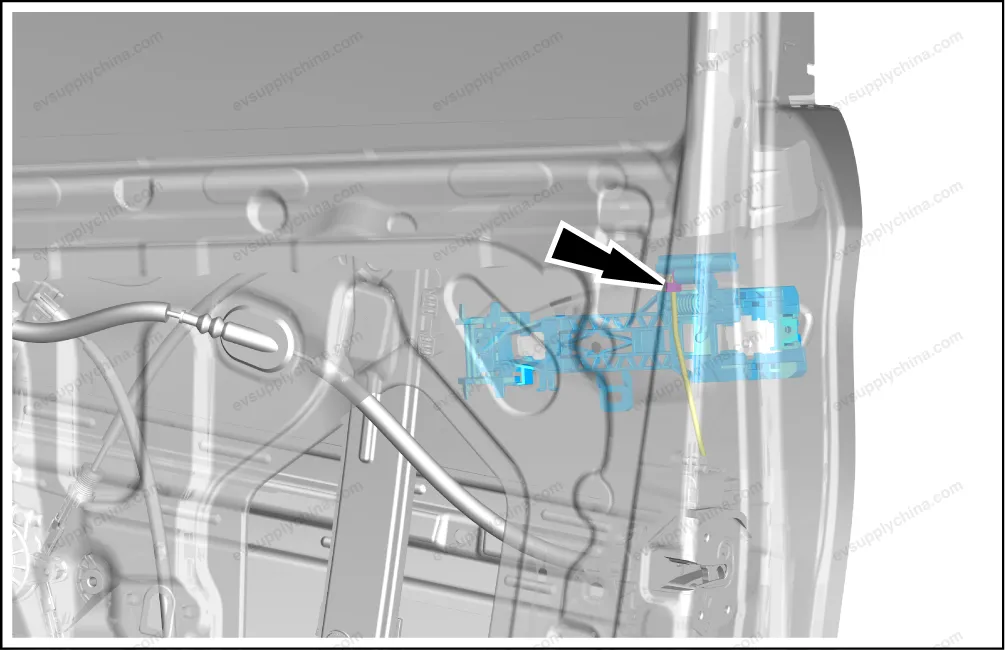
- Disconnect 1 connector of the right front door outer handle assembly.
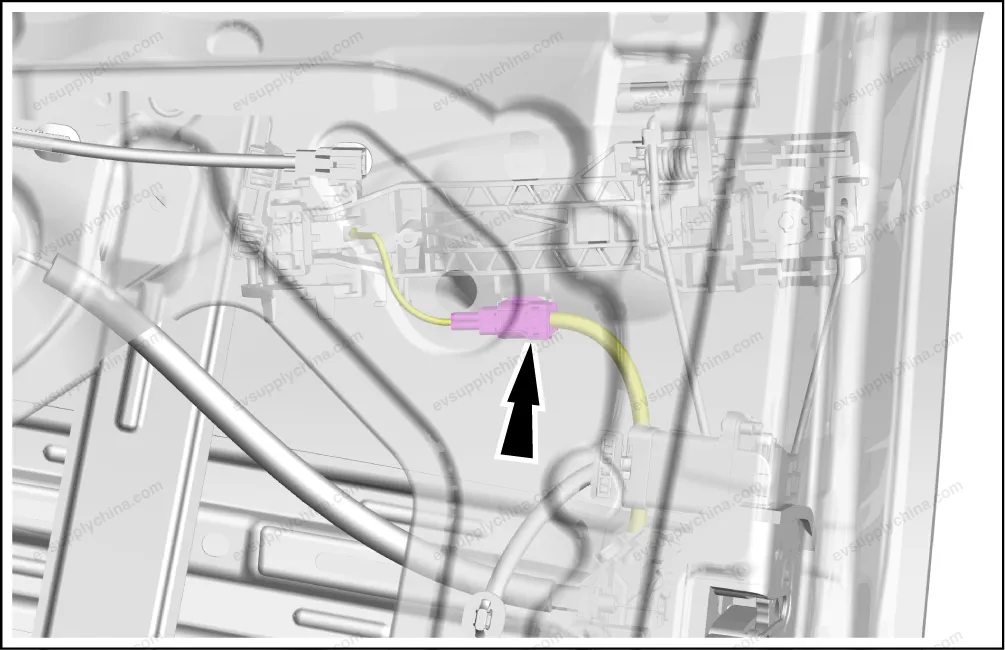
- Detach 1 fixing clip.
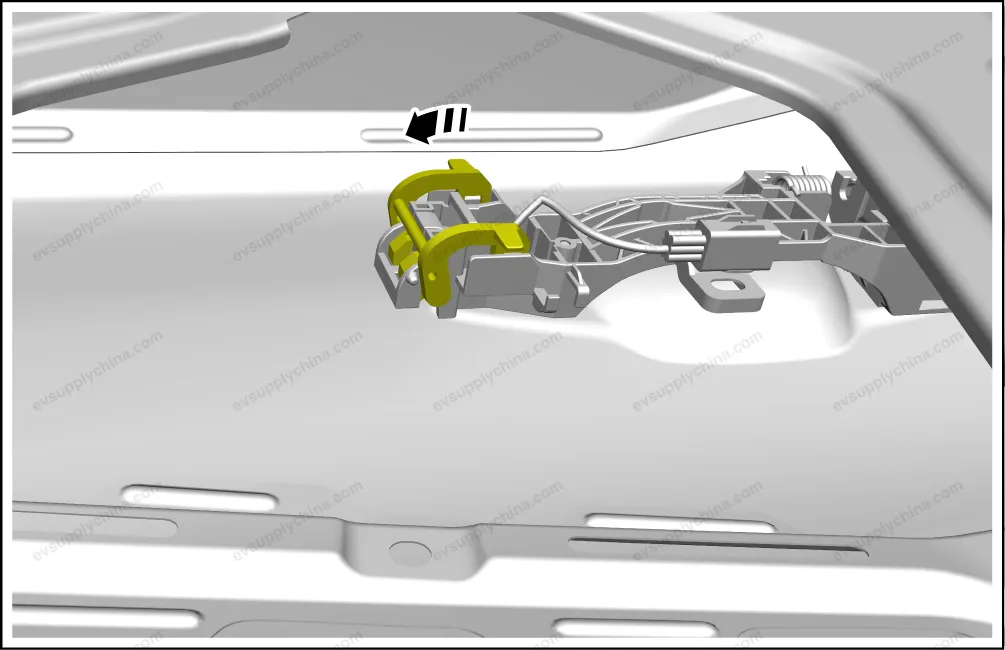
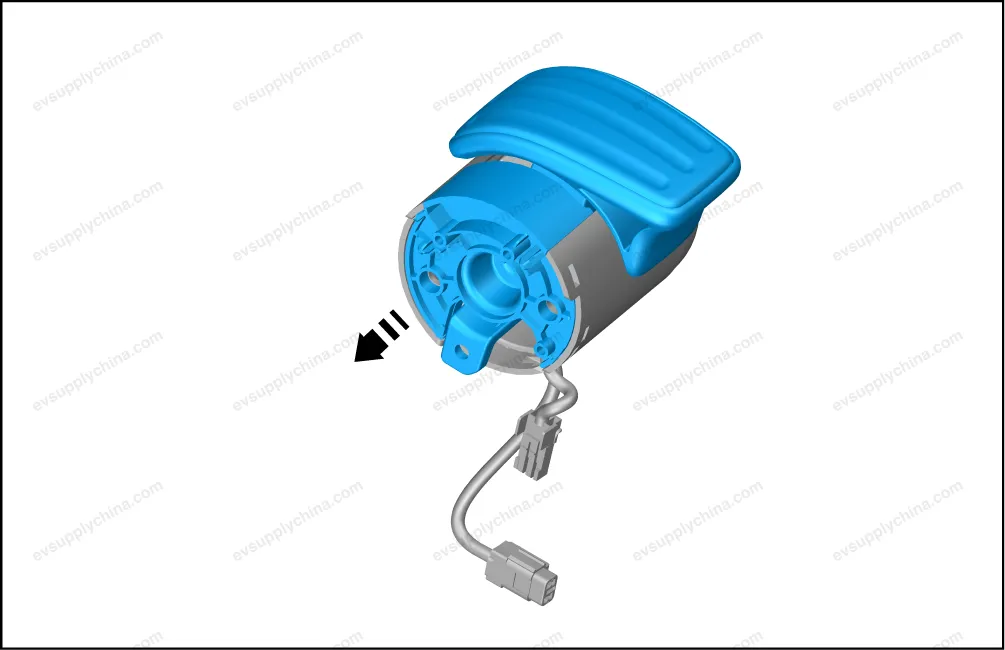
- Take out right front door outer handle assembly.
- Detach 1 fixing clip, and detach the left front door lock cylinder lever from the vehicle lock cylinder key assembly.
- Take out the vehicle lock cylinder key assembly.
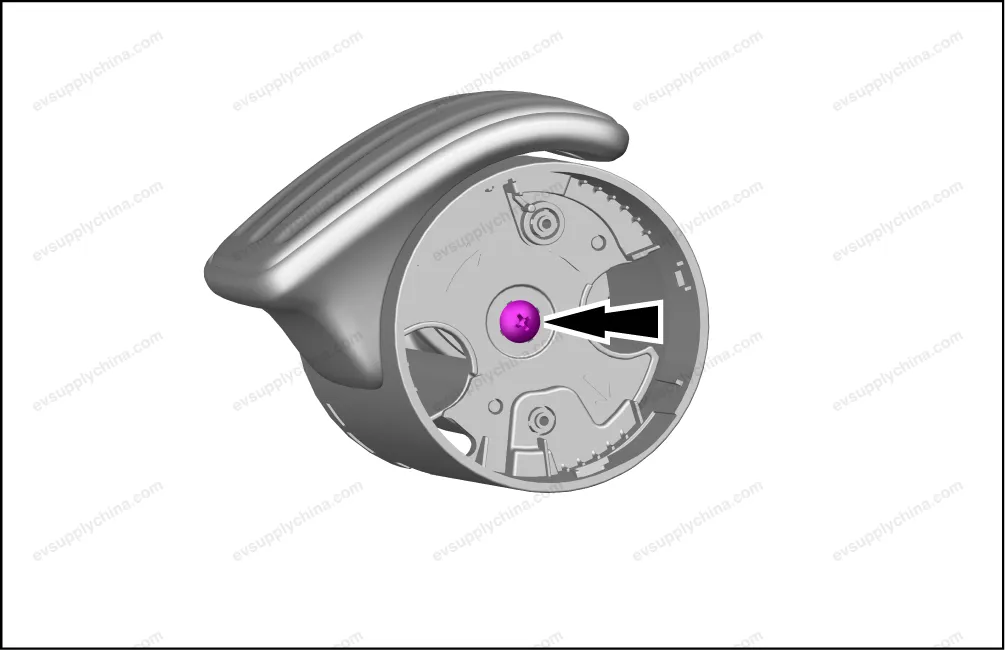
- Remove 1 fixing screw of the right front door outer handle seat assembly.
- Remove the right front door outer handle seat assembly.
- Detach 1 fixing clip, and detach the right front door lock outward-opening lever from the right front door outer handle seat assembly.
- Take out the right front door outer handle seat assembly.
Installation
- The installation steps are opposite to the removal steps.
Right Front Door Handle Box Cover Plate- Removal and Installation
Removal
- Pry up the right front door handle box cover.
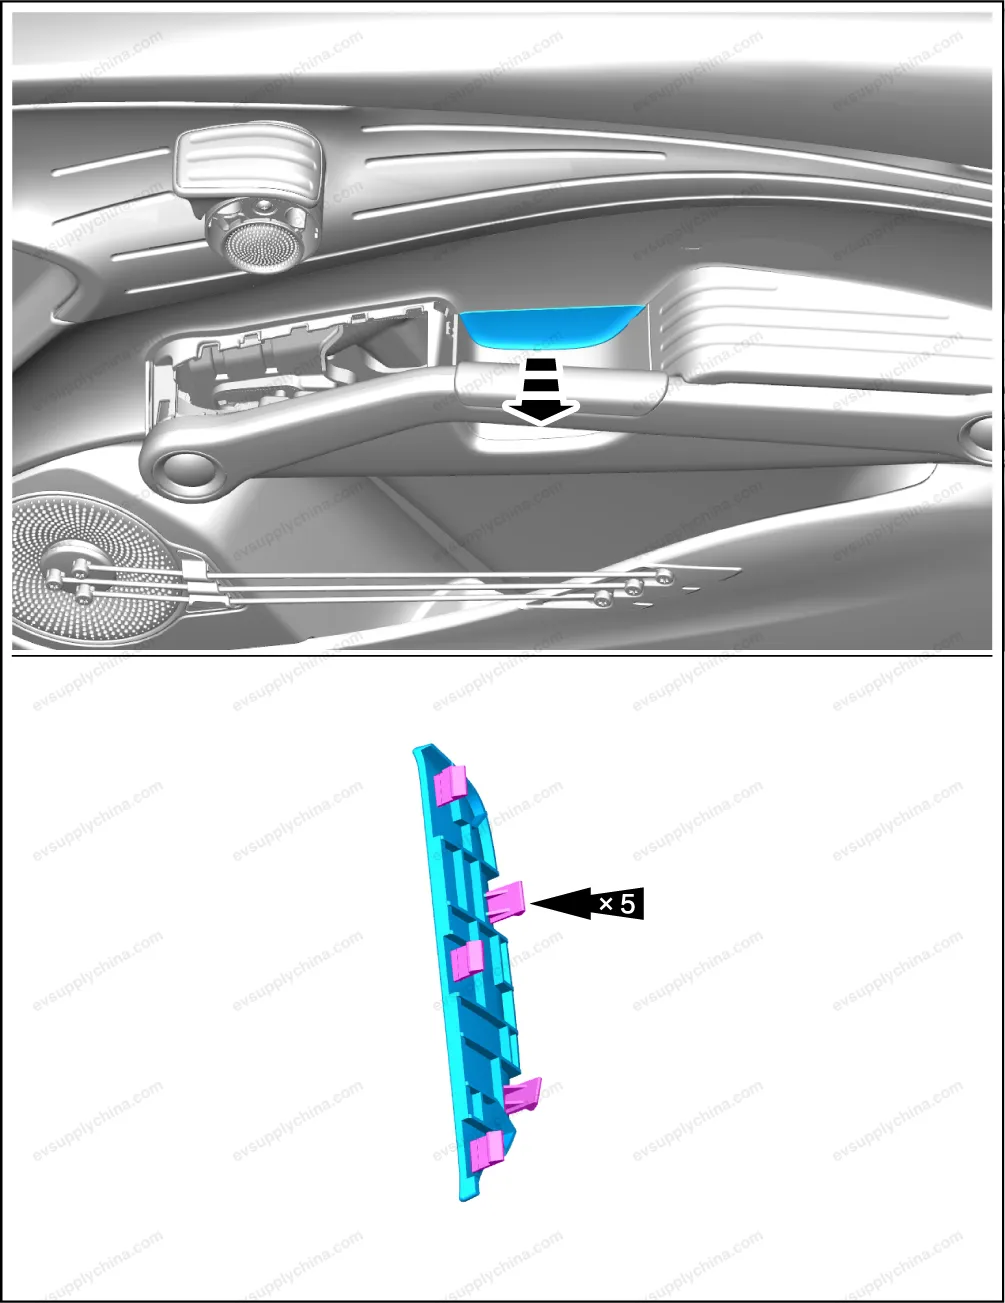
Caution Be careful when removing the trim panel to avoid scratching the surface material.
Installation
- The installation steps are opposite to the removal steps.
Right Front Door Snap Handle Ambient Light Assembly - Removal and Installation
Removal
- Remove the right front door guard assembly. See Right Front Door Guard Assembly - Removal and Installation
- Remove the right front door snap handle ambient light control module.
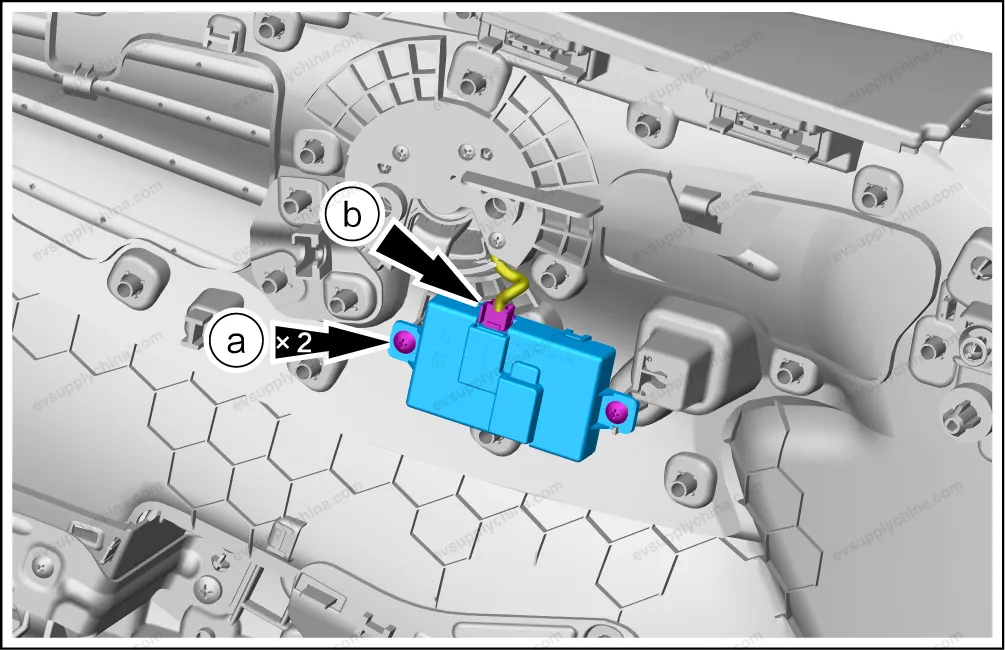
- Disconnect 1 connectors.
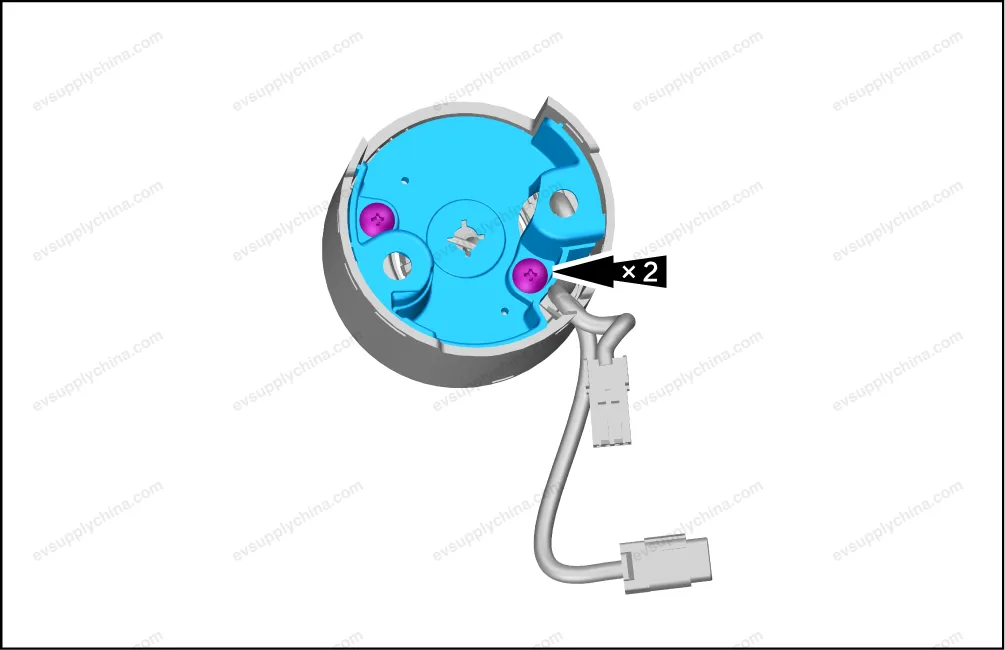
- Remove 2 fixing screws, and take out the right front door snap handle ambient light control module.
- Remove 3 fixing screws, and take out the right front door inner snap handle.

- Remove 2 fixing screws, and put aside the right front tweeter horn.
- Remove 1 fixing screws.
- Pry up the right front door inner snap handle seat and the handle.
- Remove 2 fixing screws, and take out the right door inner snap handle inner plate.
- Take out the right front door inner snap handle ambient light and the tweeter horn.
Install
- The installation is performed in reverse order of removal.