وكالة
BYD Atto 3
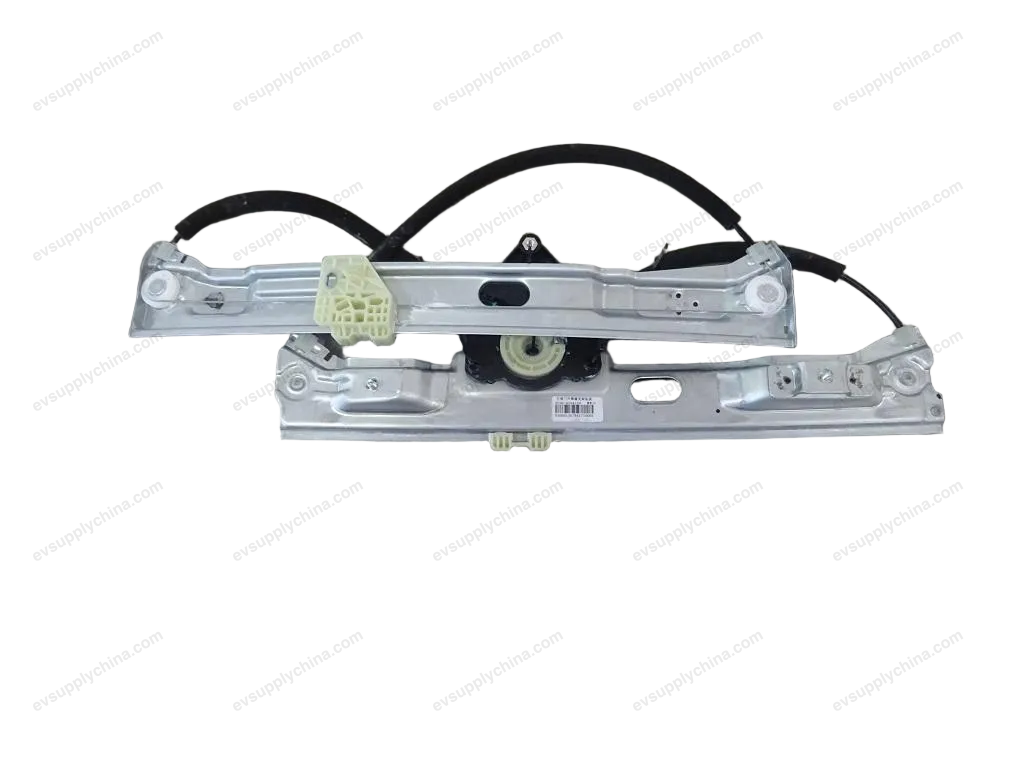
مجموعة كتيفة محرك زجاج الباب الأمامي الأيسر
أكواد OE / المواد
13180420-00SC2E-6104110$15USD
متوفرالمواصفات الفنية
- موديل السيارة
- BYD Atto 3
- تكوين التوجيه
- عام (مقود يسار ومقود يمين)
- الفئة
- محركات الزجاج
الشحن والإرجاع
شحن عالمي من الصين جواً أو بحراً. التسليم القياسي 5–30 يوم عمل، السريع 2–10 أيام عمل. تحسب تكلفة الشحن عند الدفع.
نافذة إرجاع 7 أيام للقطع غير المستخدمة في عبوتها الأصلية. تواصل معنا قبل إرجاع أي قطعة.
السيارات المتوافقة — مجموعة كتيفة محرك زجاج الباب الأمامي الأيسر
BYDYuan PLUS/Atto 3
2022–2025مجموعة كتيفة محرك زجاج الباب الأمامي الأيسر دليل الورشة — BYD Atto 3
Left Front Window Regulator Bracket Assembly - Removal and Installation
Removal
- Remove the left front door glass assembly. See Left Front Door Glass Assembly - Removal and Installation
- Remove the left front door sealing plug II. SeeLeft Front Door Sealing Plug II - Removal and Installation
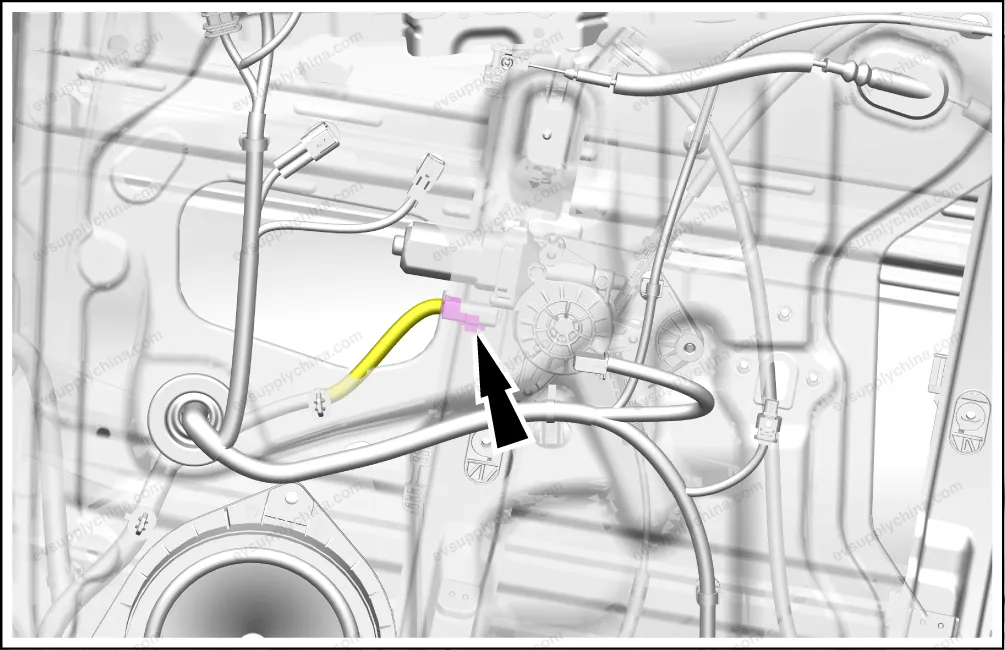
- Disconnect one connector of the left front window regulator bracket assembly.
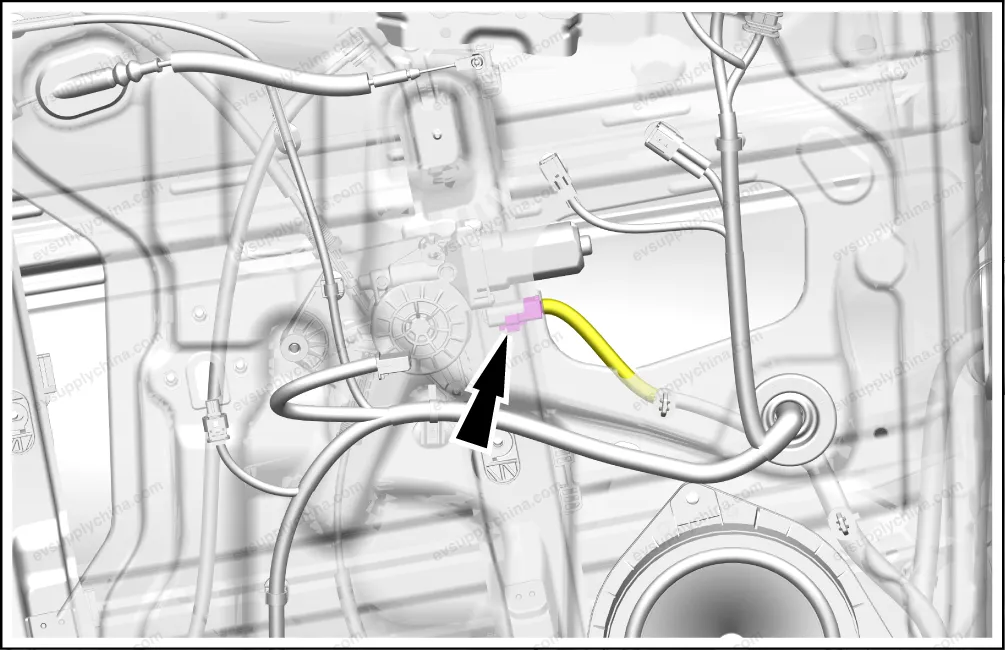
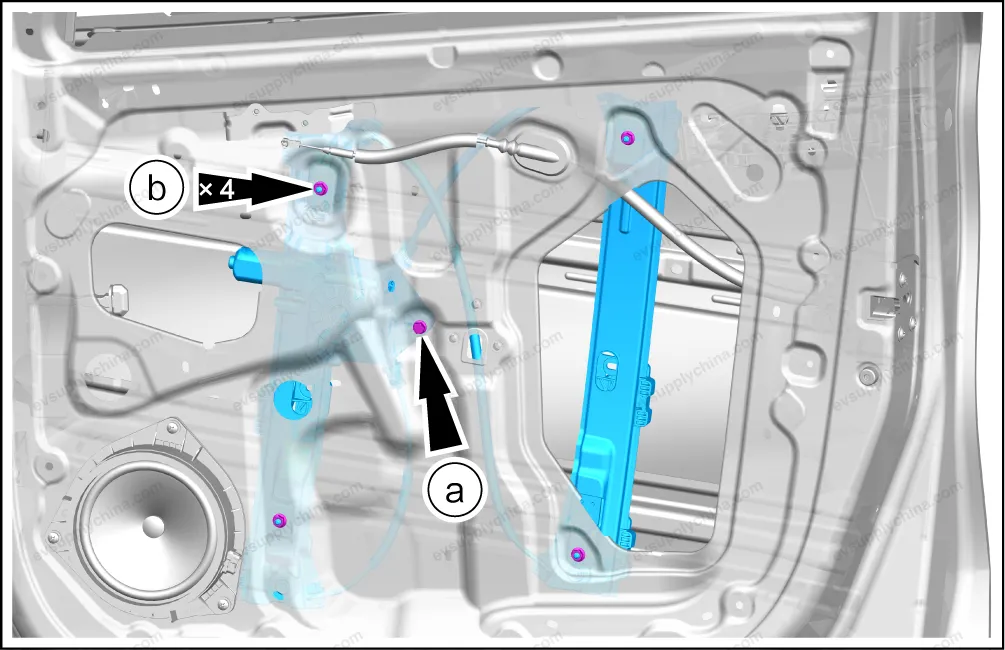
- Remove the left front window regulator bracket assembly.

- Remove one fixing bolt.
- Remove 4 fixing nuts, and take out the left front window regulator bracket assembly.
- Where replacing the left front window regulator bracket assembly is required, remove the following accessories of the left front window regulator bracket assembly:
Installation
- Follow the removal steps in reverse order to install.
Caution After the installation, test the front window regulator bracket assembly for normal function.
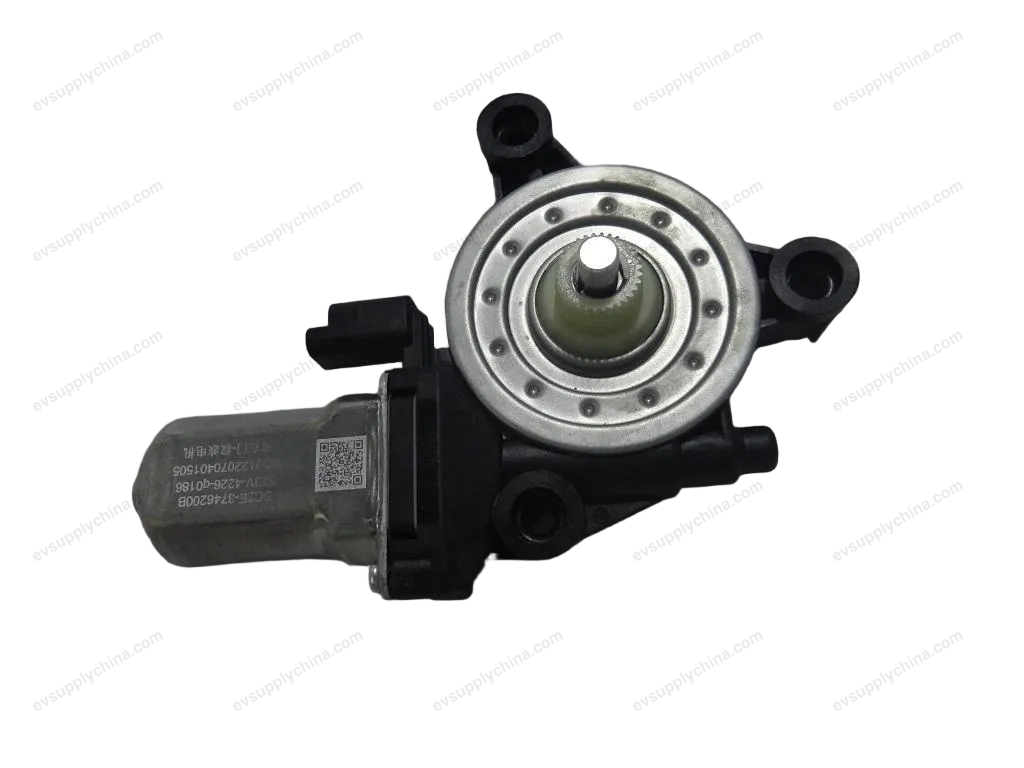
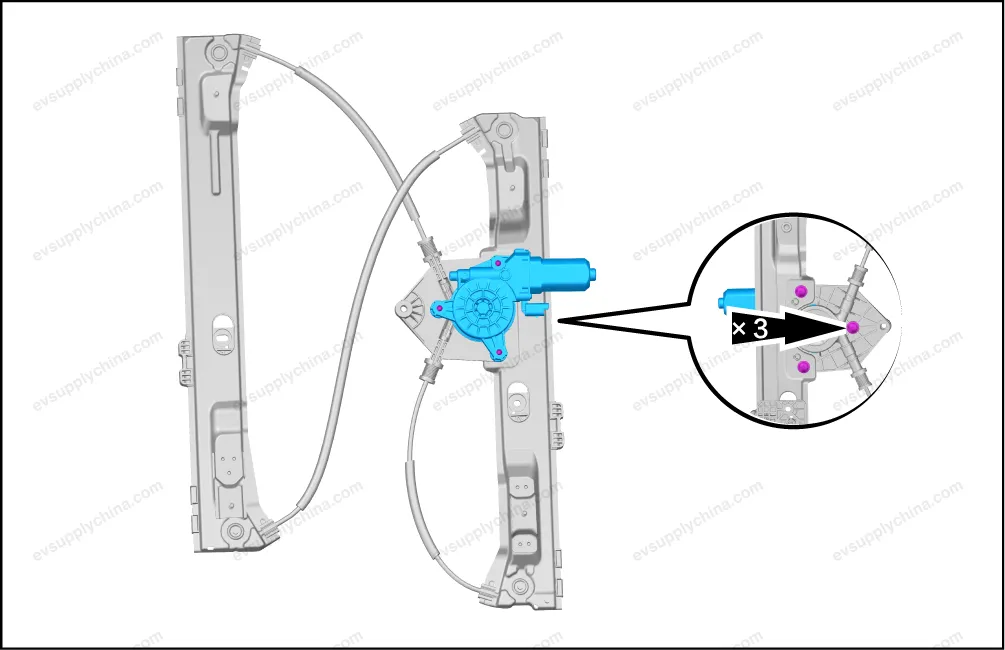
Left Front Window Regulator Motor - Removal and Installation
Removal
- Remove the left front window regulator bracket assembly. See Left Front Window Regulator Bracket Assembly - Removal and Installation
- Remove 3 fixing bolts, and take out the left front window regulator motor.
Installation
- Follow the removal steps in reverse order to install.
Caution After the installation, conduct a functional test on the front window regulator motor.
Right Front Window Regulator Bracket Assembly - Removal and Installation
Removal
- Remove the right front door glass assembly. See Right Front Door Glass Assembly - Removal and Installation
- Remove the right front door sealing plug II. SeeRight Front Door Sealing Plug II - Removal and Installation
- Disconnect one connector of the right front window regulator bracket assembly.
- Remove the right front window regulator bracket assembly.
- Remove one fixing bolt.
- Remove 4 fixing nuts, and take out the right front window regulator bracket assembly.
- Where replacing the right front window regulator bracket assembly is required, remove the following accessories of the right front window regulator bracket assembly:
Installation
- Follow the removal steps in reverse order to install.
Caution After the installation, test the front window regulator bracket assembly for normal function.