مجموعة تطعيم زاوية الرفرف الأيسر
أكواد OE / المواد
15171395-00SC2E-5302330Cالمواصفات الفنية
- موديل السيارة
- BYD Atto 3
- تكوين التوجيه
- عام (مقود يسار ومقود يمين)
- الفئة
- رفارف وحواجز طين
الشحن والإرجاع
شحن عالمي من الصين جواً أو بحراً. التسليم القياسي 5–30 يوم عمل، السريع 2–10 أيام عمل. تحسب تكلفة الشحن عند الدفع.
نافذة إرجاع 7 أيام للقطع غير المستخدمة في عبوتها الأصلية. تواصل معنا قبل إرجاع أي قطعة.
السيارات المتوافقة — مجموعة تطعيم زاوية الرفرف الأيسر
مجموعة تطعيم زاوية الرفرف الأيسر دليل الورشة — BYD Atto 3
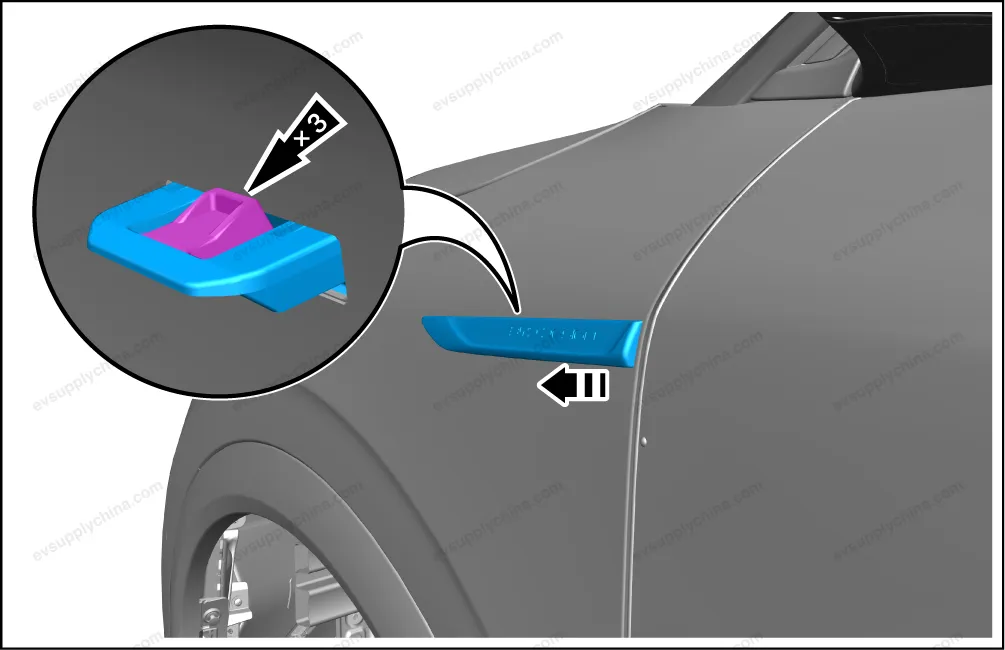
Left Fender Corner Trim Assembly - Removal and Installation
Removal
- Pry up the left fender corner trim assembly with a plastic lever.
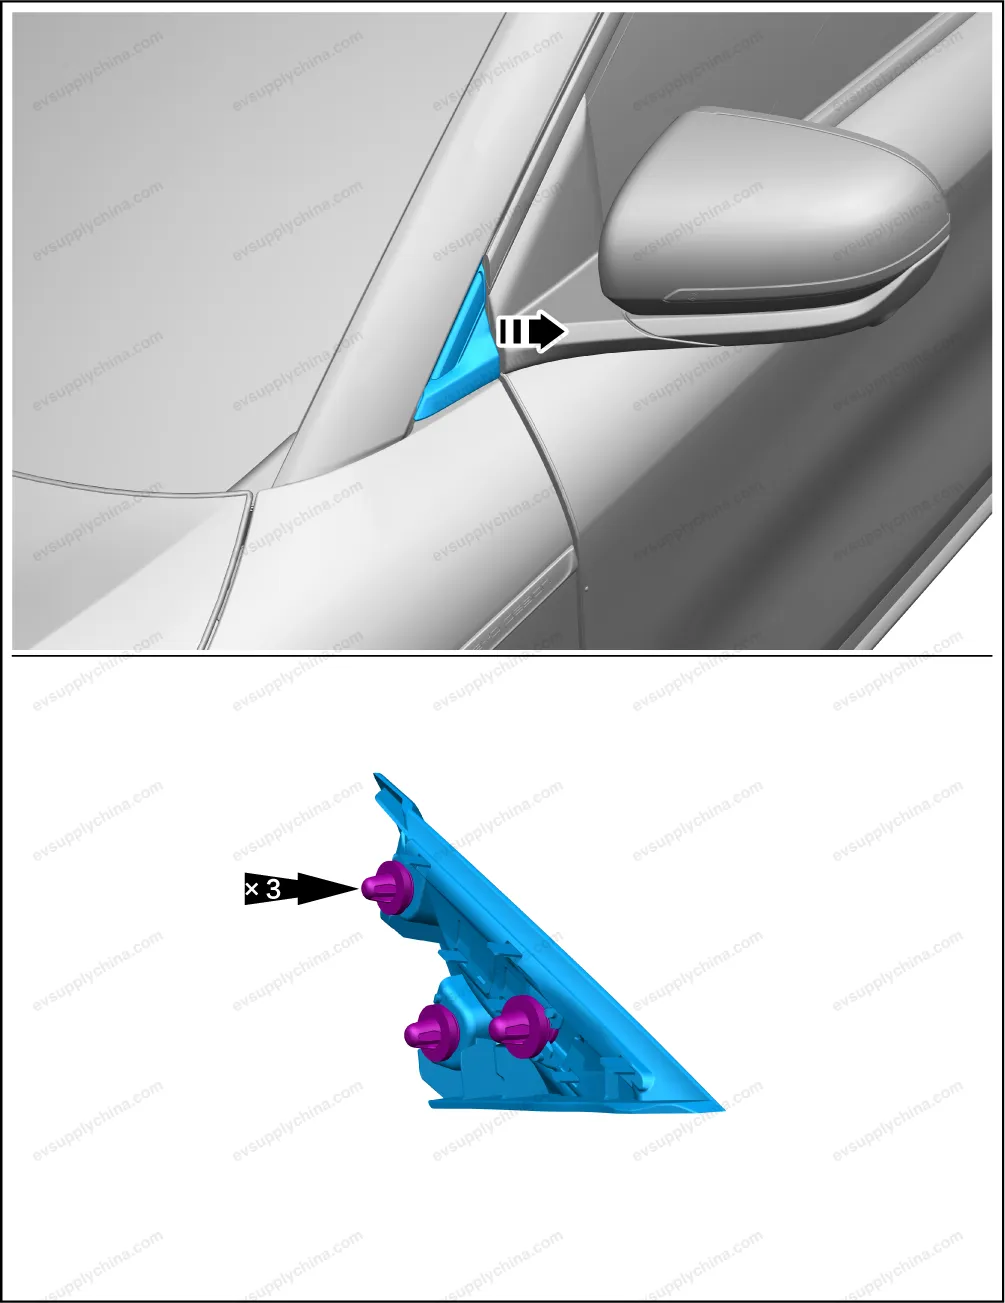
Caution When removing the trim panel, be careful not to damage the vehicle paint.
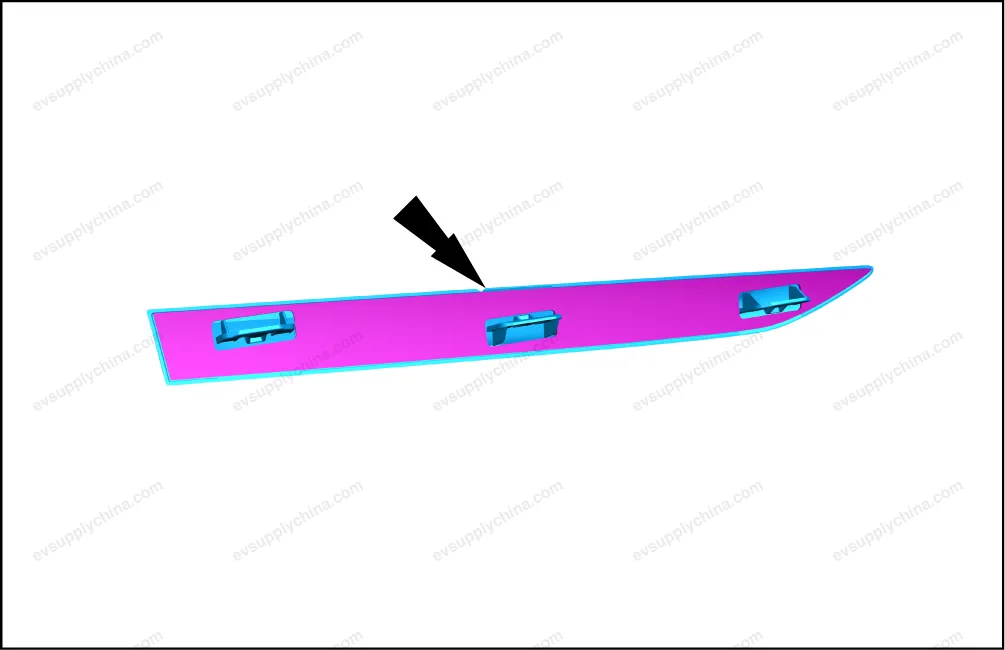
Installation
- The installation steps are opposite to the removal steps.
Caution Before installation, it is necessary to check whether all the clips are missing or damaged, and if so, install new clips, and then install the trim panel; After installation, check whether all clips are installed in place. The installation position of the trim panel may deviate, resulting in warping or abnormal gaps.
Right Fender Corner Trim Assembly - Removal and Installation
Removal
- Pry up the right fender corner trim assembly with a plastic lever.
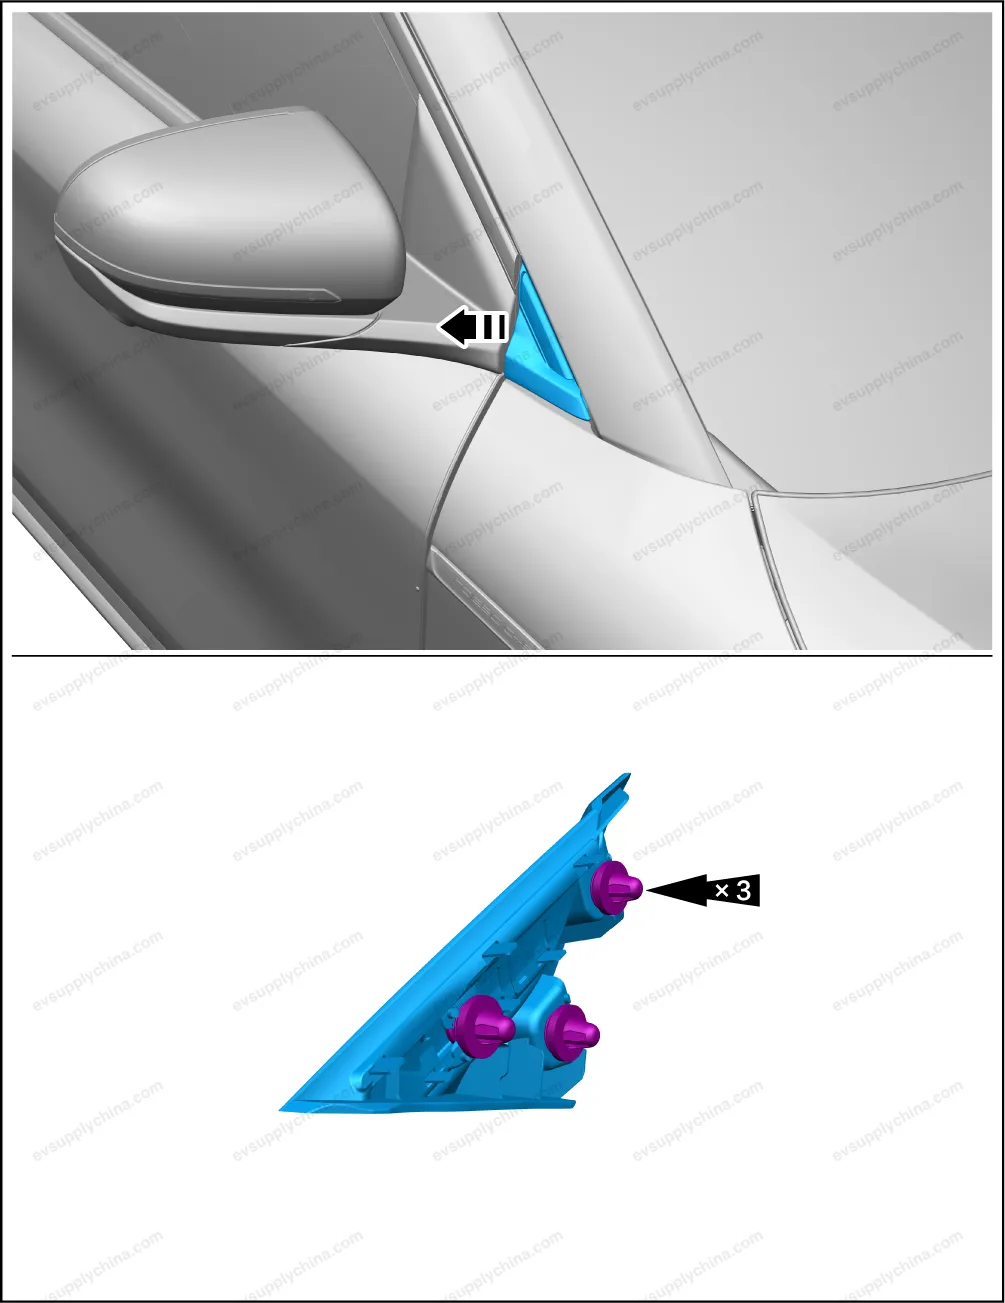
Caution When removing the trim panel, be careful not to damage the vehicle paint.
Installation
- The installation steps are opposite to the removal steps.
Caution Before installation, it is necessary to check whether all the clips are missing or damaged, and if so, install new clips, and then install the trim panel; After installation, check whether all clips are installed in place. The installation position of the trim panel may deviate, resulting in warping or abnormal gaps.
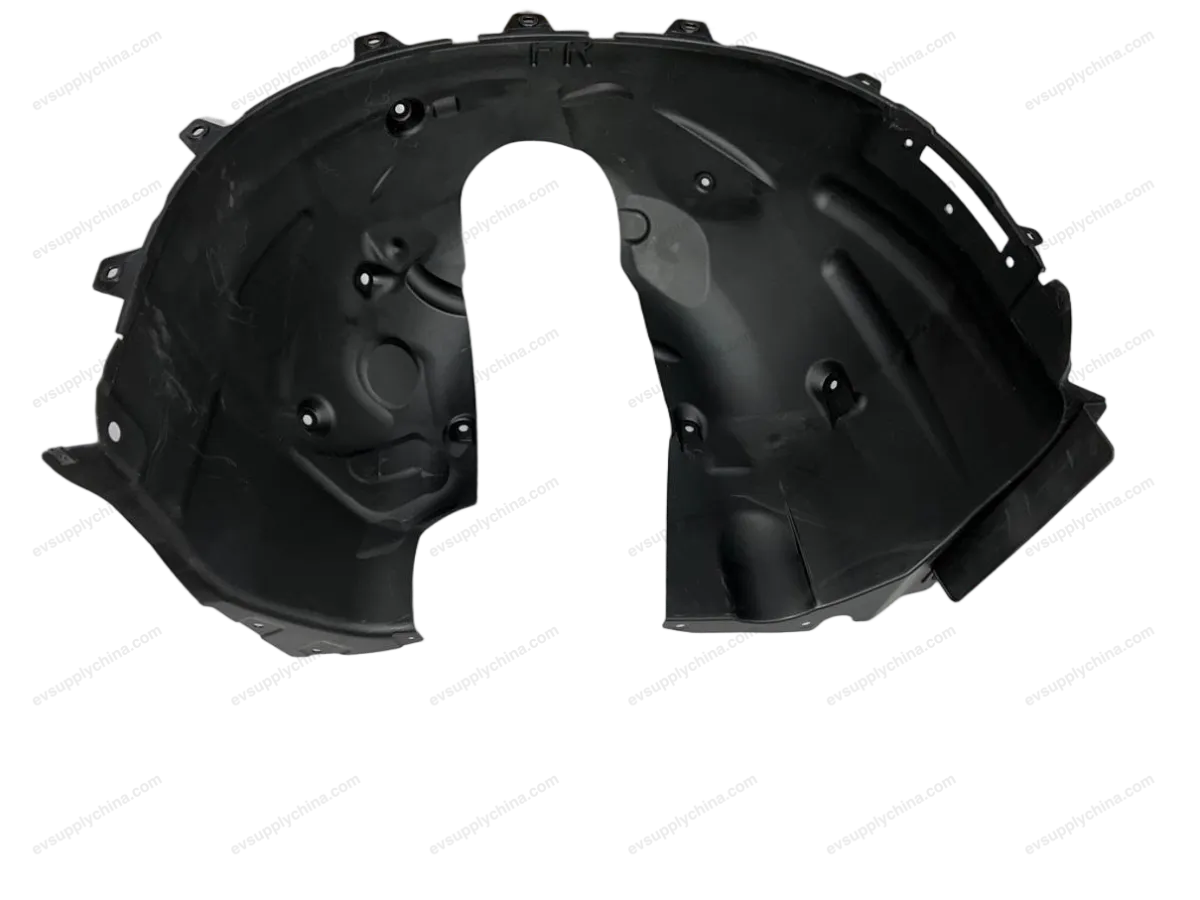
Left Fender Trim Strip Assembly - Removal and Installation
Removal
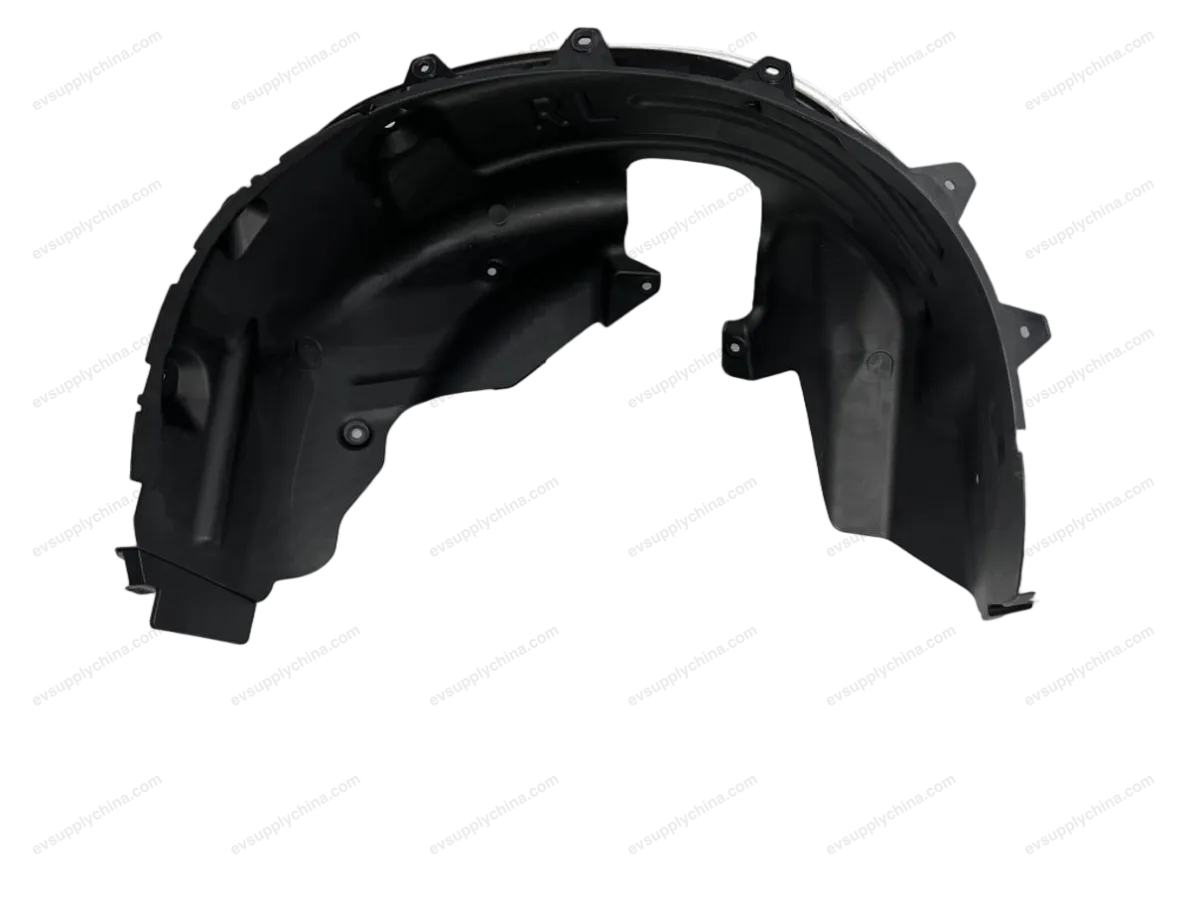
- Remove the left front wheel mudguard assembly. See Left Front Wheel Mudguard Assembly - Removal and Installation
- Pry up the left fender trim strip assembly.
- Remove the adhesive left on the contact surface between the left fender trim strip assembly and the left fender.
Caution Before the operation, place a buffering material between the tool and the surface of the fender, so as to prevent paint damage by the tool.
Installation
- Install new double-sided adhesive tape onto the left fender trim strip assembly.
- The installation steps are opposite to the removal steps.